Toll Free 1-888-658-1658 www.outdoorlivingtoday.com sales@outdoorlivingtoday.com
Parts (Step 81)
Horizontal Gable Trims
(3/4” x 4 1/2” x 42”)
x 2
(3/4” x 4 1/2” x 45 1/4”)
x 4
Hardware (Step 81)
N1 - 1 1/2” Finishing Nails
x 36 total
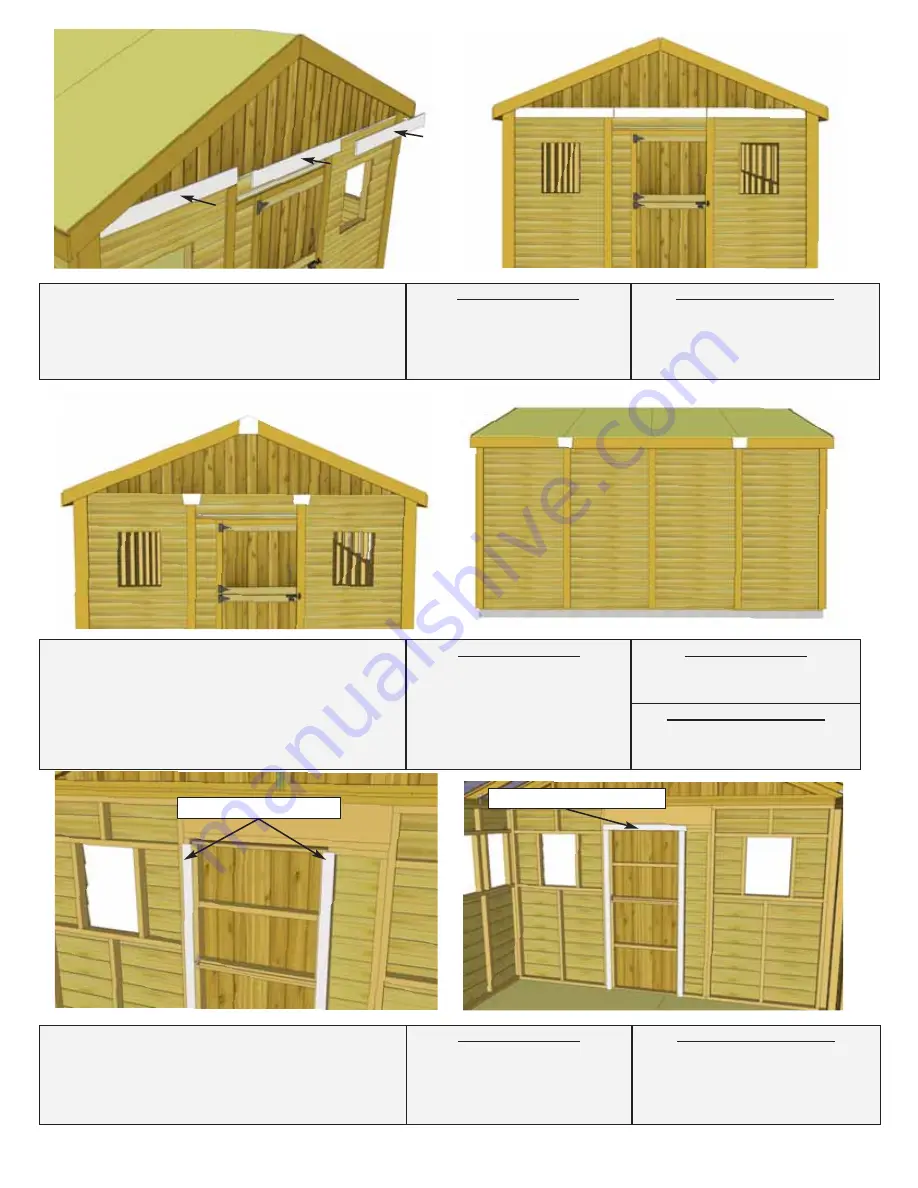
81.
Locate
Horizontal Gable Trims
for
both front and rear of shed. Position equally
over Gable and Wall seam. Attach each piece
with
6 - 1 1/2” Finishing Nails
.
Parts (Step 82)
Pentagon Detail Plates
(9 1/2” x 7 1/2”)
x 2
Facia Detail Plates
(8” x 5 1/2”)
x 4
Hardware (Step 82)
N1 - 1 1/2” Finishing Nails
x 36 total
82.
Attach
Facia Detail Plates
and
Pentagon Detail Plates
to cover seams
where
Facia
and
Trim
pieces come together.
Secure each with
4 - 1 1/2” Finishing Nails
.
Parts (Step 83)
Door Stops
(1/2” x 2 1/2” x 72”)
x 2
(1/2” x 2 1/2” x 36”)
x 1
Hardware (Step 83)
S3 - 2” Screws
x 12 total
83.
Attach
Interior Vertical
and
Horizontal
Door Stops
to door framing from inside of
shed. Use
4 - 2” screws
to secure each stop.
Stops should overlap door by approx. 1/2”.
Vertical Door Stops
Horizontal Door Stop
Parts (Step 82)
Gable Detail Plates
(8” x 4 1/2”)
x 4
Page 44


