11
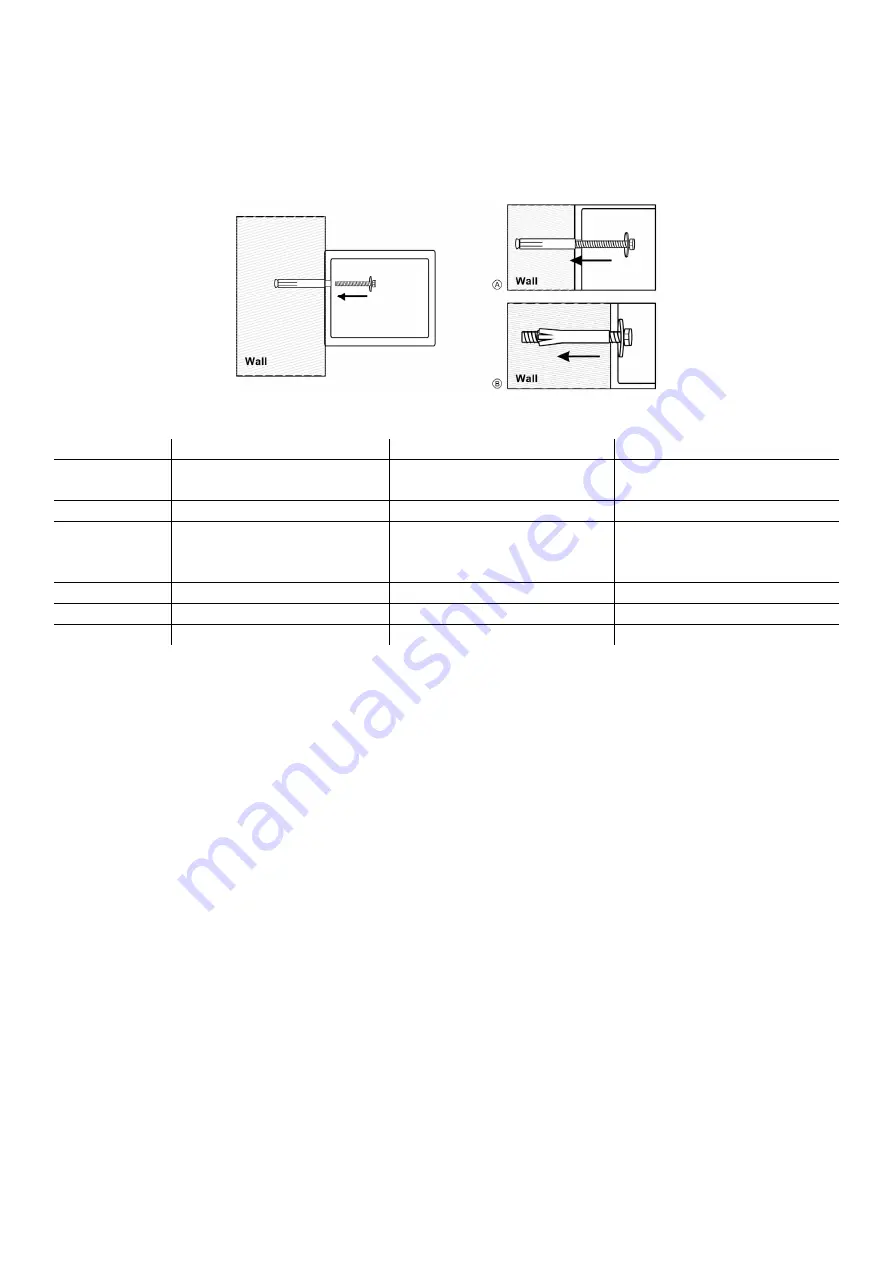
Mounting method
Mount the safe in a place that is not easy to move.
•
Drill the holes for the expansion screws (or clamping screws) in the right place.
•
Turn the expansion screws anticlockwise to loosen them.
•
Use the expansion screws (or the clamping screws) to fix the cabinet to the wall.
•
Make sure the enclosure is fixed in the right place, then tighten all the screws.
CAUTION: Use the expansion screws if there is a concrete wall. Use the clamping screws if there is a wooden wall.
Technical data
Name
GOsafe 120FP
GOsafe 210FP
GOsafe 210
Dimensions
(H × W × D)
Outside: 250 × 350 × 250 mm
Interior: 247 × 347 × 190 mm
Outside: 230 × 430 × 350 mm
Inside: 225 × 425 × 290 mm
Outside: 230 × 430 × 350 mm
Inside: 225 × 425 × 290 mm
Weight
8.9 kg
13,8 kg
13,8 kg
Lock variant
Fingerprint, numeric code,
finge numeric code,
emergency key
Fingerprint, numeric code,
finge numeric code,
emergency key
Numeric code, emergency key
Wall thickness 4 mm
4 mm
4 mm
Body thickness 1.5 mm
2 mm
2 mm
Batteries
4 × AA LR6 (Mignon)
4 × AA LR6 (Mignon)
4 × AA LR6 (Mignon)
Warranty
Dear customer,
We are delighted that you have chosen this equipment.
In the case of a defect, please return the device together with the receipt and original packing material to the point
of sale.
Cleaning
Clean the surface of the housing with a soft, dry, lint-free cloth. Do not use any solvents or cleaning agents.
Summary of Contents for GOsafe 120FP Series
Page 26: ...25 EL 1 2 3 4 5 6 9V 7 8 120FP 210FP Cd Hg Pb...
Page 27: ...26 1x 2x 1x 120FP 4x AA LR6 4x 1 O X 4 AA LR6...
Page 28: ...27 9V 9V 9V 4 8 1234 123456 120FP 210FP 120FP 210FP 2 10 2 2 4 8 2...
Page 29: ...28 0 3 4 8 2 120FP 210FP 2 2 30 2 3 120FP 210FP 1 3 5 120FP 210FP 20 20 20 120FP 210FP 8...
Page 38: ...37 GO Europe GmbH V1 14 Zum Kraftwerk 10 4 2022 D 45527 Hattingen ID see Table Deutschland...


