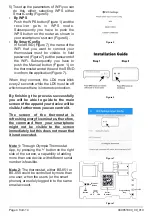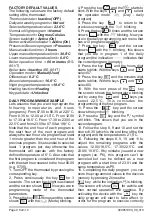
5) To set up the parameters of WiFi you can
do this either selecting WPS either
Smart Config (Figure 5)
:
Push the WPS button (Figure 1) and the
r e c e i v e r g e t s i n W P S m o d e .
Subsequently you have to push the
WPS button on the router as shown in
your smartphone’s screen (Figure 6).
Ÿ
By Smart Config
In field SSID (Figure 7) the name of the
WiFi that you want to connect your
thermostast must be visible. In field
password (Figure 7) put the password of
the WiFi. Subsequently you have to
push the Manual button (Figure 1) on
the thermostat and at the end the SEND
icon from the application (Figure 7).
When they connect, the LD4 must blink
every 2 seconds while the LD5 must be off
which means there is internet connection.
By finishing the process successfully
you will be able to guide to the main
screen of the app and your device will be
visible, furthermore you can control it.
The screen of the thermostat is
refreshing every five minutes, therefore,
the command from your smartphone
might not be visible to the screen
immediately but this does not mean that
it is not executed.
Note 1:
Through Olympia Thermostat
App, by pressing the '+' button on the right
side of the screen, a capability of adding
more than one device with different serial
number is feasible.
Ÿ
By
WPS
Note 2:
The thermostat, either BS-851 or
BS-850 could be controlled by more than
one user, when the users (or the smart
phones) are solely logged in to the same
email account.
Figure
5
Figure
6
Figure
7
Page
4 from
1
4
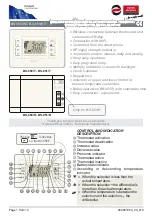
Figure
1
WPS
Button
Manual
Button
LD5
LD
1
LD
4
Programming
Key
Serial
Number
940851000_09_010

