Page
3 from
6
1
3
1.
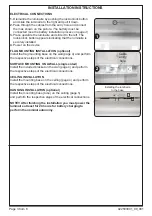
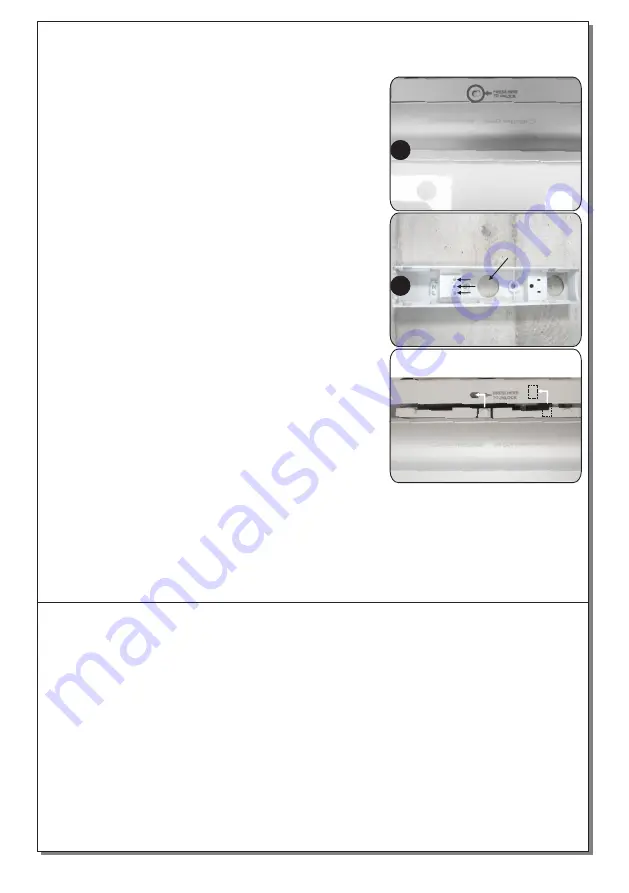
Dismantle the luminaire by pushing the lock/unlock button
and slide the luminaire to the right and pull it down.
2.
Pass through the cables from the entry hole and connect
them as shown on the picture.
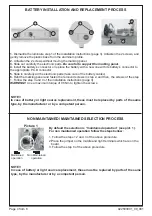
The battery must be
connected (see the battery installation process on page 4)
.
3.
Place upwards the luminaire and slide it to the left. The
lock/unlock button appears indicating that the luminaire is
securely installed.
4
. Power on the device
.
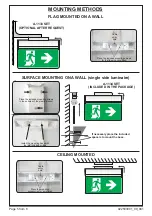
FLAG MOUNTING INSTALLATION (optional)
Install the flag mounting base on the wall (page 4) and perform
the respective steps of the electrical connections.
SURFACE MOUNTING ON A WALL (single sided)
Install the included bracket on the wall (page 4) and perform
the respective steps of the electrical connections.
CEILING INSTALLATION
Install the mounting base on the ceiling (page 4) and perform
the respective steps of the electrical connections.
HANGING INSTALLATION (optional)
Install the mounting base (tube) on the ceiling (page 5)
and perform the respective steps of the electrical connections.
NOTE!! After finishing the installation you must power the
luminaire at least for 24 hours for battery charging to
perform the nominal autonomy.
92250300
1
_09_001
L
N
Cable
entry
hole
Gnd
Installing the luminaire
to the base
INSTALLATION INSTRUCTIONS
2
ELECTRICAL CONNECTIONS


