Page
4 from
6
1
2
Maintained
operation
Non Maintained
operation
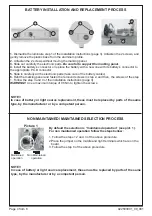
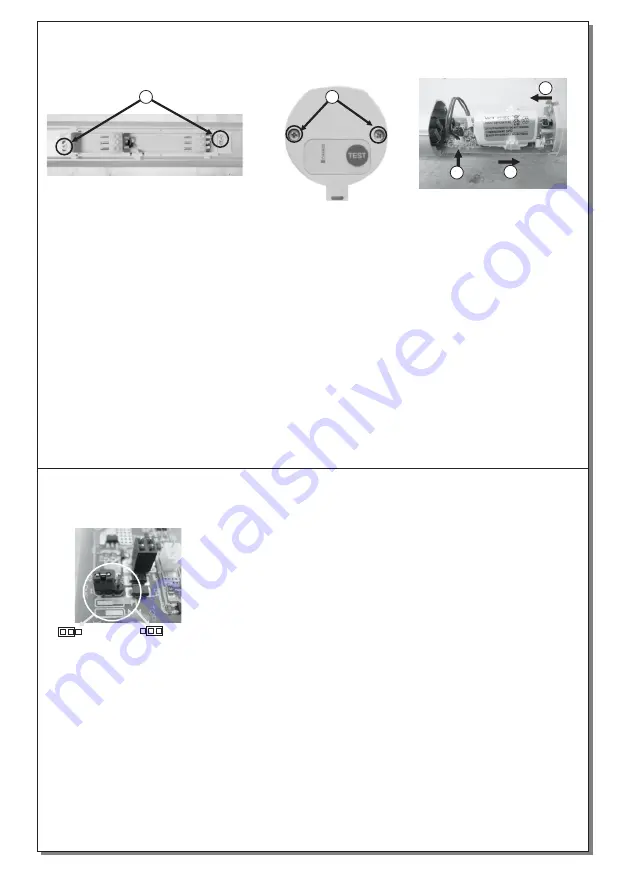
By default the selection is “maintained operation”
(
see pict.
1).
For non maintained operation follow the steps bellow:
1.
2.
Place the jumper
on the middle and right terminals which are on the
board
.
3.
Follow the step
6
of the above procedure
.
Follow the steps
1,2
and
3
of the above procedure
Picture
1
92250300
1
_09_001
4
3
5
1.
Dismantle the luminaire step 1 of the installation instructions (page 3). Unfasten the 2 screws, and
gently remove the plastic base from the aluminum profile.
2.
Unfasten the 2 screws without moving the marking panel
.
3.
Slide out carefully the electronic parts.
Be careful to support the marking panel.
4.
Ι
nstall the battery’s connector or replace the battery with a new one with its battery’s connector to
the appropriate
P.C.B
connector.
5.
Slide in carefully all the electronic parts
(take care of the battery cables).
6
.
Refit the marking panel and fasten the removed screws in step 2, and then, the screws of the step
1
.
Follow the step 3 and 4 of the installation instructions (page 3)
WARNING
!!
Use a maximum torque of
0,5
Ν
m
to tighten the screws
.
BATTERY INSTALLATION AND REPLACEMENT PROCESS
NON MAINTAINED/ MAINTAINED SELECTION PROCESS
ΝΟΤΕ!!
In case of battery or light source replacement, these must be replaced by parts of the same
type, by the manufacturer or by a competent person.
ΝΟΤΕ!!
In case of battery or light source replacement, these must be replaced by parts of the same
type, by the manufacturer or by a competent person.


