background image

OLYMPIC BILI-BASSINET

 Instruction Manual

8-1

S e c t i o n

8

Specifications

Intended Use

The Olympic Bili-Bassinet is intended to provide 
one- or two-sided therapeutic irradiance to treat 
neonatal hyperbilirubinemia.

Irradiance Average at 20 in. (50.8 cm)

„

Overhead Lights: 16.9 µW/cm²/nm

„

Mattress LOW: 23.7 µW/cm²/nm

„

Mattress HI: 36.6 µW/cm²/nm

Note: Stated irradiance is measurement of new, burned-in 
Type OB bulbs with an Olympic Bili-Meter

TM

.

Dimensions

Size – Overhead Lights Up

54-in. high x 31-in. wide x 38-in. deep


137-cm high x 79-cm wide x 96.5-cm deep

Size – Overhead Lights Down (Stored)

44-in. high x 27-in. wide x 38-in. deep


112-cm high x 69-cm wide x 96.5-cm deep

Weight

230 lb

104 kg

Electrical

Power Requirements

„

Voltage: 115V~

„

Consumption: 3.5A

„

Frequency (current): 60 Hz

Ground

Does not exceed 0.13

Fuses

„

Two 4A 3AG Slo-Blo

„

One 1/8A 3AG fast acting

Bulbs

Nominal bulb life (for 75% of initial irradiance, 
Type OB): 3,000 hours

Environmental

Temperature

„

Operating:    65–81°F

 18–27°C

„

Shipping: -40–158°F

-40–70°C

„

Storage:

-40–158°F

-40–70°C

Relative Humidity (RH)

„

Operating: 10–95%, non-condensing

„

Shipping/Storage: 10–100%, condensing

Altitude (Maximum)

10,000 ft

 3,000 m

Pressure

0.5–1.0 atm

500–1600 hPa

Noise

Maximum noise level: 55 dB(A)

Controls

„

On (|) and off (O) for each overhead light hood.

„

High (four bulbs), low (two bulbs; center off), or 

off (O) for phototherapy pad.

„

Mattress tilt allows ±10° from horizontal; 

locking positions are at 0°, 5°, and 10°.

„

Hood release allows the overhead light hoods to 

be placed in storage position.

External Connections

Hospital-grade power cord

Summary of Contents for BILI-BASSINET 58110

Page 1: ...29P Instruction Manual OLYMPIC BILI BASSINETTM CAUTION Read and be familiar with this manual before installing operating or servicing this device To ensure operator technician and patient safety use only as specified in this manual ...

Page 2: ......

Page 3: ...ICAL 5900 First Ave S Seattle WA 98108 USA Toll free 1 800 426 0353 US Canada Phone 206 767 3500 worldwide Fax 206 762 4200 Web www OlympicMedical com Copyright 2005 Olympic Medical Corporation All rights reserved ...

Page 4: ......

Page 5: ...d 3 3 Using the Overhead Lights 3 3 Positioning the Transparent Sides 3 4 Tilting the Mattress 3 5 Using the Bili Bassinet with a Radiant Warmer 3 6 Measuring Irradiance 3 6 Section 4 Maintenance 4 1 Cleaning the Bili Bassinet 4 1 Cleaning the Phototherapy Pad Fixture 4 2 Inspecting the Bili Bassinet 4 3 Replacing the Bulbs 4 3 Bulb Timers 4 3 Replacing the Overhead Bulbs 4 4 Replacing the Mattres...

Page 6: ...tting the Thermostat 6 13 Replacing the Thermostat 6 14 Replacing the Ballast 6 16 Returning for Service 6 19 Section 7 Replacement Parts 7 1 Ordering Information 7 1 Parts and Accessories 7 1 Section 8 Specifications 8 1 Electromagnetic Specifications Manufacturer s Declaration 8 3 Recommended Separation Distances Between Portable and Mobile RF Communications Equipment and the Bili Bassinet 8 5 A...

Page 7: ... by qualified service technicians Conventions The following conventions are used in this manual Table 1 1 Conventions Convention Description NOTE Notes provide additional information to clarify a point in the text CAUTION Cautions indicate situations that if not avoided could result in minor to moderate injury to the patient or operator or damage to the equipment WARNING Warnings indicate situatio...

Page 8: ...ge Mains power OFF Atmospheric pressure Mains power ON Caution hot surfaces Neutral neutral conductor Caution read instructions Nonionizing electromagnetic radiation Consult instruction manual Protective earth ground Do not reuse single use only Reference number Electrical shock hazard Shipping Eye protection to be worn by infants Storage Fuse Temperature limitations Humidity condensing Type B app...

Page 9: ...ment When not needed for phototherapy treatment turn off the lights and use the Bili Bassinet as a regular bassinet Figure 1 1 Olympic Bili Bassinet Control Panel The control panel provides user control of the phototherapy pad high low or off and overhead lamps front and rear on or off Figure 1 2 Control panel Overhead light hood Caster wheels Overhead light hood storage position Mattress Storage ...

Page 10: ...radiance output of phototherapy Olympic Bili MaskTM which protects the patient s eyes during phototherapy treatment To order these items see page 7 1 Figure 1 3 Bili Meter Figure 1 4 Bili Mask styles Olympic Bili Meter With Type F 22 Sensor for measuring irradiance from below Olympic Bili Meter With Type B 22 Sensor for measuring overhead irradiance light source light source Standard Easy On Quick...

Page 11: ...Institute of Standards and Technology NIST NOTE The differences between the Olympic Bili Meter and the IEC measurements do not represent a difference in the total irradiance output of the same bulbs The difference results from averaging the irradiance of the same bulbs over wavelength bands of different widths The Olympic Bili Meter measures from 425 to 475 nm nearly all of the irradiance of blue ...

Page 12: ...radiance Figure 1 5 Response Olympic Bili Meter Figure 1 6 Spectral energy distribution 0 10 20 30 40 50 60 70 80 90 100 390 400 410 420 430 440 450 460 470 480 490 500 510 520 Wavelength nm Relative Response Wavelength nm Relative irradiance µW cm ...

Page 13: ...re 1 7 Effective surface area Olympic Bili Bassinet top view Figure 1 8 Effective surface area Olympic Bili Bassinet side view 7 in 17 8 cm 12 in 30 5 cm Pad area Overhead lights area 24 in 61 cm 20 in 50 8 cm O v e r h e a d b u l b O v e r h e a d b u l b Pad ...

Page 14: ...1 8 OLYMPIC BILI BASSINET Instruction Manual Irradiance ...

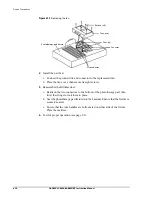
Page 15: ...totherapy pad b Remove the screw and washer on the end of the pad fixture c Tilt the phototherapy pad the opposite direction and remove the screw and washer on the other end of the pad fixture d Lift off the plastic shield see Figure 2 1 on page 2 2 e Install the four bulbs into the sockets ensuring that the bulb pins slide into the bulb holder slots Rotate each bulb to seat it in position f Re in...

Page 16: ... bulb pins slide into the bulb holder slots d Rotate each bulb to seat it in position e Install the light shield by laying it on the light hood and securing the screws f Install the light shield lay the shield on the light hood fixture then place the washers and tighten the two screws 5 Test the device for proper operation see page 2 3 Figure 2 2 Installing the overhead bulbs Plastic shield Photot...

Page 17: ...d light fixture illuminate 4 Test the mattress tilt a Pull and hold the MATTRESS TILT latch then press on either end of the mattress to tilt the phototherapy pad to the desired position b Release the latch allowing the phototherapy pad to seat firmly in place c Release the MATTRESS TILT handle d Press on either end of the mattress to confirm that the phototherapy pad is locked in position e Repeat...

Page 18: ...2 4 OLYMPIC BILI BASSINET Instruction Manual Testing the Bili Bassinet 7 Turn the power switch to the OFF O position NOTE If the device does not operate as expected see Troubleshooting on page 6 1 ...

Page 19: ...ttress to confirm that the phototherapy pad is locked in position The mattress must be in place during phototherapy treatment Place rolled blankets or towels around the patient to keep the patient on the lighted area of the mattress Never leave the patient unattended when any side of the bassinet is down Test the transparent sides regularly for correct operation confirm that each side locks in the...

Page 20: ...usion liquids in the phototherapy radiation area Phototherapy devices may affect the heat supply of thermotherapy devices e g incubators radiant warmers During phototherapy treatment thermotherapy devices should be operated in skin control mode or the air temperature setting or heat output of thermotherapy devices should be reduced as appropriate Use only with an Olympic Medical mattress Do not us...

Page 21: ...lush to the sides of the bassinet and can be raised and operated individually see Figure 3 1 To reposition the lights 1 Raising the lights see Figure 3 1 on page 3 4 a Grasp the handle on the light hood then lift the light until it locks over the bassinet b Rotate the light fixture toward the mattress until the green arrows on the sides of the fixture align and the fixture locks into position 2 Lo...

Page 22: ...a Place the overhead light in the storage position b Lift the side up out of its slot then gently fold it down against the side of the bassinet 2 Raise the sides see Figure 3 2 a Place the overhead light in the storage position b Lift the side up then slide it down into its slot Light hood Overhead light hood storage position Transparent side panel Green arrows CAUTION Never leave the patient unat...

Page 23: ...rendelenburg and Reverse Trendelenburg To tilt the mattress 1 Pull and hold the MATTRESS TILT latch see Figure 3 3 then press on either end of the mattress to tilt the phototherapy pad to the desired position 2 Release the latch allowing the phototherapy pad to lock firmly in place 1 Lift side up 2 Fold side down CAUTION Before placing a patient in the bassinet press on either end of the mattress ...

Page 24: ...r Measuring Irradiance Irradiance can only be determined by measuring with a radiometer such as the Olympic Bili Meter see page 1 4 and refer to the Olympic Bili Meter Model 22 Instruction Manual 1 2 1 Pull and hold MATTRESS TILT 2 Push the mattress to tilt 3 Release MATTRESS TILT CAUTION When using the Bili Bassinet with a radiant warmer center the bassinet under the warmer canopy Never place the...

Page 25: ...ures bassinet and mattress WARNING Electrical shock hazard when the enclosures are open Unplug the power cord from the electrical outlet before cleaning this device Do not clean this device with flammables e g antiseptics cleaning agents CAUTION Only qualified technicians should perform maintenance procedures Do not allow liquid to enter the mattress or overhead light hoods as liquids may cause a ...

Page 26: ...ain better access to the phototherapy pad 3 Remove the phototherapy pad fixture see Figure 4 1 a Remove the mattress then pull the wire handles up from their recesses in the phototherapy pad fixture b Pull the MATTRESS TILT handle while lifting the phototherapy pad fixture by the wire handle at the front of the fixture Next release the MATTRESS TILT handle then grasp the wire handle at the back of...

Page 27: ...erbalance mechanisms of the overhead light fixtures for any wear and looseness and to verify smooth operation Test the transparent sides for correct operation move each transparent side into the down position then confirm that each side locks in the up position Replacing the Bulbs Replace the Bili Bassinet bulbs at 3 000 hours to maintain greater than 75 of initial irradiance irradiance measured a...

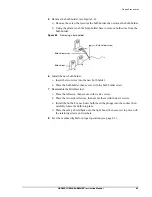
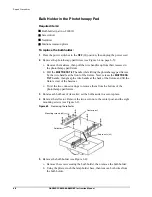
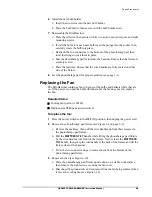
Page 28: ...ws and washers 6 Test for proper operation see page 2 3 Replacing the Mattress Pad Bulbs Required Items Replacement bulbs see page 7 1 Phillips head screwdriver To replace the mattress pad bulbs 1 Turn the power switch to the OFF O position then unplug the power cord 2 Remove the mattress 3 Pull the MATTRESS TILT handle then tilt the phototherapy pad 4 Remove the screw and washer on the end of the...

Page 29: ...4 3 Burned out bulb Replace the bulb see page 4 3 Loose connection or break in wire Check the wire connections Damaged bulb holder Replace the bulb holder see page 6 6 Unplugged connector Ensure that all connectors are securely seated on the ballast box see page 6 3 Damaged ballast Determine if the ballast is damaged by swapping connectors on the ballast face i e swap connector P3 and P4 Replace t...

Page 30: ...port contact Olympic Medical at Toll free 1 800 426 0353 US Canada Phone 206 767 3500 worldwide Fax 206 762 4200 Power on Fan runs Bulb lights but is dim or makes humming sound Reduced irradiance Replace the bulbs see page 4 3 Table 5 1 Troubleshooting chart continued Problem Probable Cause Solution ...

Page 31: ...ir actions and tests are complete perform the pre operative test procedure in this manual see page 2 3 to ensure proper operation and compliance with published specifications WARNING Electrical shock hazard when any enclosure is open Unplug the power cord from the electrical outlet before servicing this device CAUTION Only qualified technicians should perform service procedures Reattach all ground...

Page 32: ...anel see Figure 6 1 a Raise the front overhead light then remove the four screws that secure the panel in the overhead light storage compartment b Disconnect the eight connectors from the ballast box Figure 6 1 Removing the front panel WARNING Electrical shock hazard when the enclosure is open Unplug the power cord from the electrical outlet before servicing this device CAUTION Reattach all ground...

Page 33: ...k and lift up while moving cables aside Figure 6 2 Removing the ballast box cover 4 Remove the fuses The fuses are located inside the ballast box on the rear of the right wall see Figure 6 3 Figure 6 3 Replacing the fuses 5 Insert the new fuses Ballast box cover Tabs Screws x2 for securing the ballast box Fuse 4A x2 Fuse 1 8A Ballast box Slots for tabs x3 CAUTION For protection against a fire haza...

Page 34: ...s 1 Press the power switches to the OFF O position then unplug the power cord 2 Lower the overhead lights 3 Remove the phototherapy pad fixture see Figure 6 4 a Remove the mattress then pull the wire handles up from their recesses in the phototherapy pad fixture b Pull the MATTRESS TILT handle while lifting the phototherapy pad fixture by the wire handle at the front of the fixture Next release th...

Page 35: ...clips that hold the switch in place push the switch out the front of the panel Figure 6 5 Accessing the switches 5 Place the new switch a Push the new switch into the panel b Connect the push on connector to the back of the switch c Place the cover then secure with its two screws 6 Test for proper operation see page 2 3 Wire handles Connector rings MATTRESS TILT handle Transparent sides Overhead l...

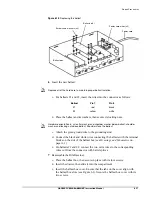
Page 36: ...he screws and lift the light shield toward the bassinet then lift it up and out from the fixture 3 Rotate each bulb out of its socket set the bulbs aside in a secure place 4 Remove the reflectors a Remove the six screws that secure the two side reflectors see Figure 6 6 b Press the shield springs to remove the flanged side reflector then remove the other side reflector c Remove the six screws that...

Page 37: ... bulb holder b Place the bulb holder then secure with the bulb holder screw 7 Reassemble the Bili Bassinet a Place the reflector then secure with its six screws b Place the two side reflectors then secure them with their six screws c Install the bulbs For each new bulb insert the prongs into the socket then carefully rotate the bulb into place d Place the safety shield back onto the light hood the...

Page 38: ...e handle at the front of the fixture Next release the MATTRESS TILT handle then grasp the wire handle at the back of the fixture and lift the fixture clear of the bassinet c Twist the two connector rings to remove them from the bottom of the phototherapy pad fixture 3 Rotate each bulb out of its socket set the bulbs aside in a secure place 4 Remove the reflector Remove the two acorn nuts the cente...

Page 39: ...s and ballasts while they are on If the power is on and the bulbs illuminate but the fan does not run replace the fan Required items Cooling fan part no 200149 Medium size Phillips head screwdriver To replace the fan 1 Press the power switches to the OFF O position then unplug the power cord 2 Remove the phototherapy pad fixture see Figure 6 4 on page 6 5 a Remove the mattress then pull the wire h...

Page 40: ... the Bili Bassinet a Reattach the two connectors to the bottom of the phototherapy pad then twist their rings to lock them in place b Seat the phototherapy pad fixture into the bassinet Ensure that the fixture is securely seated c Ensure that the wire handles are fully seated on either side of the fixture Place the mattress 6 Test for proper operation see page 2 3 Fan cover Fans x2 Ground wires Fa...

Page 41: ...f the two fans to prevent them from moving 4 Replace the phototherapy pad fixture see Figure 6 4 on page 6 5 5 Plug in the power cord then press the power switch to the ON position 6 Turn the fixture to HIGH 7 The fixture should shut down in about 30 minutes as the thermostat has tripped due to the fans inability to exhaust the heat of the ballasts and bulbs 8 Press the power switch to the OFF O p...

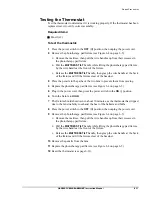
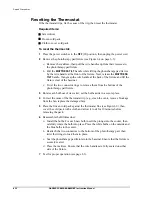
Page 42: ...ngs to remove them from the bottom of the phototherapy pad fixture 3 Rotate each bulb out of its socket set the bulbs aside in a secure place 4 Correct the cause of the thermostat trip e g clean the vents remove blockage from the fan replace the damaged fan 5 Place the frozen cold pack against the thermostat fins see Figure 6 9 then cover the cold pack with a cloth and allow it to sit for 10 minut...

Page 43: ... from their recesses in the phototherapy pad fixture b Pull the MATTRESS TILT handle while lifting the phototherapy pad fixture by the wire handle at the front of the fixture Next release the MATTRESS TILT handle then grasp the wire handle at the back of the fixture and lift the fixture clear of the bassinet c Twist the two connector rings to remove them from the bottom of the phototherapy pad fix...

Page 44: ...uts center post and eight mounting screws b Install the bulbs For each new bulb insert the prongs into the socket then carefully rotate the bulb into place c Replace the shield and shield hardware d Reattach the two connectors to the bottom of the phototherapy pad then twist their rings to lock them in place e Seat the phototherapy pad fixture into the bassinet Ensure that the fixture is securely ...

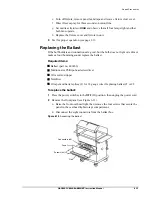
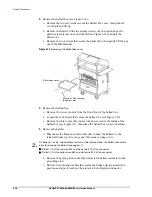
Page 45: ...e bulb does not light or is dim or makes a loud humming sound replace the ballast Required items Ballast part no 400966 Medium size Phillips head screwdriver Wire cutter stripper Nutdriver Crimper and barrel splices 2 for 18 gauge wire if replacing ballast 1 or 2 To replace the ballast 1 Press the power switches to the OFF O position then unplug the power cord 2 Remove the front panel see Figure 6...

Page 46: ...e 6 15 c Remove the three wires that connect the power cord to the inside of the ballast box see Figure 6 3 then place the ballast box on a work surface 5 Remove the ballast a Disconnect the black and white wires that connect the ballasts to the terminal blocks see Drawings and Schematics on page A 1 b Remove the green ground wire that connects the ballast connector to the grounding stud c Remove ...

Page 47: ... corresponding wires cut from the connector with barrel splices 7 Reassemble the Bili Bassinet a Place the ballast box then secure in place with its four screws b Insert the drawer then slide it into the compartment c Insert the ballast box cover Ensure that the tabs on the cover align with the ballast box slots see Figure 6 3 Secure the ballast box cover with its two screws Screws and washers x4 ...

Page 48: ...n the device then securely package it and its power cord in the original shipping container if possible and include a A letter describing in detail the difficulties experienced b All warranty information include a copy of the invoice or other applicable documentation c Purchase order PO number to cover the repair of any device not under warranty d Return address and bill to information e Contact p...

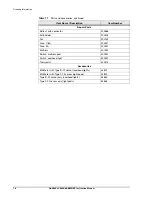
Page 49: ...vide the item number to the customer service representative NOTE Only use Olympic Medical approved parts with the Bili Bassinet Table 7 1 Parts and accessories Item Name Description Item Number Bulbs Bulb Olympic Blue Type OB 51418 Mattress Protection Mattress covers disposable 58106 Patient Eye Protection Bili Mask Easy On style regular size 52410 Bili Mask Easy On style premie size 52420 Bili Ma...

Page 50: ...021 Mattress 401282 Switch mattress pad 200001 Switch overhead light 200001 Thermostat 400973 Accessories Bili Meter with Type B 22 sensor overhead lights 53822 Bili Meter with Type F 22 sensor light pads 53825 Type B 22 sensor only overhead lights 53860 Type F 22 sensor only light pads 53865 Table 7 1 Parts and accessories continued Item Name Description Item Number ...

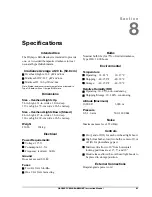
Page 51: ...30 lb 104 kg Electrical Power Requirements Voltage 115V Consumption 3 5A Frequency current 60 Hz Ground Does not exceed 0 13Ω Fuses Two 4A 3AG Slo Blo One 1 8A 3AG fast acting Bulbs Nominal bulb life for 75 of initial irradiance Type OB 3 000 hours Environmental Temperature Operating 65 81 F 18 27 C Shipping 40 158 F 40 70 C Storage 40 158 F 40 70 C Relative Humidity RH Operating 10 95 non condens...

Page 52: ...of flammable anaesthetic mixtures with air oxygen or nitrous oxide Service Service can be performed by hospital technicians Parts are often available on an overnight express basis See Ordering Information on page 7 1 for more information Warranty One year warranty includes parts and labor Excludes bulbs Electromagnetic Compatibility The Bili Bassinet complies with the requirements of IEC 60601 1 2...

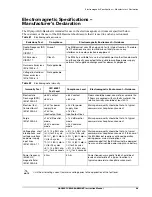
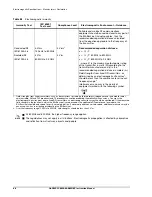
Page 53: ...rete or ceramic tile If floors are covered with synthetic material the relative humidity should be at least 30 Electrical fast transient burst IEC 61000 4 4 2 kV for power supply lines 1 kV for input output lines 2 kV for power supply lines 1 kV for input output lines Mains power quality should be that of a typical commercial or hospital environment Surge IEC 61000 4 5 1 kV differential mode 2 kV ...

Page 54: ... than the compliance level in each frequency range 2 Interference may occur in the vicinity of equipment marked with the following symbol 1 Field strengths from fixed transmitters such as base stations for radio cellular cordless telephones and land mobile radios amateur radio AM and FM broadcast and TV broadcast cannot be predicted theoretically with accuracy To assess the electromagnetic environ...

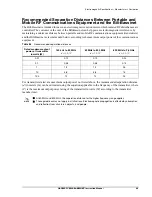
Page 55: ...tions equipment For transmitters rated at a maximum output power not listed above the recommended separation distance d in meters m can be estimated using the equation applicable to the frequency of the transmitter where P is the maximum output power rating of the transmitter in watts W according to the transmitter manufacturer Table 8 4 Recommended separation distances Rated maximum output power ...

Page 56: ...8 6 OLYMPIC BILI BASSINET Instruction Manual Electromagnetic Specifications Manufacturer s Declaration ...

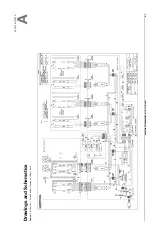
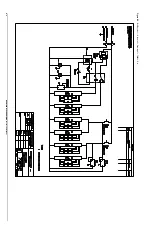
Page 57: ...OLYMPIC BILI BASSINET Instruction Manual A 1 A p p e n d i x A Drawings and Schematics Figure A 1 Bili Bassinet Wiring Diagram Drawing No 700241 Rev C ...

Page 58: ...A 2 OLYMPIC BILI BASSINET Instruction Manual Figure A 2 Bili Bassinet Schematic Drawing No 700242 Rev ...

Reviews: