background image

23

SAFETY PRECAUTIONS

En

Read All Instructions —

 Before you use the product, read all operating instructions. 

Save all manuals and documentation for future reference.

Cleaning — 

Always unplug this product from the wall outlet before cleaning. Use 

only a damp cloth for cleaning. Never use any type of liquid or aerosol cleaner, or 
any type of organic solvent to clean this product.

Attachments —

 For your safety, and to avoid damaging the product, use only 

accessories recommended by Olympus.

Water and Moisture —

 For precautions on products with weatherproof designs, 

read the weatherproofing sections.

Location —

 To avoid damage to the product, mount the product securely on a stable 

tripod, stand, or bracket. 

Power Source —

 Connect this product only to the power source described on the 

product label. 

Lightning —

 If a lightning storm occurs while using an AC adapter, remove it from 

the wall outlet immediately.

Foreign Objects —

 To avoid personal injury, never insert a metal object into the 

product.

Heat —

 Never use or store this product near any heat source such as a radiator, heat 

register, stove, or any type of equipment or appliance that generates heat, 
including stereo amplifiers.

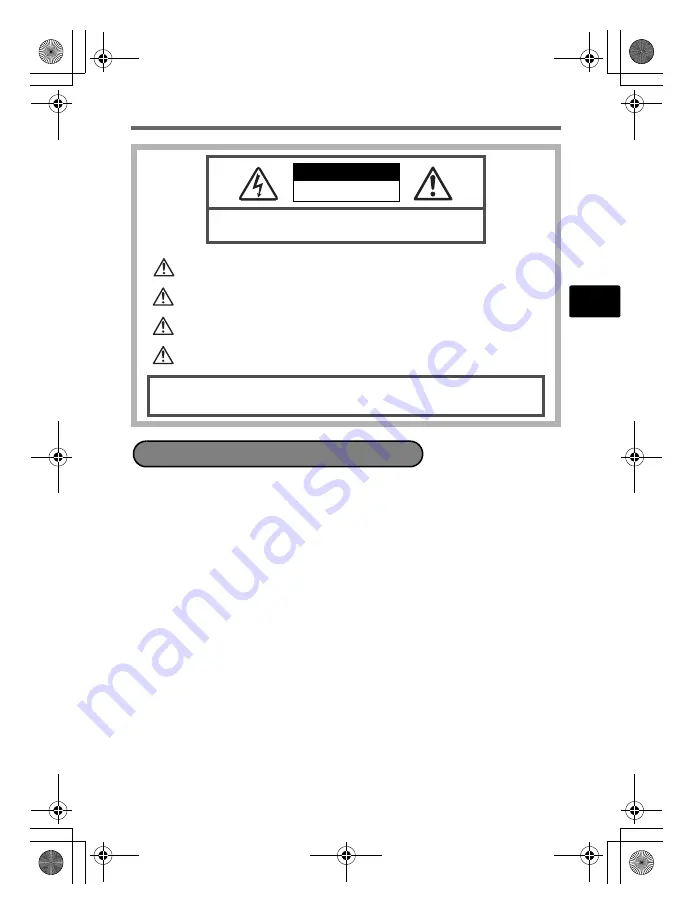
CAUTION:

 TO REDUCE THE RISK OF ELECTRICAL SHOCK, DO NOT 

REMOVE COVER (OR BACK). NO USER-SERVICEABLE PARTS INSIDE. 

REFER SERVICING TO QUALIFIED OLYMPUS SERVICE PERSONNEL.

An exclamation mark enclosed in a triangle alerts you to important operating and 
maintenance instructions in the documentation provided with the product.

DANGER

If the product is used without observing the information given under this symbol, serious 
injury or death may result.

WARNINGS

If the product is used without observing the information given under this symbol, injury or 
death may result.

CAUTION

If the product is used without observing the information given under this symbol, minor 
personal injury, damage to the equipment, or loss of valuable data may result.

WARNING!
TO AVOID THE RISK OF FIRE OR ELECTRICAL SHOCK, NEVER DISASSEMBLE, EXPOSE THIS PRODUCT TO WATER 
OR OPERATE IN A HIGH HUMIDITY ENVIRONMENT.

CAUTION

RISK OF ELECTRIC SHOCK 

DO NOT OPEN

General Precautions

d4262_oima_e_basic_00_bookfile_7.book  Page 23  Tuesday, August 2, 2005  10:54 AM

Summary of Contents for 225690 - Stylus 600 6MP Digital Camera

Page 1: ...Basic Manual DIGITAL CAMERA ENGLISH 2 FRAN AIS 28 ESPA OL 54 d4262_e_basic_01_cover_oima_7 fm Page 1 Thursday August 4 2005 12 24 PM...

Page 2: ...14 Erase All Pictures 14 Select a Language 14 Monitor Symbols Icons 15 Thumbnail Index Display 16 CONNECTING THE CAMERA 17 Playback on a TV 17 Direct Printing PictBridge 18 OLYMPUS Master SOFTWARE 19...

Page 3: ...ting Mode q Button Playback Mode Arrow Pad O N X Y Z Button OK MENU Strap Eyelet Battery Compartment Card Cover Tripod Socket Connector Cover Multi Connector DC IN Jack DISP GUIDE Button S Button Eras...

Page 4: ...anual CD ROM Basic Manual this manual warranty card Contents may vary depending on purchase location Power Cable AC Wall Outlet LI 12B Lithium Ion Battery Charge the battery recommended Battery comes...

Page 5: ...time 1 Press o n button to turn the camera on 2 Press Z to display the top menu and select MODE MENU SETUP X 3 Press O N to set an item Press X Y to select the next field o n Button Z Button 2005 01 0...

Page 6: ...e the picture Pressed Completely Shutter Button b Focus 1 Using the monitor place the AF target mark over your subject 2 Press and hold the shutter button halfway to lock the focus The green lamp indi...

Page 7: ...turn to the original size Prev Picture Next Picture Arrow Pad q Button Press the m button to return to shooting mode Press O N or X Y to scroll around c To erase a picture OK ERASE YES NO SELECT GO 1...

Page 8: ...n screen instructions b Connect the camera to the computer 1 Connect the camera and computer using the USB cable included The monitor will turn on automatically 2 Select PC on the monitor and press Z...

Page 9: ...PUS Master main menu If the Transfer Images window is not displayed automatically Tips For more detailed information regarding camera setup and usage please refer to the camera s Advanced Manual provi...

Page 10: ...o that the flash is positioned above the lens Keep your fingers and the strap away from the lens and flash Shooting mode is for taking pictures and adjusting shooting settings whereas playback mode is...

Page 11: ...ion 4 X button Macro Mode Use macro or super macro mode when taking close up pictures such as of a flower 5 OF button Exposure Compensation Use this setting to overexpose or underexpose a picture 6 Y...

Page 12: ...ghts for approximately 10 seconds after the shutter button is pressed then starts blinking After blinking for approximately 2 seconds the picture is taken PORTRAIT INDOOR MUSEUM SHOOT SELECT2 LANDSCAP...

Page 13: ...or zoom button to reactivate the camera If the camera is not operated for 15 minutes after the camera enters sleep mode it automatically retracts the lens and turns off To resume operation turn on th...

Page 14: ...and time erasing all pictures etc 1 Press Z and select MODE MENU MEMORY CARD ALL ERASE 2 Select YES and press Z All the pictures are erased You can select a language for on screen display Available l...

Page 15: ...ge size 2816 2112 2560 1920 640 480 etc 13 AF target mark 14 Number of storable still pictures Remaining recording time 4 00 36 15 Spot metering 5 16 ISO ISO 64 ISO 1600 17 White balance 5 3 1 w y 18...

Page 16: ...e 10 n 5 Protect 9 6 Record mode SHQ HQ SQ1 SQ2 7 File number M100 0004 8 Image size 2816 2112 2560 1920 640 480 etc 9 Exposure compensation 2 0 2 0 10 White balance WB AUTO 5 3 1 w y 11 ISO ISO 64 IS...

Page 17: ...Turn the TV on and set it to the video input mode For details of switching to video input refer to your TV s instruction manual 3 Press the q button to turn the camera on The last picture taken is di...

Page 18: ...and press Z After the ONE MOMENT screen disappears the camera and printer are connected Select EASY PRINT to make just one print of the selected picture quickly 3 Use the arrow pad O N X Y to select...

Page 19: ...ing you to greatly expand your digital photograph capabilities You can upgrade your software to OLYMPUS Master Plus via the Internet You need to have OLYMPUS Master installed in a computer with an Int...

Page 20: ...Record mode Image size Remaining recording time SHQ 640 480 15 frames sec 6 sec HQ 320 240 15 frames sec 20 sec SQ 160 120 15 frames sec 54 sec No of pictures when fully charged Approx 330 based on C...

Page 21: ...ions Weight 140 g 4 9 oz without battery and card Lithium ion battery LI 12B Product type Lithium ion rechargeable battery Standard voltage DC 3 7 V Standard capacity 1230 mAh Battery life Approx 300...

Page 22: ...ater may get inside the camera if the battery compartment card cover or connector cover are not firmly closed SAFETY PRECAUTIONS Weatherproof feature Do not wash the camera with water Do not drop the...

Page 23: ...use or store this product near any heat source such as a radiator heat register stove or any type of equipment or appliance that generates heat including stereo amplifiers CAUTION TO REDUCE THE RISK O...

Page 24: ...noise or smoke around it Never remove the batteries with bare hands which may cause a fire or burn your hands Never hold or operate the camera with wet hands Do not leave the camera in places where it...

Page 25: ...ire or explosion use only batteries recommended for use with this product Insert the battery carefully as described in the operating instructions If rechargeable batteries have not been recharged with...

Page 26: ...es Association JEITA For customers in USA Declaration of Conformity Model Number Stylus 600 DIGITAL 600 Trade Name OLYMPUS Responsible Party Address Two Corporate Center Drive P O Box 9058 Melville NY...

Page 27: ...27 Memo d4262_oima_e_basic_00_bookfile_7 book Page 27 Tuesday August 2 2005 10 54 AM...

Page 28: ...s photos 40 S lection d une langue 40 Symboles et ic nes de l cran ACL 41 Affichage de miniatures index 42 CONNEXION DE L APPAREIL PHOTO 43 Affichage sur un t l viseur 43 Impression directe PictBridge...

Page 29: ...ge Molette de d filement O N X Y Touche Z OK MENU illet de courroie Couvercle de la carte du compartiment de la batterie Embase filet e de tr pied Couvercle du connecteur Connecteur multiple Prise d e...

Page 30: ...M Manuel de Base pr sent manuel carte de garantie Le contenu est susceptible de varier en fonction du lieu d achat C ble d alimentation Prise secteur Batterie au lithium ion LI 12B Chargez la batterie...

Page 31: ...pour allumer l appareil photo 2 Appuyez sur Z pour afficher le menu principal puis s lectionnez MENU MODE CONFIG X 3 Appuyez sur O N pour configurer un l ment Appuyez sur X Y pour s lectionner le cham...

Page 32: ...ncheur b Effectuez la mise au point 1 A l aide de l cran ACL placez le rep re de mise au point automatique sur votre sujet 2 Appuyez sur le d clencheur et maintenez le enfonc mi course pour verrouille...

Page 33: ...taille d origine Photo pr c dente Photo suivante Molette de d filement Touche q Appuyez sur la touche m pour revenir en mode prise de vue Appuyez sur O N ou X Y pour faire d filer c Pour effacer une i...

Page 34: ...cran b Connectez l appareil photo l ordinateur 1 Connectez l appareil photo et l ordinateur l aide du c ble USB fourni L cran ACL s allume automatiquement 2 S lectionnez PC l cran ACL puis appuyez sur...

Page 35: ...rincipal OLYMPUS Master Si la fen tre Transf rer des images n est pas affich e automatiquement Conseils Pour des informations plus d taill es concernant la configuration et l utilisation de l appareil...

Page 36: ...f Prenez garde que vos doigts ou la courroie ne g nent pas l objectif ni le flash Le mode prise de vue permet de prendre des photos et de r gler les param tres de prise de vue tandis que le mode lectu...

Page 37: ...mode gros plan ou super gros plan lorsque vous prenez des photos en gros plan telle que la photo d une fleur 5 Touche OF compensation d exposition Ce r glage vous permet d effectuer des photos surexpo...

Page 38: ...t environ 10 secondes apr s que le d clencheur ait t enfonc puis il clignote La photo est prise apr s environ 2 secondes de clignotement PORTRAIT PAYSAGE PAYSG PORTRT SCENE NUIT NUIT PORTRAIT SPORT IN...

Page 39: ...iver l appareil photo Une fois qu il est entr en mode veille si l appareil n est toujours pas utilis au bout de 15 minutes l objectif se r tracte automatiquement et l appareil s teint Pour l utiliser...

Page 40: ...marrage la date et l heure et d effacer toutes les photos etc 1 Appuyez sur Z et s lectionnez MENU MODE MEMOIRE CARTE TOUT EFFAC 2 S lectionnez OUI puis appuyez sur Z Toutes les photos sont effac es V...

Page 41: ...t SHQ HQ SQ1 SQ2 12 Taille d image 2816 2112 2560 1920 640 480 etc 13 Rep re de mise au point automatique 14 Nombre d images fixes pouvant tre stock es Dur e d enregistrement restante 4 00 36 15 Mesur...

Page 42: ...ssion Nombre d impressions Vid o 10 n 5 Protection 9 6 Mode d enregistrement SHQ HQ SQ1 SQ2 7 Num ro de fichier M100 0004 8 Taille d image 2816 2112 2560 1920 640 480 etc 9 Compensation d exposition 2...

Page 43: ...ur et mettez le en mode entr e vid o Pour en savoir plus sur la commutation de l entr e vid o veuillez consulter le manuel du t l viseur 3 Appuyez sur la touche q pour allumer l appareil photo La dern...

Page 44: ...ez sur Z Une fois que l cran UN MOMENT dispara t l appareil photo et l cran sont connect s S lectionnez IMPRESSION FACILE pour effectuer juste une impression rapide de la photo s lectionn e 3 Utilisez...

Page 45: ...DVD et plus encore vous permettant d augmenter grandement les capacit s en mati re de photographie num rique Vous pouvez mettre niveau votre logiciel en OLYMPUS Master Plus via Internet Vous devez av...

Page 46: ...1704 8 2048 1536 9 1600 1200 12 SQ2 1280 960 18 1024 768 28 0640 480 46 Vid o Mode d enregistrement Taille d image Dur e d enregistrement restante SHQ 640 480 15 images sec 6 sec HQ 320 240 15 images...

Page 47: ...tockage Alimentation Une batterie au lithium ion Olympus LI 12B ou un adaptateur secteur Olympus Dimensions 97 mm L 55 mm H 26 5 mm P hors saillies Poids 140 g sans batterie ni carte Batterie au lithi...

Page 48: ...pareil photo si le couvercle de la carte du compartiment de la batterie ou le couvercle du connecteur n est pas correctement ferm PR CAUTIONS DE S CURIT Imperm abilit Ne lavez pas l appareil photo l e...

Page 49: ...e source de chaleur telle qu un radiateur un accumulateur de chaleur ou tout type d appareil qui g n re de la chaleur comprenant les amplificateurs ATTENTION POUR R DUIRE LE RISQUE DE D CHARGE LECTRIQ...

Page 50: ...eil Ne jamais retirer les batteries les mains nues ce qui pourrait vous br ler les mains Ne jamais manipuler l appareil avec des mains mouill es Ne pas laisser l appareil dans des endroits o il pourra...

Page 51: ...la batterie recommand e pour l usage avec ce produit Introduire soigneusement la batterie comme d crit dans les instructions de fonctionnement Si les batteries rechargeables n ont pas t recharg es au...

Page 52: ...s utilisateurs aux tats Unis D claration de conformit Mod le num ro Stylus 600 DIGITAL 600 Marque OLYMPUS Organisme responsable Adresse Two Corporate Center Drive P O Box 9058 Melville NY 11747 9058 t...

Page 53: ...53 Memo d4262_oima_fr_basic_00_bookfile_7 book Page 53 Wednesday August 3 2005 4 12 PM...

Page 54: ...otograf as 66 Seleccionar un idioma 66 S mbolos e iconos del monitor 67 Visualizaci n de miniaturas ndice 68 CONEXI N DE LA C MARA 69 Reproducci n en un televisor 69 Impresi n directa PictBridge 70 SO...

Page 55: ...raf a Bot n q Modo de reproducci n Teclas de control O N X Y Bot n Z OK MENU Enganche para correa Tapa del compartimiento de la bater a tarjeta Rosca tr pode Tapa del conector Multiconector Jack DC IN...

Page 56: ...CD ROM Manual B sico este manual tarjeta de garant a Los contenidos pueden variar dependiendo del lugar de compra Cable de corriente Toma de corriente CA Bater a de iones de litio LI 12B Cargue la bat...

Page 57: ...el bot n o n para encender la c mara 2 Presione Z para mostrar el men superior y seleccione MENU MODO CONFIG X 3 Presione O N para seleccionar una opci n Presione X Y para seleccionar el siguiente cam...

Page 58: ...do Bot n disparador b Enfoque 1 Utilizando el monitor sit e la marca de objetivo de enfoque autom tico AF sobre el sujeto 2 Presione y mantenga presionado a medias el bot n disparador para bloquear el...

Page 59: ...ma o original Fotograf a anterior Fotograf a siguiente Teclas de control Bot n q Presione el bot n m para volver al modo de fotograf a Presione O N o X Y para desplazar la imagen c Para borrar una fot...

Page 60: ...iones en pantalla b Conecte la c mara a un ordenador 1 Conecte la c mara y el ordenador usando el cable USB incluido El monitor se encender autom ticamente 2 Seleccione PC en el monitor y presione Z A...

Page 61: ...el men principal de OLYMPUS Master Si no aparece autom ticamente la ventana Transferir im genes Consejos Para obtener informaci n m s detallada sobre la configuraci n y el uso de la c mara consulte el...

Page 62: ...l objetivo Mantenga los dedos y la correa alejados del objetivo y del flash El modo de fotograf a es para tomar fotograf as y efectuar los ajustes de las tomas mientras que el modo de reproducci n es...

Page 63: ...tograf as de primeros planos por ejemplo de una flor 5 Bot n OF Compensaci n de la exposici n Utilice este ajuste para sobreexponer o subexponer una fotograf a 6 Bot n Y Modo de flash Seleccione uno d...

Page 64: ...f a El LED del disparador autom tico se ilumina durante unos 10 segundos despu s de presionar el bot n disparador luego empieza a parpadear Tras parpadear durante 2 segundos aproximadamente se toma la...

Page 65: ...para reactivar la c mara Si la c mara no se utiliza durante 15 minutos despu s de entrar en el modo de reposo se retrae autom ticamente el objetivo y se apaga Para volver a utilizarla enci ndala otra...

Page 66: ...a de inicio de fecha y hora borrado de todas las fotograf as etc 1 Presione Z y seleccione MENU MODO MEMORIA TARJETA BORRAR TODO 2 Seleccione SI y presione Z Se borran todas las fotograf as Se puede s...

Page 67: ...i n SHQ HQ SQ1 SQ2 12 Tama o de imagen 2816 2112 2560 1920 640 480 etc 13 Marca de objetivo de enfoque autom tico AF 14 N mero de fotograf as almacenables Tiempo de grabaci n restante 4 00 36 15 Medic...

Page 68: ...impresiones V deo 10 n 5 Protecci n 9 6 Modo de grabaci n SHQ HQ SQ1 SQ2 7 N mero de archivo M100 0004 8 Tama o de imagen 2816 2112 2560 1920 640 480 etc 9 Compensaci n de la exposici n 2 0 2 0 10 Bal...

Page 69: ...o de entrada de v deo Para m s informaci n sobre c mo cambiar a entrada de v deo consulte el manual de instrucciones del televisor 3 Presione el bot n q para encender la c mara En el televisor aparece...

Page 70: ...ez que desaparezca la pantalla UN MOMENTO la c mara y la impresora estar n conectadas Seleccione IMPR SIMPLE para imprimir s lo una copia de la fotograf a seleccionada r pidamente 3 Utilice las teclas...

Page 71: ...VD y mucho m s permiti ndole ampliar considerablemente sus posibilidades en fotograf a digital Puede actualizar su software a la versi n OLYMPUS Master Plus a trav s de Internet Es necesario tener ins...

Page 72: ...0 12 SQ2 1280 960 18 1024 768 28 0640 480 46 V deo Modo de grabaci n Tama o de imagen Tiempo de grabaci n restante SHQ 640 480 15 cuadros seg 6 seg HQ 320 240 15 cuadros seg 20 seg SQ 160 120 15 cuadr...

Page 73: ...ter a de iones de litio Olympus LI 12B o un adaptador de CA de Olympus Dimensiones 97 mm An 55 mm Al 26 5 mm Pr excluidos los salientes Peso 140 g sin la bater a ni la tarjeta Bater a de iones de liti...

Page 74: ...lice la c mara Puede entrar agua en el interior de la c mara si la tapa del compartimento de la bater a tarjeta o la tapa del conector no est bien cerrada PRECAUCIONES DE SEGURIDAD Resistencia a la in...

Page 75: ...guarde este producto cerca de fuentes de calor tales como radiadores rejillas de calefacci n estufas o cualquier tipo de equipo o aparato generador de calor incluyendo amplificadores est reo PRECAUCI...

Page 76: ...o humo extra o alrededor de la misma Nunca retire las bater as con las manos descubiertas ya que podr a causar un incendio o quemarle las manos Nunca sujete ni utilice la c mara con las manos mojadas...

Page 77: ...ndada para el uso con este producto Inserte la bater a cuidadosamente tal como se describe en el manual de instrucciones Si las bater as recargables no han sido recargadas dentro del tiempo especifica...

Page 78: ...Declaraci n de conformidad N mero de modelo Stylus 600 DIGITAL 600 Nombre comercial OLYMPUS Entidad responsable Direcci n Two Corporate Center Drive P O Box 9058 Melville NY 11747 9058 EE UU N mero d...

Page 79: ...79 Memo d4262_oima_sp_basic_00_bookfile_7 book Page 79 Wednesday August 3 2005 6 05 PM...

Page 80: ...80 Memo d4262_oima_sp_basic_00_bookfile_7 book Page 80 Friday August 5 2005 10 15 AM...

Page 81: ...81 Memo d4262_oima_sp_basic_00_bookfile_7 book Page 81 Friday August 5 2005 10 15 AM...

Page 82: ...82 Memo d4262_oima_sp_basic_00_bookfile_7 book Page 82 Friday August 5 2005 10 15 AM...

Page 83: ...83 Memo d4262_oima_sp_basic_00_bookfile_7 book Page 83 Friday August 5 2005 10 15 AM...

Page 84: ...Bredowstrasse 20 22113 Hamburg Germany Letters Postfach 10 49 08 20034 Hamburg Germany European Technical Customer Support Please visit our homepage http www olympus europa com or call our TOLL FREE...

Reviews: