36
Fig. 51
9
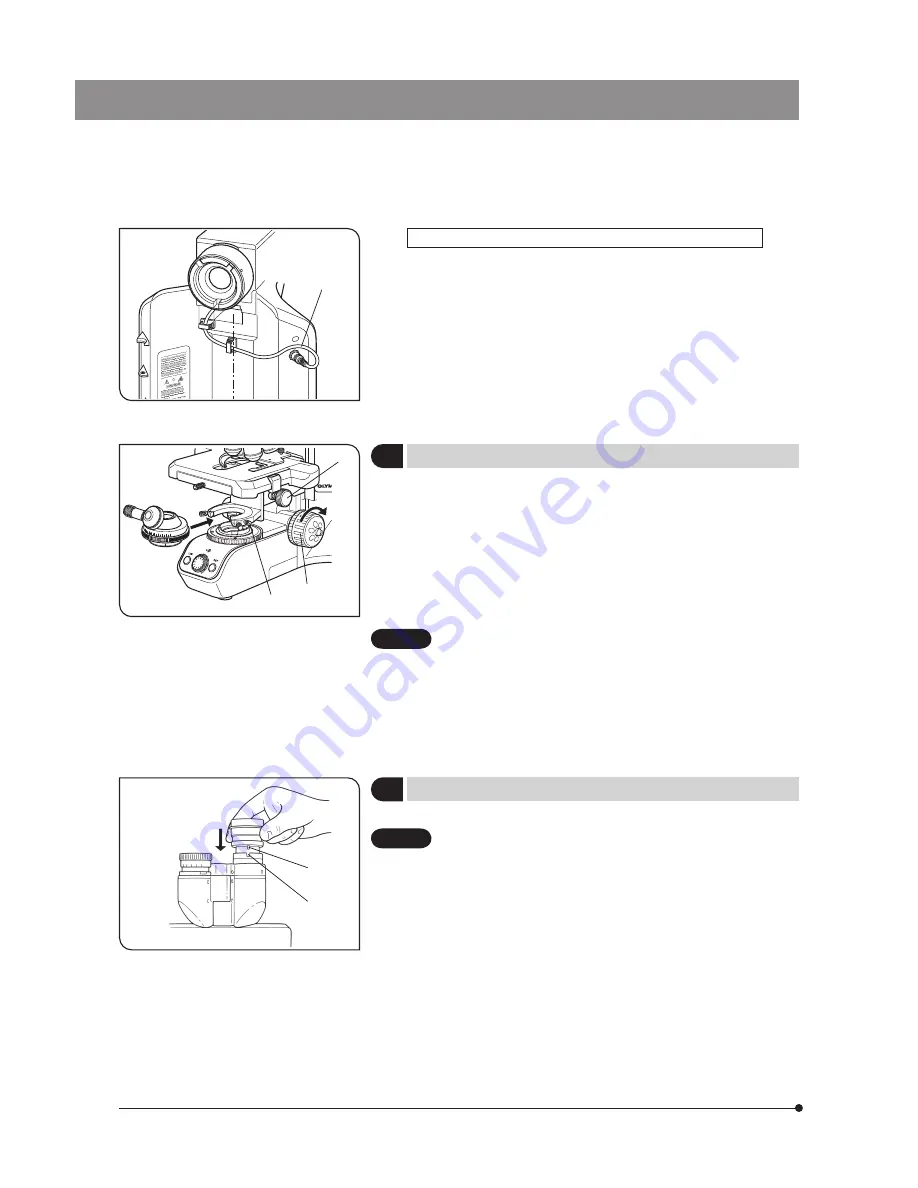
Attaching the Condenser
(Fig. 50)
1. Turn the coarse adjustment knob @ to raise the stage to its upper limit.
2. Turn the condenser height adjustment knob
2
to lower the condenser
holder to its lowest position.
3. Fully loosen the condenser clamping knob
3
.
4. Position the condenser so that the aperture scale is located in front.
Gently slide the condenser along the dovetail all the way until it is
stopped.
} When attaching the U-SC3 swing-out condenser, align the positioning pin
at the back of the condenser with the groove in the condenser sleeve.
· When attaching a swing-out condenser with a positioning pin at
the back such as the U-SC3, attach by aligning the positioning
pin with the groove in the condenser sleeve.
· When attaching a condenser with swing-out top lens, swing out
the top lens out of the way before inserting the condenser.
5. Tighten the condenser clamping knob and gently raise the condenser
holder to its highest position.
10
Attaching the Eyepieces
(Fig. 51)
Gently insert the eyepieces all the way into the eyepiece sleeves.
· When using the U-BI30-2 binocular tube, eyepieces with a po-
sitioning pin cannot be attached because the U-BI30-2 does
not have the positioning notch.
· When using an eyepiece with micrometer, attach it to the right-
hand eyepiece sleeve.
When doing so, make sure that the eyepiece positioning pin @
fits into the notch
2
on the eyepiece sleeve.
· The super-widefield trinocular observation tube is equipped with
a positioning notch on both the left and right eyepiece sleeves.
Make sure that the positioning pins on both eyepieces fits into
the respective notches.
1
2
Fig. 50
1
3
2
CAUTION
CAUTION
Use only coded 5 position nosepiece for BX43 (BX43-5RES)
} Distribute its cable | toward the rear panel by passing it below the arm,
and connect the cable to the connector no the rear panel.
} As shown in Fig. 49, connect to the connector by letting the cable into
the cable holder (attached with BX43-5RES) attached to the rear panel.
Fig. 49
4


