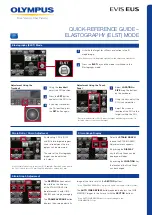
QUICK-REFERENCE GUIDE –
ELASTOGRAPHY (ELST) MODE
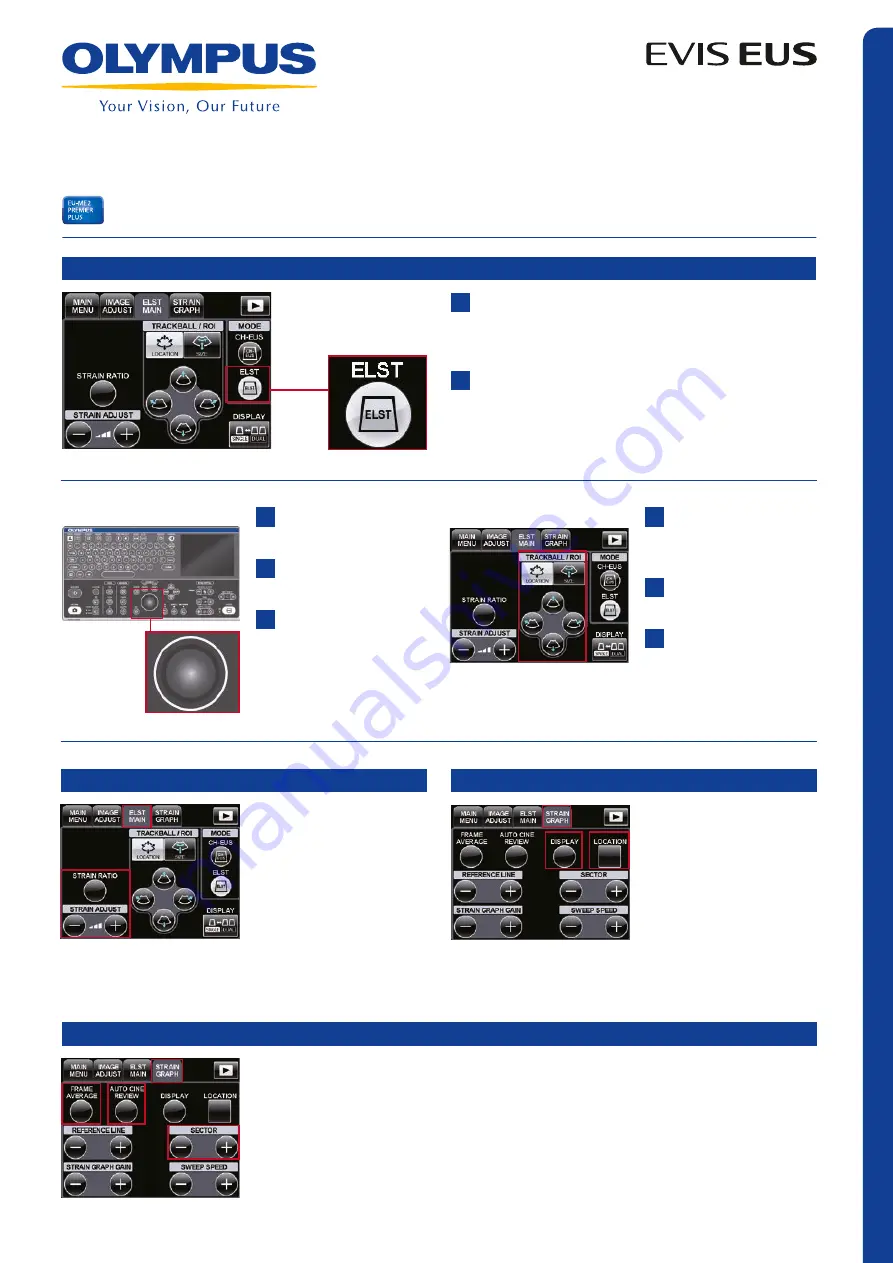
Visualize the target for stiffness evaluation in the B
mode image.
Press the
ELST
key and the mode is switched to the
Elastography mode.
Elastography (ELST) Mode
Strain Ratio / Strain Adjustment
Strain Graph Display
1
2
* Note: Make sure it is displayed right below the ultrasound transducer.
* Recommended size of ROI. Adjust the target while being careful not to
include objects other than the target.
Using the
trackball
,
adjust the ROI position.
Press the
SET
button
and adjust the ROI size.
If you want to readjust
the ROI position, press
the
SET
button again.
By allocating 2 ROIs (ROI A
and B) to two targeted regions,
strain ratio between the two
regions can be measured.
The color of the Elastography
images can be adjusted
in 5 steps.
Select the
STRAIN GRAPH
tab and the STRAIN GRAPH
Adjustment menu appears.
By pressing the
DISPLAY
key, the Strain Graph can be
displayed or hidden.
By pressing the
LOCATION
key,
the location of the Strain Graph
can be changed.
Select
LOCATION
or
SIZE
using the buttons
on the keyboard.
Using the keys, adjust the
ROI size and position.
Adjust the size and
location of the ROI so the
target is within the ROI.
1
1
2
2
3
3
Adjustment Using the Touch
Panel
Adjustment Using the
Trackball
* Unit of strain indicator is in percent (%). Example: Distortion value would
be 10% if an object of 10 mm length is inflated or shrunk by 1 mm
Strain Graph Adjustment
The
SECTOR
buttons adjust
the width on the time axis
of the STRAIN GRAPH to
be referenced in auto CINE
REVIEW and image averaging.
The
FRAME AVERAGE
button
displays the average elasticity
image of the time set with the
SECTOR
buttons.
* If the FRAME AVERAGE key is pressed again, the length of time is reset.
The
AUTO CINE REVIEW
button repeatedly displays the CINE
MEMORY images in the time set with the
SECTOR
buttons.
* If the AUTO CINE REVIEW button is pressed again, the
CINE MEMORY stops.


