Setting the Confocal Aperture/
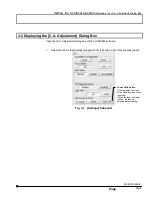
Displaying the [C.A. Adjustment] Dialog Box
MAINTENANCE
3 - 4
Page
2.
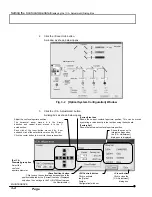
Click the <Scan Unit> button.
A window as shown below opens.
Fig. 3-2 [Optical System Configuration] Window
3.
Click the <C.A. Adjustment> button.
A dialog box as shown below opens.
[Set C.A.
Diameter] group box
Select the
confocal
aperture diameter.
Adjust the confocal aperture position.
The horizontal arrow moves it in the X-axis
direction and vertical arrow moves it in the Y-
axis direction.
Each click of the inner button moves it by 8 µm
and each click of the outer button moves it by 40 µm.
Click the center button to move it to the saved position.
[Current] text box
Shows the current confocal aperture position. This can be moved
by entering a value directly in the text box using the keyboard.
[Factory Set]
Shows the factory-set confocal aperture position.
<Save Position> button
Click to save the confocal aperture position in the
position indicated by the [Current] text box .(Displayed
only when the user logs in the FLUOVIEW software as
the Administrator.)
<SU Control> button
Click to activate
the [Optical
System
Configuration] window.
<Close> button
Click to close the
[C.A. Adjustment]
dialog box.
Shows the scan unit’s
internal settings when
the [C.A. Adjustment]
dialog box is displayed.


