72
5
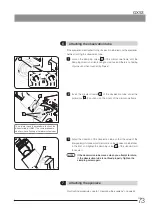
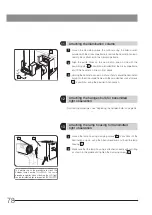
Attaching the stage
Align the clamping screw holes b (4 positions) of the microscope
frame with the stage mounting holes c (4 positions), place the
stage gently, and push the stage toward the back of the microscope
frame.
Screw in the hex socket screws provided with the stage using the
Allen wrench.
Fit the stage center plate d into the stage.
Rotating the stage center plate to make the notch come to
the front allows you to check the tip of the objective easily.
2
3
4
TIP
b
c
d
b
c
g
e
f
i
h
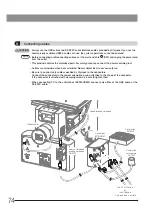
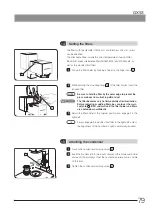
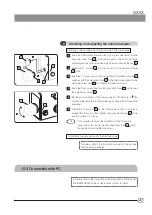
Attaching the handle holder GX-SFR
Fit the shaft f of the flexible handle into the U-shaped groove of the
handle holder e .
Secure the handle holder clamping screw g to the stage lightly using
the Allen screwdriver.
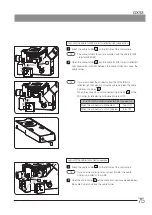
Align the stage centering index line h with the end surface i of
the upper stage.
Move the handle holder to front and back to set it at the position
where the X-axis knob and Y-axis knob can be operated most easily.
Tighten the clamping screws of the handle holder completely.
1
2
3
4
5
a
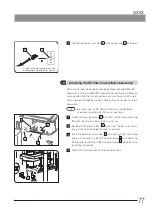
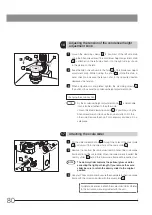
The pad a for protecting the focusing unit is attached as factory
default. Remove it by rotating the coarse focusing knob toward front
side. Note, the tension of the coarse focusing knob is set to tight as
factory default. Adjust it to loose (see page 21).
1
4


