background image

Last update: 2021/09/23 17:15

olympus_ix71_zdrive_install https://asiimaging.com/docs/olympus_ix71_zdrive_install

https://asiimaging.com/docs/

Printed on 2022/01/10 05:45

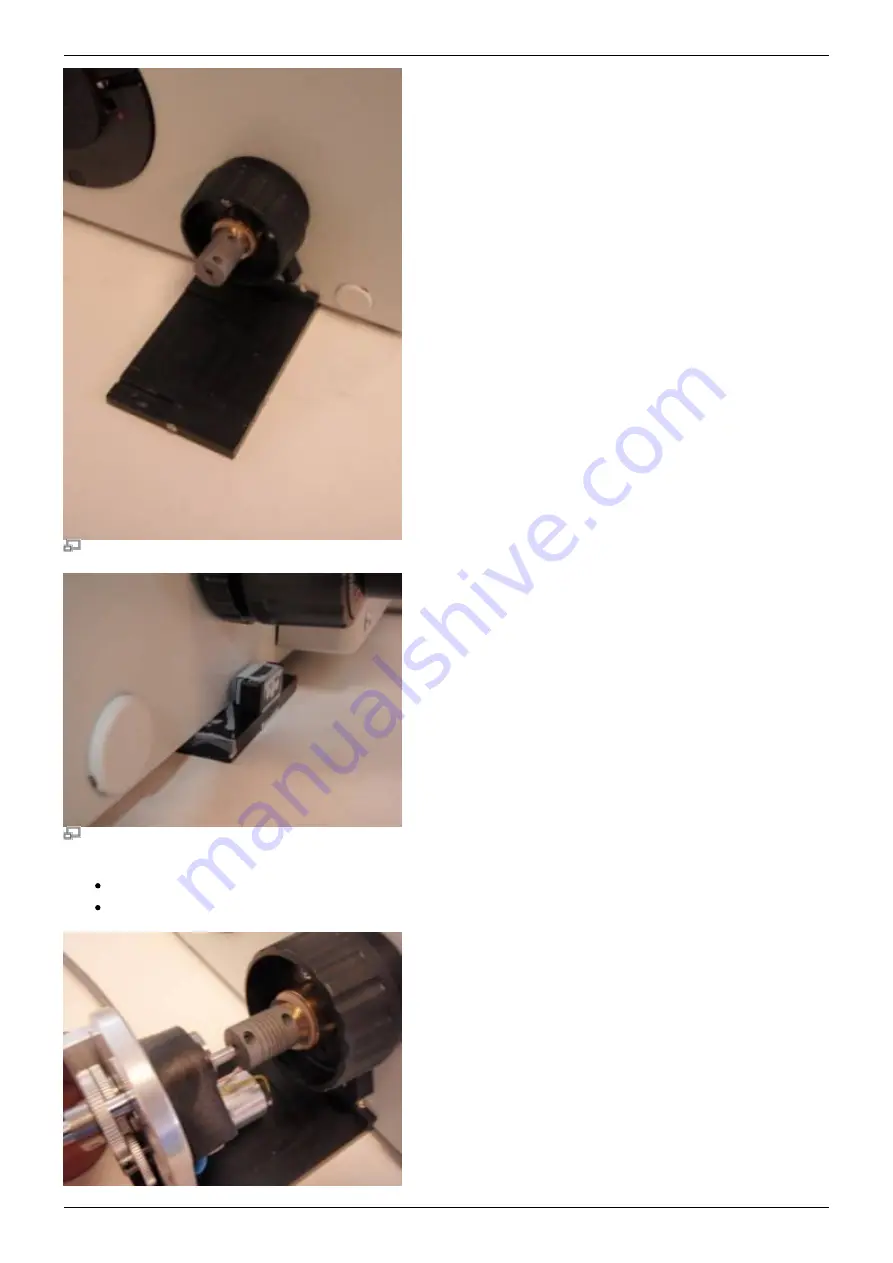
Slide base plate under microscope and center beneath focus assembly.

Leave base plate clamp loose at this time.

Leave base plate clamp slightly loose for later adjustment.
Slide the drive shaft of the motor drive assembly into the flexible coupler.

Summary of Contents for IX71

Page 1: ...1 microscope NOTE On January 2007 Olympus changed the size of the threaded end of their ne focus shaft from 3 mm to 4 mm Microscopes with serial numbers 7Axxxxxx and newer and all 8 digit versions ide...

Page 2: ...The following tools are required for this procedure 1 16 Allen wrench provided 5 64 Allen wrench provided 3 32 Allen wrench provided 7 64 Allen wrench provided The procedure has three parts Removing...

Page 3: ...the inner left ne focus knob with Allen wrench Loosen set screw in knob if present Use Allen wrench to remove screw that secures the outer focus knob Unscrew inner left ne focus knob while holding the...

Page 4: ...ding right hand knob in place Slide exible coupler over the threaded end of the left ne focus shaft while holding the right ne focus knob in place and tighten clamp with a 2 mm or 5 64 inch Allen wren...

Page 5: ...ch Allen wrench to remove the horizontal adjustment screw Use the 7 64 inch Allen wrench to loosen the two vertical adjustment screws Slide the baseplate assembly completely under the microscope as sh...

Page 6: ...nstall https asiimaging com docs Printed on 2022 01 10 05 45 Slide base plate under microscope and center beneath focus assembly Leave base plate clamp loose at this time Leave base plate clamp slight...

Page 7: ...in the horizontal adjustment screw to hold the drive assembly in place using the 7 64 inch Allen wrench Leave the adjustment screws loose enough so that later the drive can slide up and down and the...

Page 8: ...ed or the drive may slip Lightly tighten the vertical and horizontal adjustment screws as shown Since the motor is usually self aligning this should be a good position for the drive Check the alignmen...

Page 9: ...is felt repeat the above steps Part 4 Installing the Motor Drive Cover Plate and Fine Focus Knob Install cover with screws as shown Screw on small focus knob as shown Locate the motor drive cover Pos...

Page 10: ...nstall the large outer knob that was removed in Part One Replace the rubber boot if 3 present After screwing on small knob attach the large knob Drive and cover installed on the Olympus IX71 This comp...

Page 11: ...2022 01 10 05 45 11 11 Olympus IX71 Microscope Z Axis Motor Drive Installation Applied Scienti c Instrumentation https asiimaging com docs...

Reviews: