29
1
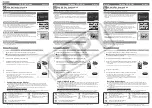
In the Transfer Images window, select the [My Albums] tab, and select
[Calendar].
2
Select [Sort by Shooting Date] or [Selected Date].
• Sort by shooting date: Create a new album for each date of shooting,
and assign the images to the corresponding album.
The date setting must have been made on the camera before
shooting the images.
• Selected date: Select a date on the calendar, and save the images in
the album for that date.
3
Click the [Transfer Images] button.
This copies all images into albums as specified in step 2 .
If an image has no recorded shooting date, the [Select Date] dialog box
appears; specify the shooting date using the calendar.
If an existing file has the same file name as one of the files to be transferred,
the [Overwrite] dialog box appears (page 27).
When all of the images have been transferred, the [Transfer Images] dialog
box appears (page 28). Clicking [Browse images now] displays the album
window, in which you can view the images that have been transferred.
To copy only selected images
See the description for saving to an album (page 28).


