


19
MVX10
}The parfocality adjustment makes correction of focusing unnecessary
when the observation image is switched to the image monitored with the
TV camera.
1. Looking into the eyepieces, select a high zoom ratio and focus on the
specimen.
2. Select the TV/camera light path to view the TV monitored image and
select a low zoom ratio.
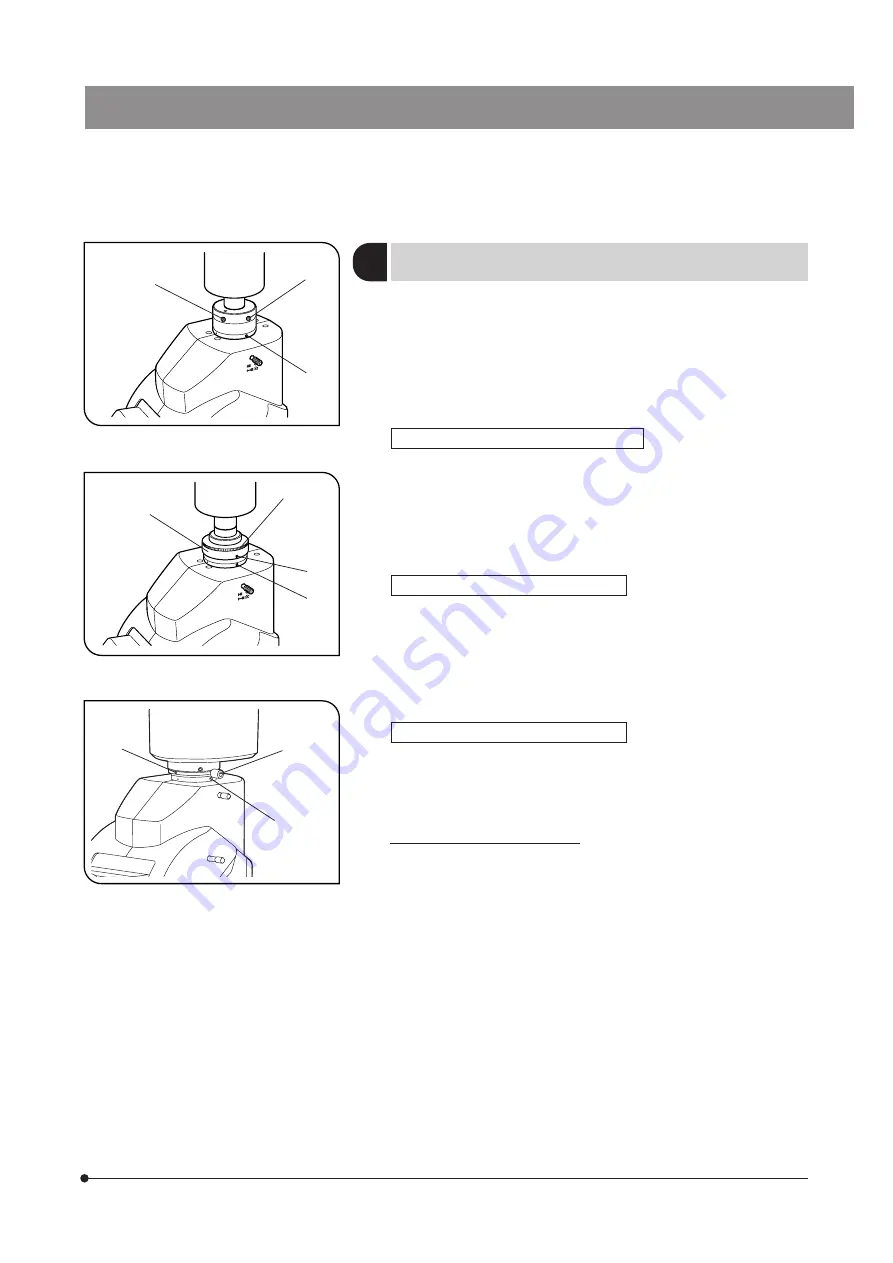
When Using the MVX-TV0.63XC (Fig. 17)
3. Using the Allen screwdriver, loosen the parfocality adjustment clamping
screw (LOCK) @ on the camera adapter.
4. While observing the monitored image, turn the parfocality adjustment
screw (FOCUS) ² slowly to focus on the specimen.
5. When the specimen is focused, tighten the clamping screw @ using the
Allen screwdriver.
When Using the MVX-TV1XC (Fig. 18)
3. Using the Allen screwdriver, loosen the parfocality adjustment clamping
screw ³ and camera adapter clamping screw |.
4. While observing the monitored image, hold the upper part ƒ of the
camera adapter and rotate the lower part … to focus on the specimen.
5. When the specimen is focused, tighten the clamping screws ³| using
the Allen screwdriver.
When Using the MVX-TV1XB (Fig. 19)
3. While observing the monitor image, adjust its focus by rotating the
parforcality adjustment area
7
of the camera adapter.
4. When the specimen is focused, tighten the clamping screw
8
.
Adjusting the TV Camera Angle
1. Loosen only the camera adapter clamping screw | and rotate the TV
camera to adjust its angle.
2. After adjusting the angle, tighten the clamping screw |.
Adjusting the Parfocality Between Obser-
vation Image and Monitor Image
4
(Figs. 17 to 19)
Fig. 17
@
²
|
Fig. 18
ƒ
…
³
|
Fig. 19
|
8
7
Summary of Contents for MVX10
Page 2: ......
Page 13: ...9 MVX10 Make a photocopy of this spread and post it near the microscope for quick reference...
Page 52: ...MEMO...
Page 53: ...MEMO...
Page 54: ...MEMO...
Page 55: ......


