


34
Stage plate mounting
hole
Gliding surfaces
Stage plate
Use the one provided
with the base.
Gliding stage
Stage plate mounting
threaded hole
Applicable base
Note 1) If dirt or metallic powder is attached on the
gliding surfaces, be sure to clean them.
Note 2) When placing the gliding stage parts, be sure
to avoid bringing the gliding surfaces in con-
tact with the desk surface.
Note 3) Clean the gliding surfaces periodically.
2
Assembly
Mount
Same dimensions as the stage plate.
Mount
@
²
³
Hold the gliding stage by the surrounding edge and move it horizontally.
# This stage is applicable only to reflected light illumination.
3
Operation
10-8 Cup Stage SZH-SC
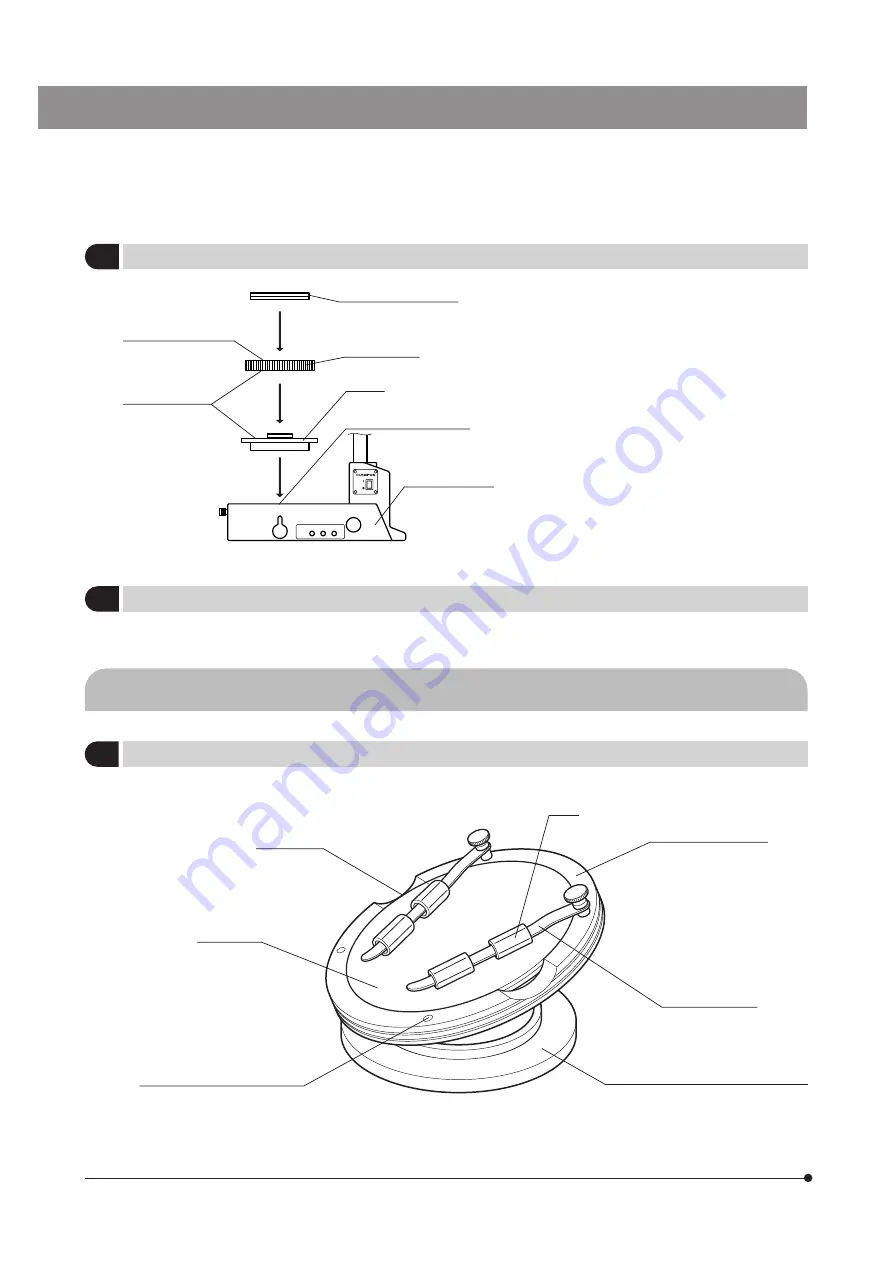
1
External View & Nomenclature
Finger hook
Stage plate
Specimen holder mount holes
(x 4)
Tube
Cup stage
Tilting limit angle: 30°
Specimen holder
Summary of Contents for MVX10
Page 2: ......
Page 13: ...9 MVX10 Make a photocopy of this spread and post it near the microscope for quick reference...
Page 52: ...MEMO...
Page 53: ...MEMO...
Page 54: ...MEMO...
Page 55: ......


