


35
MVX10
2
Assembly
# Before assembly, remove dirt and dust from the parts and perform the operation cautiously.
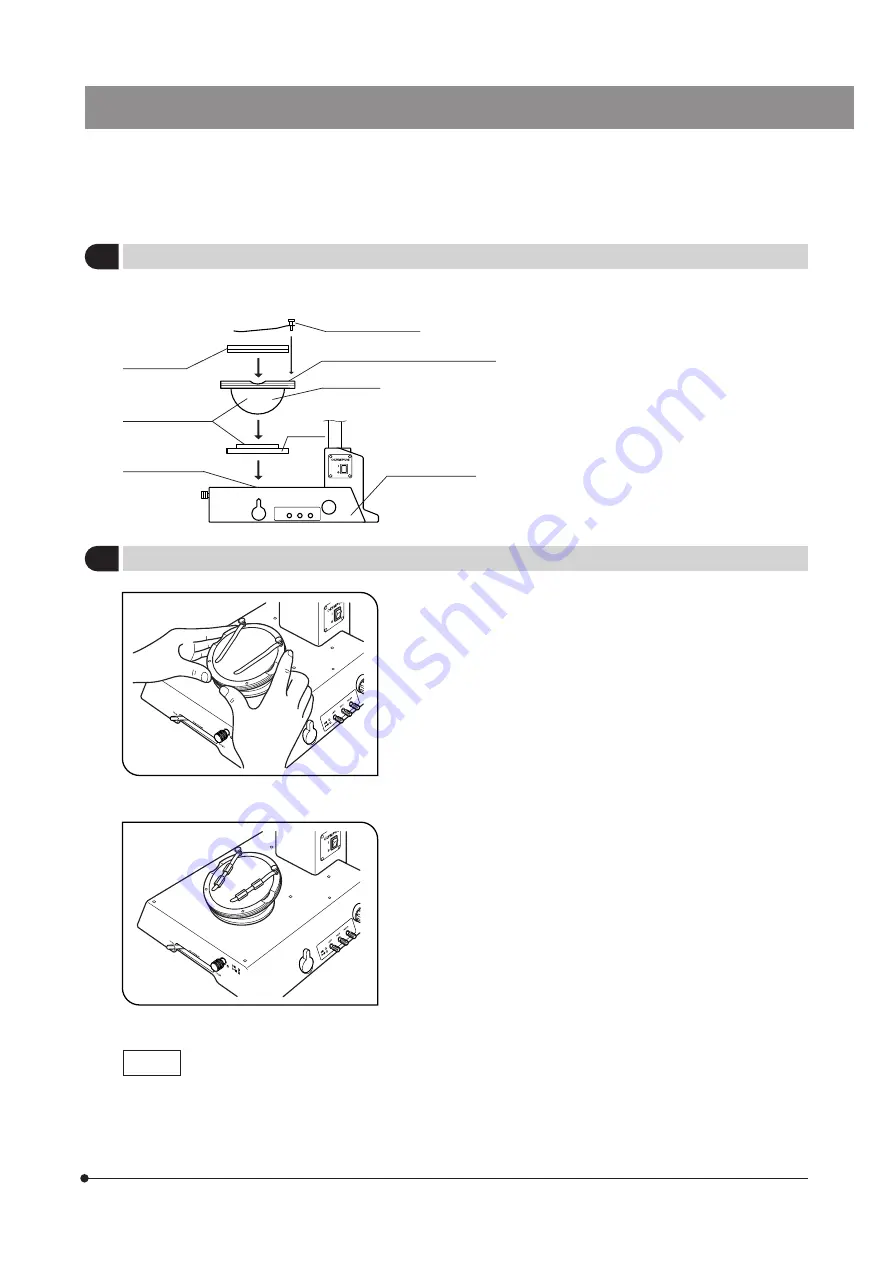
Stage plate
Gliding surfaces
Stage plate
mounting hole
Specimen holder
Specimen holder mounting hole
Cup stage
Mount
Applicable base
@ Fit the cut stage mount into the stage plate
mounting hole of an applicable base.
² Place the cup stage on the mount.
Before placing, clean the gliding surfaces on
the cup stage and mount by wiping with a clean
cloth.
³ Attach the stage plate.
| Attach the specimen holder.
}Clean the gliding surfaces periodically.
Place a specimen on the stage plate, hold the edge of the cut stage and
tilt it slowly. (Fig. 29)
}If the specimen slips off, fix it using the provided specimen holder.
}To fix a container such as a petri dish, fit the provided tube around the
specimen holder and hold the container with it. (Fig. 30)
Notes
# Take care not to touch the gliding surfaces of the cup stage and mount with a hand. If they are contaminated,
clean with neutral detergent before use.
# The cup stage may move spontaneously if a load of 20 g or more is applied to its outer periphery.
# When the cup stage is tilted while a specimen with large height is placed on it, the image may be defocused. If
this happens, adjust focusing again.
3
Operation
(Figs. 29 & 30)
Fig. 29
Fig. 30
@
²
³
|
Summary of Contents for MVX10
Page 2: ......
Page 13: ...9 MVX10 Make a photocopy of this spread and post it near the microscope for quick reference...
Page 52: ...MEMO...
Page 53: ...MEMO...
Page 54: ...MEMO...
Page 55: ......


