DMTA-10040-01EN, Rev. E, February 2018
Control Functions
117
however, the user can choose between displaying channel 1 (
FREQ 1
),
channel 2 (
FREQ 2
), or the mix signal (
MIX
).
CHANNEL
The Channel function is used to display which signal is being displayed:
frequency 1, frequency 2, or Mix.
To choose the
CHANNEL,
or signal displayed, press the DISP menu key (
),
followed by the B key. With
CHANNEL
highlighted, rotate the knob to select the
desired signal,
FREQ 1
(frequency 1),
FREQ 2
(frequency 2), or
MIX
.
SWP MODE
(sweep mode)
Sweep mode is used to control the instrument’s sweep mode, and includes
AUTO
Y
and
AUTO XY
for use with rotating scanners.
AUTO Y
contains the external
horizontal sync signal and
AUTO XY
contains both the horizontal and vertical
external sync signals.
To choose the sweep mode, press the DISP menu key (
), followed by the
C key. With
SWP MODE
highlighted, rotate the knob to select the desired signal:
AUTO Y
or
AUTO XY
.
V POS
(vertical position)
Vertical position is used to control the signal trace shown on the instrument
screen and is only displayed when
AUTO Y
is selected. By default, the setting is
50 %, or centered on the screen. Choices for this setting range from 0 % (bottom of
the screen) to 100 % (top of the screen).
To choose the vertical position, press the DISP menu key (
), followed by the
E key. With
V POS
highlighted, rotate the knob to select the desired position.
H POS
Changes the null position in the horizontal axis. To change the horizontal
position, press the DISP menu key (
), followed by the D key. With
H POS
highlighted, rotate the knob to select the desired position.
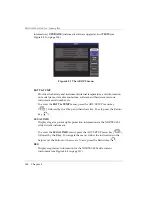
GRID
Five screen grid types are available:
OFF
,
10 × 10
,
FINE
,
COARSE,
and
WEB
. By
default, the NORTEC 600 instrument uses a 10 × 10 grid.
To choose the grid to be displayed, press the DISP menu key (
) twice,
followed by the D key. With
GRID
highlighted, rotate the knob to select the
desired grid.
Summary of Contents for nortec 600
Page 8: ...DMTA 10040 01EN Rev E February 2018 Table of Contents viii...
Page 16: ...DMTA 10040 01EN Rev E February 2018 Labels and Symbols 6...
Page 30: ...DMTA 10040 01EN Rev E February 2018 Introduction 20...
Page 58: ...DMTA 10040 01EN Rev E February 2018 Chapter 1 48...
Page 71: ...DMTA 10040 01EN Rev E February 2018 Software User Interface 61 Press the Return key to exit...
Page 72: ...DMTA 10040 01EN Rev E February 2018 Chapter 2 62...
Page 342: ...DMTA 10040 01EN Rev E February 2018 Chapter 7 332...
Page 356: ...DMTA 10040 01EN Rev E February 2018 Appendix B 346...
Page 366: ...DMTA 10040 01EN Rev E February 2018 List of Figures 356...
Page 368: ...DMTA 10040 01EN Rev E February 2018 List of Tables 358...

