DMTA-10040-01EN, Rev. E, February 2018
Using the Instrument
143
To calibrate the signals
1.
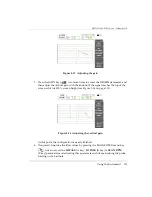
Place the probe between two notches on the standard, position the longest face of
the probe tip (see Figure 5-32 on page 143) perpendicularly to the notches, and
then press the A-LIFT NULL key (
).
Figure 5
‑
32 The longest face of the probe tip
2.
With the longest face of the probe tip oriented perpendicular to the notches,
inspect the 1.0 mm (0.04 in.) notch.
3.
Press the FREEZE key (
).
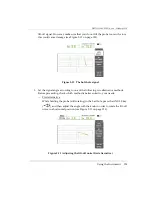
The resulting signal is shown in Figure 5-33 on page 143.
Figure 5
‑
33 The signal on the notch
Summary of Contents for nortec 600
Page 8: ...DMTA 10040 01EN Rev E February 2018 Table of Contents viii...
Page 16: ...DMTA 10040 01EN Rev E February 2018 Labels and Symbols 6...
Page 30: ...DMTA 10040 01EN Rev E February 2018 Introduction 20...
Page 58: ...DMTA 10040 01EN Rev E February 2018 Chapter 1 48...
Page 71: ...DMTA 10040 01EN Rev E February 2018 Software User Interface 61 Press the Return key to exit...
Page 72: ...DMTA 10040 01EN Rev E February 2018 Chapter 2 62...
Page 342: ...DMTA 10040 01EN Rev E February 2018 Chapter 7 332...
Page 356: ...DMTA 10040 01EN Rev E February 2018 Appendix B 346...
Page 366: ...DMTA 10040 01EN Rev E February 2018 List of Figures 356...
Page 368: ...DMTA 10040 01EN Rev E February 2018 List of Tables 358...


