84
EPOCH 4PLUS
9.2
Distance Amplitude Correction (DAC)
A Distance Amplitude Correction (DAC) curve is used to plot amplitude variations of
signals from reflectors of the same size, but at different distances from the transducer.
Normally, these reflectors produce echoes of varying amplitude due to material
attenuation and spreading of the sound beam. The purpose of a DAC curve is to
graphically compensate for material attenuation, nearfield effects, beam spread, and
surface roughness.
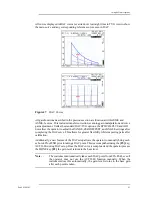
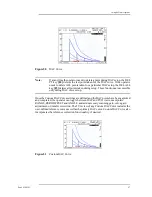
After plotting a DAC curve, reflectors that are the same size as those used for creation of
the curve produce echoes that peak along the curve despite different locations in the test
piece. Similarly, reflectors that are smaller than those used to create the curve fall below
the level, while larger reflectors exceed the curve level.
With the use of the DAC curve option, the EPOCH 4PLUS is capable of drawing user-
defined DAC curves. It is possible to select formats that are consistent with either
American Society of Mechanical Engineers (ASME), ASME-3, or Japanese Industrial
Standard (JIS) Z3060 code requirements.
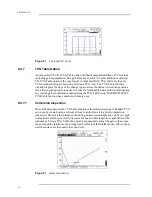
When the ASME format is selected, a single curve is drawn. The ASME-3 format lets you
draw three curves simultaneously at 0 dB, –6 dB, and –14 dB. When the JIS format is
selected, up to eight segmented curves are drawn.
In all formats, the signal amplitude as a percentage of the primary curve level is displayed
on the screen. Users can select to view this value in terms of a “%” or “dB.” In addition,
DAC alarms can be set to activate whenever an echo exceeds the primary curve level.
DAC curves can be saved in the EPOCH 4PLUS’s datalogger and recalled when needed.
9.2.1
Drawing DAC Curves
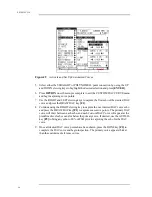
To draw a DAC curve, follow these steps:
1. Calibrate the EPOCH 4PLUS for the appropriate transducer. Adjust the Gain so the
peak of the highest amplitude echo that is to be used in the DAC curve is visible on the
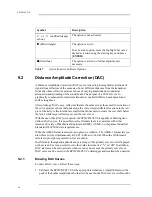
Symbol
Description
"
or
"
(unfilled triangle
or box)
The option is not activated.
!
(filled triangle)
The option is active.
To activate an option, move the highlight bar over a
desired selection using the slewing keys and press
[ENTER].
$
(filled box)
The option is active; no further adjustment is
necessary.
Table 7
Active/Inactive Software Options
Summary of Contents for Panametrics Epoch 4 Plus
Page 4: ...EPOCH 4PLUS...
Page 10: ...EPOCH 4Plus...
Page 18: ...8 EPOCH 4PLUS...
Page 40: ...30 EPOCH 4PLUS...
Page 50: ...40 EPOCH 4PLUS...
Page 54: ...44 EPOCH 4PLUS...
Page 92: ...82 EPOCH 4PLUS...
Page 172: ...162 EPOCH 4PLUS...

