background image

E-4

FCC NOTICE

This equipment has been tested and found to comply with the limits for a Class B digital device,
pursuant to Part 15 of the FCC Rules. These limits are designed to provide reasonable protection
against harmful interference in a residential installation. This equipment generates, uses, and can
radiate radio frequency energy and, if not installed and used in accordance with the instructions, may
cause harmful interference to radio communications. However, there is no guarantee that interference
will not occur in a particular installation. If this equipment does cause harmful interference to radio or
television reception, which can be determined by turning the equipment off and on, the user is
encouraged to try to correct the interference by one or more of the following measures; 

m

Reorient or relocate the receiving antenna.

m

Increase the separation between the equipment and the receiver.

m

Connect the equipment into an outlet on a circuit different from that to which the receiver is
connected.

m

Consult the dealer or an experienced radio or television technician for help.

FCC Warning: Changes or modifications not expressly approved by the party responsible 

for compliance could void the user’s authority to operate the equipment.

INDUSTRY CANADA RADIO FREQUENCY INTERFERENCE NOTICE

This Class B digital apparatus meets all requirements of the Canadian Interference-Causing Equipment
Regulations.

$

Replacement Parts — When replacement parts are required, be sure the service technician has
used replacement parts specified by the manufacturer or have the same characteristics as the
original parts.  Unauthorized substitutions may result in fire, electric shock, or other hazards.

%

Safety Check — Upon completion of any service or repairs to this product, ask the service
technician to perform safety checks to determine that the product is in proper operating condition.

^

Wall or Ceiling Mounting — The product should be mounted to a wall or ceiling only as
recommended by the manufacturer.

&

Heat — The product should be situated away from heat sources such as radiators, heat registers,
stoves, or other products (including amplifiers) that produce heat.

Summary of Contents for SCPH-10130U

Page 1: ...e INSTRUCTION MANUAL Nous vous remercions pour l achat d un produit OLYMPUS Veuillez conserver ce manuel port e de main pour un usage ult rieur MODE D EMPLOI Le agradecemos por la adquisici n de un pr...

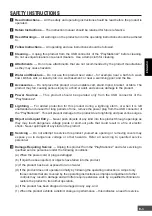
Page 2: ...intenance servicing instructions in the literature accompanying the product This is intended to alert the user to the possibility of serious injury or death if ignored WARNING This is intended to aler...

Page 3: ...is left unattended and unused for long periods of time remove the power plug from the USB connector of the PlayStation 2 This will prevent damage to the product due to lightning and power line surges...

Page 4: ...t to which the receiver is connected m Consult the dealer or an experienced radio or television technician for help FCC Warning Changes or modifications not expressly approved by the party responsible...

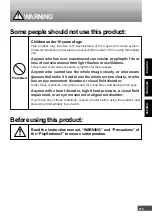
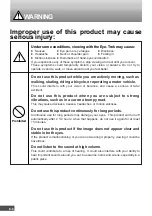
Page 5: ...clearly or who wears glasses that make it hard to see the whole screen clearly or who has an eye movement disorder or visual field disorder Under those conditions using this product for a long time co...

Page 6: ...duct when you are subject to strong vibrations such as in a car on a bumpy road This may cause dizziness nausea headaches or motion sickness Do not use this product continuously for long periods Conti...

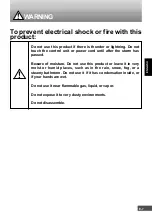
Page 7: ...f moisture Do not use this product or leave it in very moist or humid places such as in the rain snow fog or a steamy bathroom Do not use it if it has condensation inside or if your hands are wet Do n...

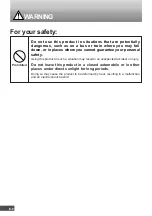
Page 8: ...guarantee your personal safety Using this product in such a situation may result in an unexpected accident or injury Do not leave this product in a closed automobile or in other places under direct su...

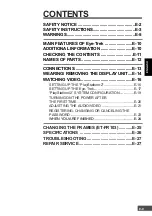
Page 9: ...THE DISPLAY UNIT E 14 WATCHING VIDEO E 16 SETTING UP THE PlayStation 2 E 16 SETTING UP THE Eye Trek E 17 PlayStation 2 SYSTEM CONFIGURATION E 19 TURNING ON THE POWER AFTER THE FIRST TIME E 20 ADJUSTI...

Page 10: ...t use the display unit if the image cannot be properly focused The display unit may become warm after long periods of use but this is not a malfunction A black or white spot or a red green or blue poi...

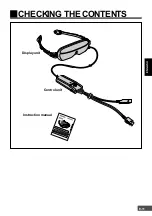
Page 11: ...ENGLISH E 11 CHECKING THE CONTENTS Display unit Instruction manual Control unit...

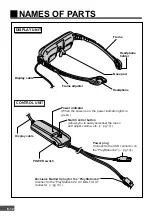
Page 12: ...he power indicator lights in green Multi Control button Allows you to easily select set the menu and adjust volume etc Z pg 17 Display cable POWER switch Power plug Connect to the USB connector on the...

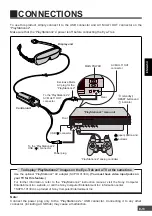
Page 13: ...Control unit open button and indicator Note Connect the power plug only to the PlayStation 2 s USB connector Connecting it to any other connector including a USB hub may cause a malfunction standby R...

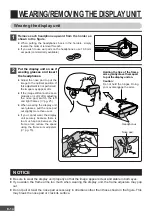
Page 14: ...d the image may appear dim If the image still cannot be seen properly or is dim after adjusting the nose pad switch the left and right frames Z pg 25 When wearing the display unit over glasses pull th...

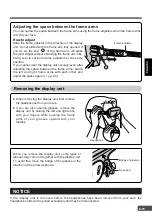
Page 15: ...e space between the frame arms You can narrow the space between the frame arms using the frame adjusters when the frame arms don t fit your face When removing the display unit first remove the headpho...

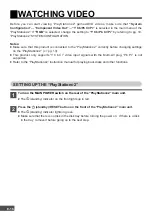
Page 16: ...ation 2 Z pg 13 This product only supports Y Cb Cr video input signals with the Multi AV plug Pb Pr is not supported Refer to the PlayStation 2 instruction manual for playing back disks and other func...

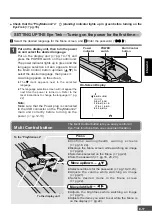
Page 17: ...time On Screen Display E N G L I S H D E U T S C H F R A N A I S I T A L I A N O E S P A O L Put on the display unit then turn the power on and select the desired language Put on the display unit Zpg...

Page 18: ...screen appears press the the Multi Control button three times to select the number for the three digits The password is set to when this product is used for the first time or after it is reset Zpg 20...

Page 19: ...nd down directional buttons then press the button Enter Selected items are highlighted 2 Select Component Video Out using the PlayStation 2 analog controller s up and down directional buttons then pre...

Page 20: ...the wrong password 3 times in a row the power automatically turns off after PASSWORD ENTERED IS NOT CORRECT SHUTTING POWER OFF is displayed When the password registration has been canceled The passwor...

Page 21: ...o the normal screen press the Multi Control button If there is no operation for 3 seconds or more the adjusted brightness will be activated and the display will return to the normal screen Adjusting t...

Page 22: ...5 seconds When the power is turned on again all the settings will return to the initial factory settings The Language selection menu will again be accessible and the password will return to Refer to R...

Page 23: ...rs On Screen Display Move the Multi Control button up down to select YES then press it The password entry screen appears REGISTERING CHANGING THE PASSWORD 2 3 Enter a password 1 Move the Multi Control...

Page 24: ...warning will be displayed until the Multi Control button is pressed After an additional 5 minutes another warning will be displayed and the power will shut off automatically After 5 minutes WATCHING V...

Page 25: ...ster out to detach 3 Detach the other adjuster following the same procedures Frame Left Adjuster Inside Frame Left Adjuster Outside 2 Attaching the frames 1 Push the frame into the display unit while...

Page 26: ...the PlayStation 2 Audio 1 1 Vrms 47 k Video Y 1 Vp p Cb Cr 350 mVp p Input impedance 75 Ambient Temperatures Operation 5 to 35 C Storage 20 to 60 C Dimensions Display unit Approx 132 W x 50 H x 30 D m...

Page 27: ...to ON pg 20 was turned on power when you want to use again turns off automatically A black white red The LCD screens are manufactured to precise specifications pg 10 green or blue dot is but colored d...

Page 28: ...OLYMPUS AMERICA INC Two Corporate Center Drive Melville NY 11747 3157 U S A Tel 631 844 5000 Customer Service 888 533 4448 http www olympus com Printed in Japan TF5616 1...

Reviews: