05
05
Downrod
Hanger
ball
07
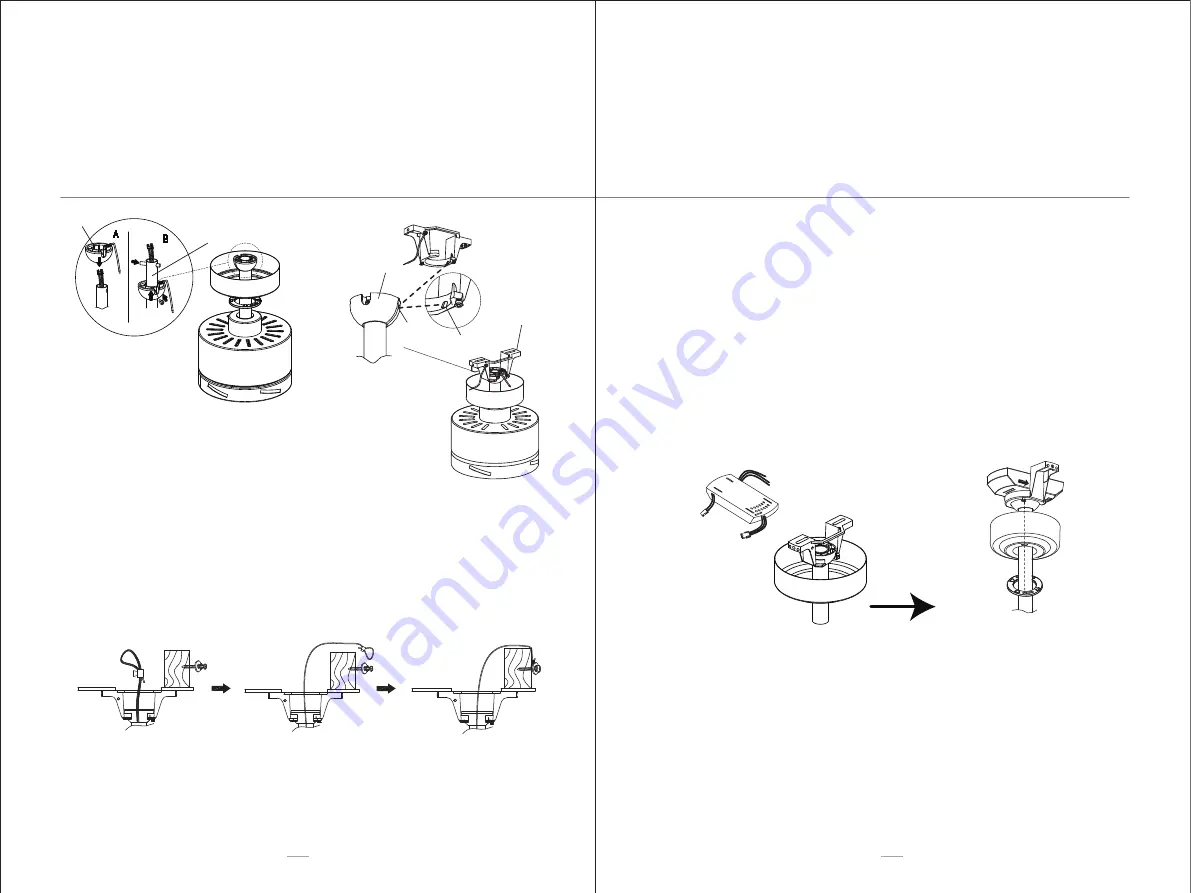
Reinstall the hanger ball on the downrod
as follows. Route the wires and safety
cable through the hanger ball. Position
the pin through the two holes in the
downrod and align the hanger ball so
the pin is captured in the groove in the
top of the hanger ball. Pull the hanger
ball up tight against the pin. Securely
tighten the set screw in the hanger ball.
A loose set screw could cause fan wobble.
ASSEMBLY
ASSEMBLY
15
16
The safety cable must be installed into the house structure beams using a 3” lag screw.
Make sure that when the safety cable is fully extended the lead wires are longer than
the cable and no stress is placed on the lead wires.
09
10
Wiring Instructions
• IMPORTANT: If you are not sure if the electrical outlet box and fan are
grounded, contact a licensed electrician for advice.
They must be grounded for safe operation.
• WARNING: To avoid possible electric shock, be sure electricity is turned
off at the main fuse box before wiring.
• Once wiring step has been completed, slide the wired receiver in between
the mounting bracket and the top of the downrod assembly with the flat
side of the receiver facing the ceiling.
VIEW AFTER INSTALLATION
Between Fan and Receiver
• Connect the pin connectors together; refer to next page fo details.
Between Receiver and Mains
• Connect the black live wire marked ”AC POWER L” from the receiver to
the live wire (typically black) from the outlet box.
• Connect the white neutral wire marked ”AC POWER N” from the receiver
to the neutral wire (typically white) from the outlet box.
• Connect the green ground wire from the mounting bracket and hanger
ball to the ground wire bare or green from the outlet box.
• Working frequency: 60 Hz ONLY.
08
Hang the fan on hanger bracket, and
make sure the slot of hanger ball is
snapped into the clip of hanger
bracket exactly.
Hanger ball
Hanger
bracket
Groove
Tab


