Maintenance
OMAX JetMachining® Center Operator’s Guide
400433D-EN
4 - 27
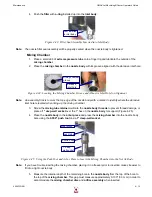
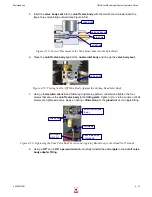
5.
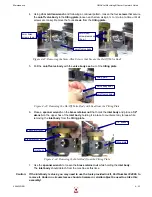
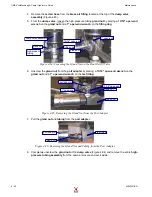
Insert the
valve body seat
into the
on/off valve body
with the small hole end inward and the
large hole end pointing outward (see Figure 4-54).
Figure 4-54: Correct Placement of the Valve Body Seat into the Valve Body
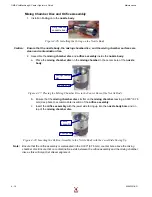
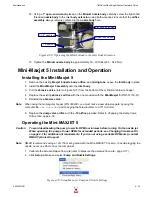
6.
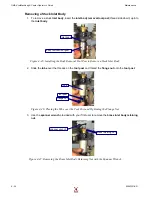
Place the
on/off valve body
against the
nozzle inlet body
and line up the
valve body seat
.
Figure 4-55: Placing the On/Off Valve Body Against the Cutting Head Inlet Body
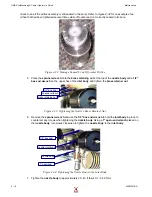
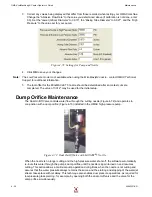
7.
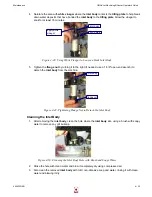
Using a
5 mm Allen wrench
and following a tightening pattern, reinstall and tighten the four
screws that secure the
on/off valve body
to the
tilting plate
. Tighten ¼ to ½ turn at a time until all
screws are tightened evenly. Apply a coating of
Blue Goop
to the
gland nut
of coil nipple fitting.
Figure 4-56: Tightening the Four Valve Body Screws and Applying Blue Goop to the Gland Nut Threads
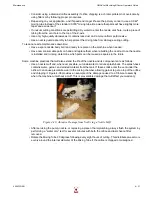
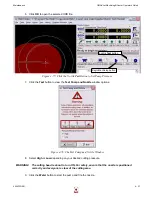
8.
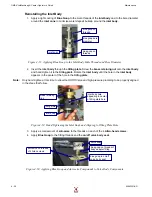
Using a
5/8"
and a
3/4" open-end wrench
, carefully reinstall the
coil nipple
to the
on/off valve
body adapter fitting
.
valve body
valve body seat
small hole
large hole
valve body
5mm Allen screws
(4 ea.)
place blue goop
on threads
valve body
coil nipple
gland nut
coil nipple
Summary of Contents for JetMachining Center 2626
Page 8: ...OMAX JetMachining Center Operator s Guide viii 400433D EN ...
Page 12: ...OMAX JetMachining Center Operator s Guide xii 400433D EN ...
Page 22: ...OMAX JetMachining Center Operator s Guide Safety First 1 10 400433D EN ...
Page 140: ...OMAX JetMachining Center Operator s Guide OMAX Glossary 6 16 400433D EN ...
Page 144: ...OMAX JetMachining Center Operator s Guide Index 4 400433D EN ...


