OMAX JetMachining® Center Operator’s Guide
Maintenance
4 - 26
400433D-EN
Reinstalling the Inlet Body
1.
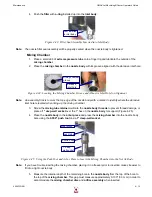
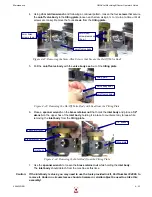
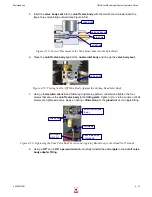
Apply a light coating of
Blue Goop
to the male threads of the
inlet body
and to the bore diameter
around the
inlet cone
to minimize water deposit buildup around the
inlet body
.
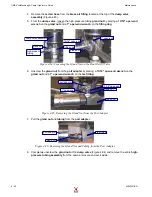
Figure 4-51: Applying Blue Goop to the Inlet Body Male Threads and Bore Diameter
2.
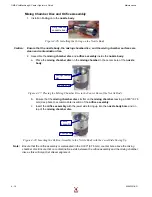
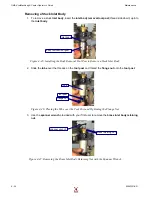
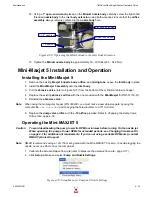
Insert the
inlet body
through the
tilting plate
. Screw the
brass retaining nut
onto the
inlet body
and hand-tighten it to the
tilting plate
. Rotate the
inlet body
until the hole in the
inlet body
appears in the center of the hole in the
tilting plate
.
Note:
Only hand-tighten at this time to allow the On/Off Valve and high-pressure plumbing to be properly aligned
in the steps that follow.
Figure 4-52: Hand Tightening the Inlet Body and Aligning to Tilting Plate Hole
3.
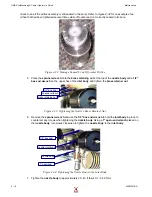
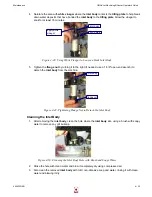
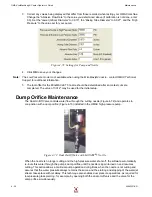
Apply a small amount of
anti-seize
to the threads on each of the 4
Allen-head screws
.
4.
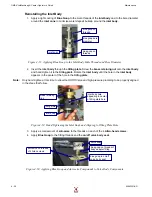
Apply
Blue Goop
to the fitting threads and the
on/off valve body seat
.
Figure 4-53: Applying Blue Goop and Anti-seize Compounds to Valve Body Components
blue goop on
threads
blue goop bore
diameter
inlet body
blue goop on
threads
inlet body
tilting plate
brass retaining
ring
inlet body hole
appearing in center
of tilting plate hole
blue goop on threads of
body adapter fitting
blue goop to on/off
valve body seat
anti-seize on threads
of 4 Allen screws
valve body
Summary of Contents for JetMachining Center 2626
Page 8: ...OMAX JetMachining Center Operator s Guide viii 400433D EN ...
Page 12: ...OMAX JetMachining Center Operator s Guide xii 400433D EN ...
Page 22: ...OMAX JetMachining Center Operator s Guide Safety First 1 10 400433D EN ...
Page 140: ...OMAX JetMachining Center Operator s Guide OMAX Glossary 6 16 400433D EN ...
Page 144: ...OMAX JetMachining Center Operator s Guide Index 4 400433D EN ...


