background image

PAGE 
16


CUTTING

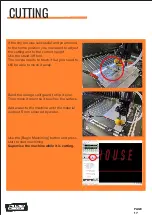
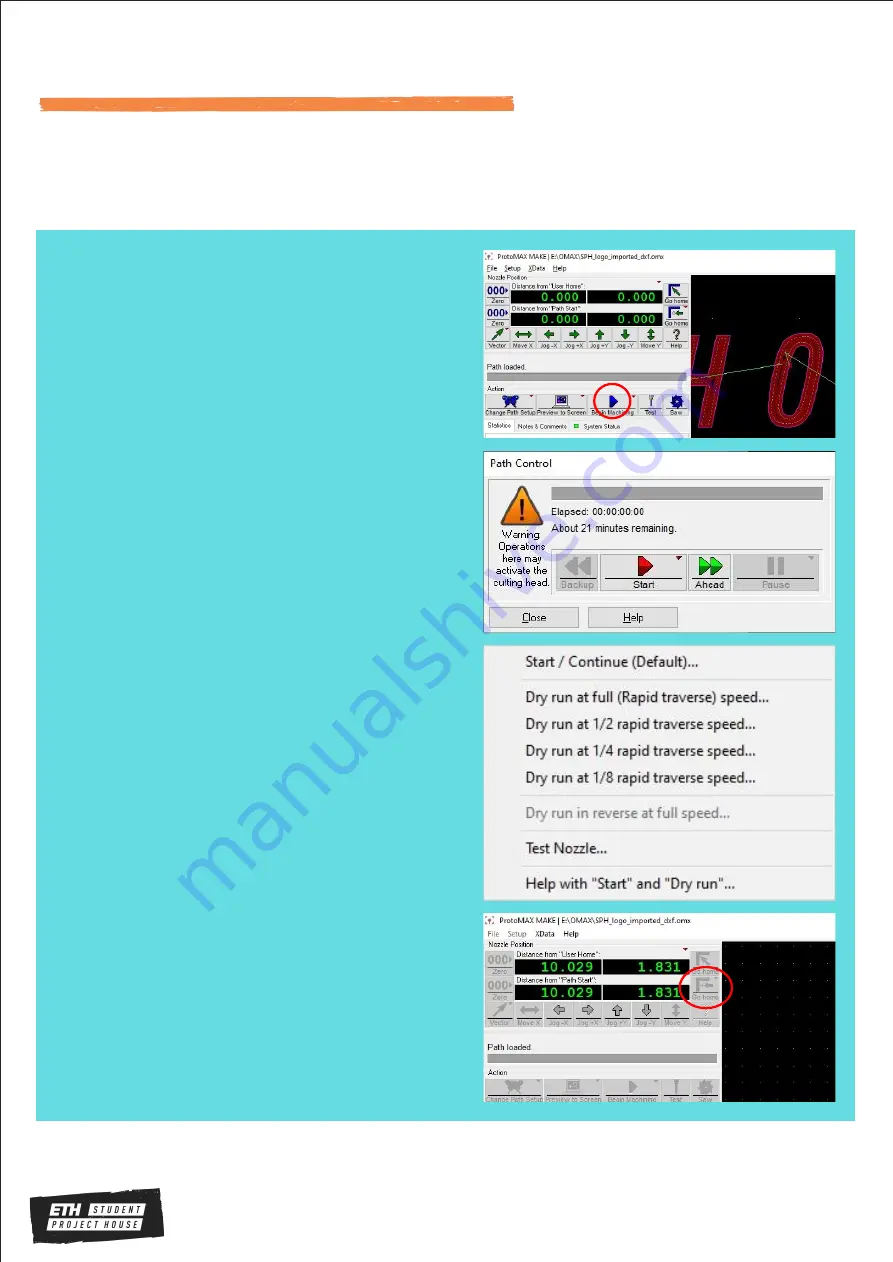
With you file loaded click on [Begin 
Machining].

In the window that shows up right click 
[Start]

Here you have the chance to make a dry 
run. A dry run is mandatory before any 
cutting. 

During the dry run check that there are no 
collision. You can see the progress on the 
screen. After the dry run is done use the [Go 
Home] button to get back to the correct 
starting position.

Summary of Contents for ProtoMax

Page 1: ...PROTOMAX WATER JET CUTTER Workarea 300 x 300 mm Max Thickness 25mm Possible Materials Metals Carbon Fiber Plastics etc...

Page 2: ...2 SAFETY Never operate equipment without safety guards or covers Never place your hands in the vicinity of the nozzle while cutting Do not make any modi cations Safety goggles and rubber gloves manda...

Page 3: ...a dxf le After selecting the path to your design a preview is shown If needed use the checkboxes on the left to modify it When you are done click Ok Your design will be shown on the main screen Selec...

Page 4: ...ing should be su cient Next click Start Design size The size of the design can be modi ed using the Size tool on the left Moving around Using the Move tool we move our design close to the lower left c...

Page 5: ...sired quality 3 Should be su cient Higher number mean higher quality so longer processing time and costs Cut path Now we can create the toolpath using the Autopath tool The green lines that are shown...

Page 6: ...button on the right Select the starting point The point must be an end point Make sure to always use the point so that the inner parts are cut rst You will be once more prompted with a preview If you...

Page 7: ...ing noise is normal Ensure that the plug right labeled Pump is also connected Next you can turn on the machine using the big red switch on the right side If the machine doesn t turn on it can be becau...

Page 8: ...HINE Check that both black water valves are in the close position as shown here If they are closed you can open the blue valve until the end An orange ring should be visible Lift the nozzle so that is...

Page 9: ...he red box in the top left corner to start the homing process REMEMBER Every time the machine is moving the lid neets to be closed Wear the safety glasses and rubber gloves when working on the machine...

Page 10: ...play Units option to change it Similar to before you can easily set the units to mm From the get go you are presented with a sample le Use the Change Path Setup to select your own design omx le you ju...

Page 11: ...e to the location of your le and select it A preview of the design and path will be displayed At this point it is important to select the material on the lower left section Also ensure the material th...

Page 12: ...that the overrun with the spongy tip on the right is moved all the way up Flushing the machine Next the machine needs to be ushed To do so use the arrow keys on the keyboard to move the cutting head t...

Page 13: ...ube from the cutting head and place it on top of the axis so that is can not drop into the water Release the head unit and move it to about 5 mm above the metal slats using the big black knob Make sur...

Page 14: ...mputer click on Test Select the rst option and press Next Double check that the abrasive tube is removed and secured and that the cutting unit is between two slots Then press Start Test The Test will...

Page 15: ...s you can see abrasive sand particles moving in the tube you can stop the test Next place your material in the machine and secure it using the clamps from the side Ensure the clamps are only located a...

Page 16: ...right click Start Here you have the chance to make a dry run A dry run is mandatory before any cutting During the dry run check that there are no collision You can see the progress on the screen After...

Page 17: ...nd o tool The nozzle needs to touch it but you need to still be able to move it away Bend the orange split guard to ip it over Then move it down so it touches the surface Add water to the machine unti...

Page 18: ...he water Once more remove the abrasive tube and secure it on top Then run the Test Cutting Head routine to clean the nozzle Lower the water level so that the metal slats are 1 cm above the water level...

Page 19: ...se water and paper towels to clean the machine Please do not use cleaning agents Close all the water valves Make sure that the blue valve does not show an orange ring Then turn o the machine and unplu...

Page 20: ...PAGE 20 FILLING UP THE ABRASIVE If the abrasive sand is too little you can ll it up by using the big cup near the waterjet Only ll up the abrasive sand if is necessary and when the machine is o...

Reviews: