Attaching the Add-On Device to Pinless Bridge Acoustic Guitars
In this step you will modify the Add-On Device for your pinless bridge guitar. If you have a
bridge pin guitar go to
Attaching the Add-On Device to Bridge-Pin Acoustic Guitars
(page 10).
1
5
6
7
2
3
4
1
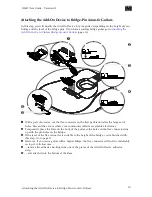
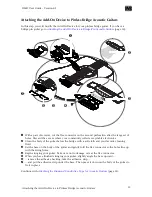
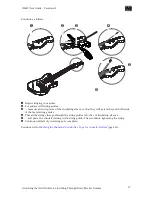
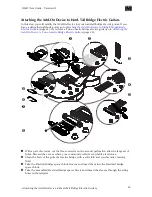
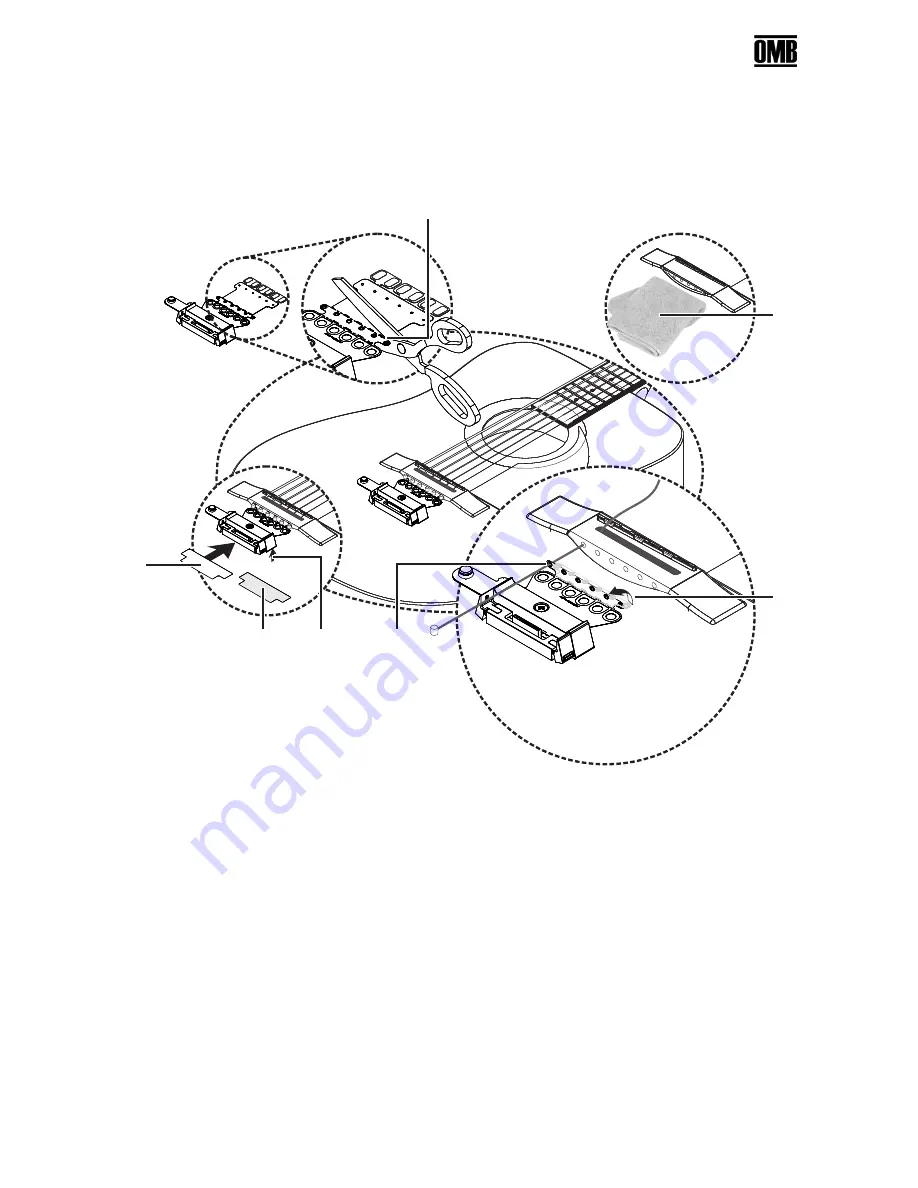
With a pair of scissors, cut the flex connector on the second perforation after the large set of
holes. Discard the excess where your community collects recyclable electronics.
2
Clean the body of the guitar below the bridge with a soft cloth and your favorite cleaning
fluid.
3
Set the base on the body of the guitar and gently fold the flex connector so the holes line up
with the string holes.
4
Begin stringing your guitar. Take care not to damage or tear the flex connector.
5
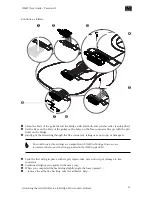
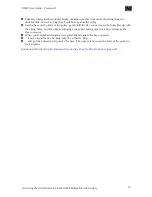
When you have finished stringing your guitar, slightly angle the base upward…
6
…remove the adhesive backing, take the adhesive strip…
7
…and put the adhesive strip under the base. Then press it down on the body of the guitar to
fix it in place.
Continue with
Attaching the Diamond Conductive Tape for Acoustic Guitars
(page 23).
Attaching the Add-On Device to Pinless Bridge Acoustic Guitars
13
OMB User Guide - Version 0.I

