background image

14

Cleaning and Maintenance

CLEANING THE CONDENSER COIL

Required Tools:

•  Phillips screwdriver.

•  Stiff bristle brush.

•  Adjustable wrench

When using electrical appliances basic safety precautions should be followed:

•  Disconnect power to unit.

•  Take off lower grill assembly by removing all screws.

•  Remove bolts anchoring compressor assembly to frame rails and carefully slide out -- tube connections are 

flexible.

•  Clean off accumulated dirt from condensing coil with the stiff bristle brush.

•  Lift cardboard cover above fan at plastic plugs and carefully clean condenser coil and fan blades.

•  After brushing condenser coil, vacuum dirt from coil and interior floor.

•  Replace cardboard cover, carefully slide compressor assembly back into position and replace bolts.

•  Reinstall louver assembly onto unit with appropriate fasteners and clips. Tighten all screws.

•  Connect unit to power and check to see if condenser is running.

STAINLESS STEEL CARE AND CLEANING

Recommended cleaners for stainless steel

•  Soap, ammonia and detergent medallion applied with a soft cloth or sponge for routine cleaning.

•  Arcal 20, Loc-O-Nu Ecoshine provide a barrier film for fingerprints and smears.

•  Cameo, Talc, Zud First lmpression is for stubborn stains and discoloration. Rub in direction of polish lines.

•  Easy-off and De-Grease It oven aid are excellent for removals on all finishes for grease-fatty acids, blood 

and burnt-on foods.

•  Any good commercial detergent can be applied with a sponge or soft cloth to remove grease and oil.

•  Benefit, Super Sheen, Sheila Shine are good for restoration/passiveness.

CAUTION:

 Do not use any steel wool, abrasive or chlorine based products to clean stainless steel surfaces.

Stainless Steel Enemies

There are three basic items that can break down stainless steel’s passivity layer and allow corrosion to occur.

1.  Scratches from wire brushes, metal scrapers and steel pads are just a few examples of items that can be 

abrasive to stainless steel’s surface.

2.  Deposits left on stainless steel can leave spots. Hard water can leave spots. Hard water that is heated can 

leave deposits if left to sit for too long. These deposits can cause the passive layer to break down and rust 

stainless steel. All deposits left from food prep or service should be removed as quickly as possible.

3.  Chlorides are present in table salt, food and water. Household and industrial cleaners are the worst type of 

chlorides to use.

Summary of Contents for BB-CN-0012-DH

Page 1: ...905 607 0234 Email service omcan com www omcan com Back Bar Bottle Coolers Models BD CN 0007 HC BB CN 0012 DH BD CN 0019 HC BB CN 0016 DH BD CN 0023 HC BB CN 0020 DH BD CN 0032 HC Instruction Manual...

Page 2: ...Safety and Warranty Technical Specifications Installation Operation Cleaning and Maintenance Parts Breakdown Electrical Schematics Notes Warranty Registration Model BD CN 0007 HC Model BB CN 0012 DH M...

Page 3: ...e It s of the utmost importance to save these instructions for future reference Also save the original box and packaging for shipping the equipment if servicing or returning of the machine is required...

Page 4: ...ol y que este ha sido entrenado en el correcto funcionamiento de esta m quina y sta usando ropa apropiada y autorizada Cualquier modificaci n a la m quina an la la garant a y puede causar da os a las...

Page 5: ...nts overloading wiring circuits which could become a fire hazard from overheated wires Never unplug your cooler by pulling on the power cord Always grip the plug firmly and pull straight out from the...

Page 6: ...may have a cooling system that used ozone depleting chemicals If you are throwing away your old refrigerator be sure the refrigerant is removed for proper disposal by a qualified service technician If...

Page 7: ...x 737mm 48 x 18 5 x 29 1219 x 470 x 737mm Weight 154 lbs 70 kgs 216 lbs 98 kgs 279 lbs 127 kgs 255 lbs 116 kgs Item Number 50066 50063 50067 50064 Model BD CN 0023 HC BB CN 0020 DH BD CN 0032 HC Power...

Page 8: ...Cabinet Allow six 6 inches between the wall and rear of the refrigerated bar equipment to assure proper ventilation Step 2 Level Cabinet Cabinet should be level side to side and front to back Place a...

Page 9: ...f tape on the floor prior to applying the sealant will protect the floor DRAFT BEER TOWER INSTALLATION 1 Beer tower contents 2 Thread the beer line connector to the keg coupler 3 Insert an air hose in...

Page 10: ...r off the coil must circulate down the back wall LIGHT SWITCH LOCATION The switch is located on the front of the evaporator housing toward the right of the cabinet Open the front door NOTE If the unit...

Page 11: ...ller displays the value of the probe set using parameter 4 1 ambient probe default 2 second probe 3 third probe In addition the display has LEDs that indicate the activation of the control functions s...

Page 12: ...will start flashing after a few moments Increase or decrease the value using UP or DOWN Press SET to confirm the new value SWITCHING THE DEVICE ON OFF Press UP for more than 3 sec The control and defr...

Page 13: ...ch are not covered by warranty Air is pulled through the condenser continuously along with dust lint grease etc If you keep the condenser clean you will minimize your service expense and lower your el...

Page 14: ...oshine provide a barrier film for fingerprints and smears Cameo Talc Zud First lmpression is for stubborn stains and discoloration Rub in direction of polish lines Easy off and De Grease It oven aid a...

Page 15: ...ssible Installation of certain filters can be an advantage Contact a treatment specialist about proper water treatment 5 Maintain cleanliness of food equipment Use cleaners at recommended strength alk...

Page 16: ...Doors with One Tap 19 cu ft 546 L Capacity 110V 60HZ ETL cETLus INTERTEK UDD 2 HC 50064 BB CN 0016 DH Cooler Back Bar 15 8 cu ft Capacity Solid Door with Beer Dispenser 115V 60 1 NSF ETL cETLus INTERT...

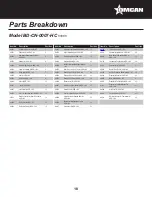
Page 17: ...17 Parts Breakdown Model BD CN 0007 HC 50066...

Page 18: ...1 HC 23 AA604 Air Pipe Protection Board for UDD 1 HC 39 AA585 Door for UDD 1 HC 8 AA594 Evaporator Fan Holder for UDD 1 HC 24 AA605 Evaporator Cover for UDD 1 HC 40 AA586 Gasket for UDD 1 HC 9 AA595...

Page 19: ...19 Parts Breakdown Model BB CN 0012 DH 50063...

Page 20: ...48 HC 47 AA510 Control Panel for UDD 24 48 HC 10 AA378 Temperature Probe Fixer for UDD 24 48 HC 29 AA527 Cabinet for UDD 24 48 HC 48 AA364 LED Power Supply for UDD 24 48 HC 11 AA379 Temperature Probe...

Page 21: ...21 Parts Breakdown Model BD CN 0019 HC 50067...

Page 22: ...for UDD 2 HC 47 AA610 Control Panel for UDD 2 HC 10 AA378 Temperature Probe Fixer for UDD 2 HC 29 AA629 Cabinet for UDD 2 HC 48 AA364 LED Power Supply for UDD 2 HC 11 AA379 Temperature Probe for UDD 2...

Page 23: ...23 Parts Breakdown Model BB CN 0016 DH 50064...

Page 24: ...A537 Control Panel for UDD 24 60 HC 10 AA379 Temperature Probe for UDD 24 60 HC 30 AA528 Drain Hose for UDD 24 60 HC 50 AA364 LED Power Supply for UDD 24 60 HC 11 AA547 Evaporator Fan Installation Boa...

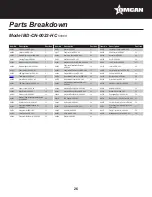
Page 25: ...25 Parts Breakdown Model BD CN 0023 HC 50068...

Page 26: ...Panel for UDD 3 HC 10 AA379 Temperature Probe for UDD 3 HC 30 AA528 Drain Hose for UDD 3 HC 50 AA364 LED Power Supply for UDD 3 HC 11 AA645 Evaporator Fan Installation Board for UDD 3 HC 31 AA529 Plas...

Page 27: ...27 Parts Breakdown Model BB CN 0020 DH 50065...

Page 28: ...D 24 72 HC 10 AA121 Temperature Probe for UDD 24 72 HC 30 AA484 Middle Shelf for UDD 24 72 HC 50 AA364 LED Power Supply for UDD 24 72 HC 11 AA570 Evaporator Fan Installation Board for UDD 24 72 HC 31...

Page 29: ...29 Parts Breakdown Model BD CN 0032 HC 50069...

Page 30: ...l for UDD 4 HC 10 AA121 Temperature Probe for UDD 4 HC 30 AA678 Middle Beam Cover for UDD 4 HC 50 AA364 LED Power Supply for UDD 4 HC 11 AA669 Evaporator Fan Installation Board for UDD 4 HC 31 AA679 A...

Page 31: ...31 Electrical Schematics Model BD CN 0007 HC 50066...

Page 32: ...32 Electrical Schematics Model BB CN 0012 DH 50063...

Page 33: ...33 Model BD CN 0019 HC 50067 Electrical Schematics...

Page 34: ...34 Model BB CN 0016 DH 50064 Electrical Schematics...

Page 35: ...35 Model BD CN 0023 HC 50068 Electrical Schematics...

Page 36: ...36 Electrical Schematics Model BB CN 0020 DH 50065...

Page 37: ...37 Electrical Schematics Model BD CN 0032 HC 50069...

Page 38: ..._______________ ________________________________________________________________________________________ ________________________________________________________________________________________ ______...

Page 39: ...ter online by visiting OMCAN PRODUCT WARRANTY REGISTRATION 3115 Pepper Mill Court Mississauga Ontario Canada L5L 4X5 https omcan com warranty registration or email to service omcan com Purchaser s Inf...

Page 40: ...relations avec nos clients et les fabricants de valeur Aujourd hui avec des partenaires en Am rique du Nord Europe Asie et Am rique du Sud nous travaillons continuellement am liorer et d velopper l e...

Reviews: