20
Operation
LIGHTING
Consider that this cooler has been designed with the intention to exhibit products to encourage your and your
supplier’s sales. For best results, lighting must be turned on during sale hours.
Our LED lighting technology allows an improved electric efficiency, reducing and providing more operation
years with regard to lighting. LED lighting is located around the door perimeter, on the internal cabinet upper
portion, or around the perimeter of the internal cabinet.
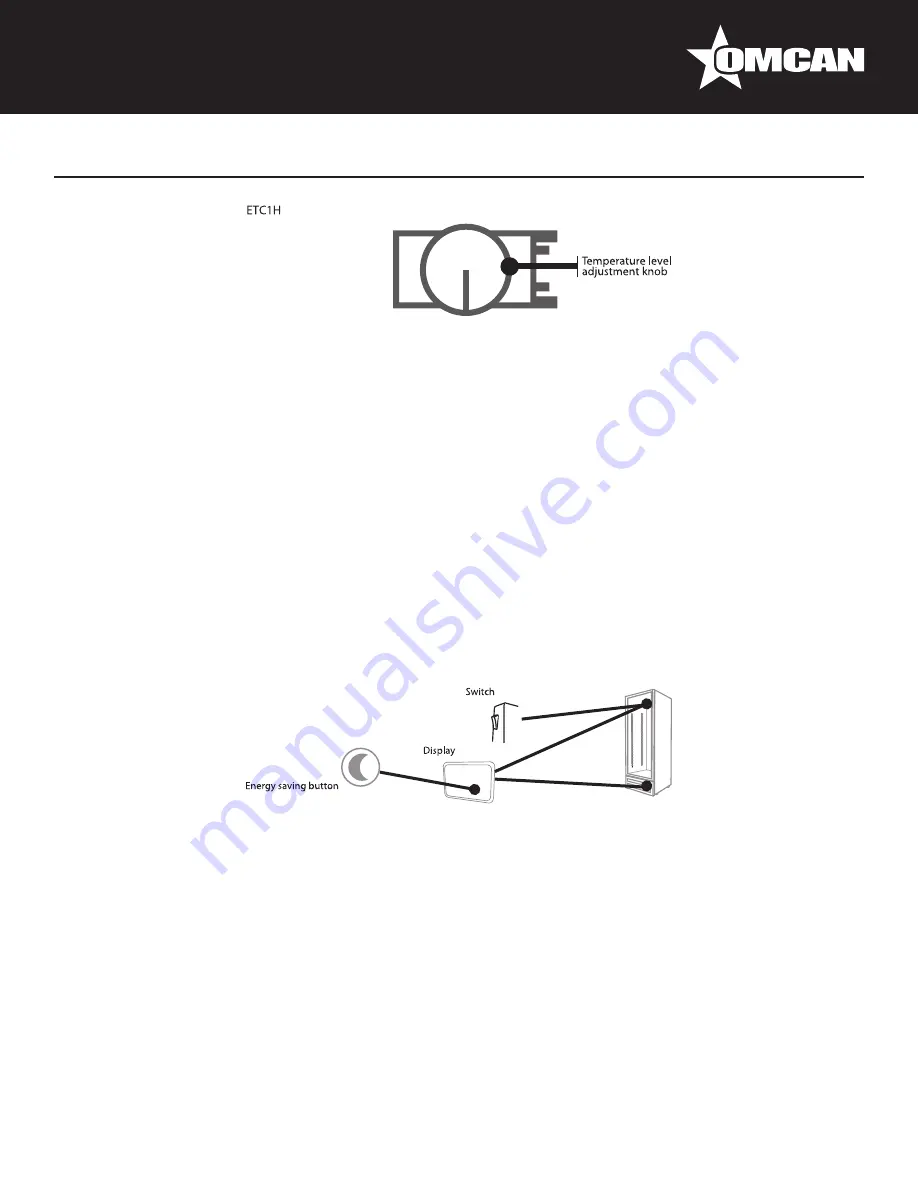
Your cooler may include a switch that allows you to turn off lighting manually. Use it only when your business
is closed. During sale schedule, this lighting technology represents a minimum percentage of the cooler’s total
energy consumption.
If the cooler includes a Intelligent Control Function (CIF), lighting will be tuned off automatically in savings
mode. You don’t have to worry about this, each control will turn lighting off according to cooler characteristics
and the products contained in it. Just open the door to exit savings mode.
IMPORTANT: if you notice any lighting malfunction, please contact the Customer Service Center.
HINGED DOOR
Cooler’s door is designed to thermally isolate the refrigerated product from the environment. If it gets fractured
or broken, do not attempt to repair it; call the Customer Service Center.
With a moistened cloth, clean glass solid and glass door internal and external surfaces at least once per week.
At least every three months, clean the door’s seal, check it for perfect condition, and check whether it makes
contact with frame inside cabinet.
Door hinges and supports have been designed for an adequate turning radius and a proper seal separation
distance. If for any reason you need to replace or adjust, request support from the Omcan Tech Support
Department at 1-800-465-0234.
Summary of Contents for Imbera G319
Page 13: ...13 Installation LEVELING SKID LEVELING SCREW WHEEL WALL SEPARATOR ...
Page 19: ...19 Operation ...
Page 26: ...26 Parts Breakdown Model VR08 41215 General Assembly ...
Page 27: ...27 Parts Breakdown Model VR08 41215 Evaporator Assembly ...
Page 28: ...28 Parts Breakdown Model VR08 41215 Condenser Assembly ...
Page 29: ...29 Parts Breakdown Model VR08 41215 Door Assembly ...
Page 31: ...31 Parts Breakdown Model VR06 41214 General Assembly ...
Page 32: ...32 Parts Breakdown Model VR06 41214 Evaporator Assembly ...
Page 33: ...33 Parts Breakdown Model VR06 41214 Condenser Assembly ...
Page 34: ...34 Parts Breakdown Model VR06 41214 Door Assembly ...
Page 36: ...36 Parts Breakdown Model VR12 41217 General Assembly ...
Page 37: ...37 Parts Breakdown Model VR12 41217 Evaporator Assembly ...
Page 38: ...38 Parts Breakdown Model VR12 41217 Condenser Assembly ...
Page 39: ...39 Parts Breakdown Model VR12 41217 Door Assembly ...
Page 41: ...41 Parts Breakdown Model VR10 41216 General Assembly ...
Page 42: ...42 Parts Breakdown Model VR10 41216 Evaporator Assembly ...
Page 43: ...43 Parts Breakdown Model VR10 41216 Condenser Assembly ...
Page 44: ...44 Parts Breakdown Model VR10 41216 Door Assembly ...
Page 46: ...46 Parts Breakdown Model G319 HC 45445 Model G319 41161 General Assembly ...
Page 47: ...47 Parts Breakdown Model G319 HC 45445 Model G319 41161 Evaporator Assembly ...
Page 48: ...48 Parts Breakdown Model G319 HC 45445 Model G319 41161 Condenser Assembly ...
Page 49: ...49 Parts Breakdown Model G319 HC 45445 Model G319 41161 Door Assembly ...
Page 52: ...52 Parts Breakdown Model G326 41219 General Assembly ...
Page 53: ...53 Parts Breakdown Model G326 41219 Evaporator Assembly ...
Page 54: ...54 Parts Breakdown Model G326 41219 Condenser Assembly ...
Page 55: ...55 Parts Breakdown Model G326 41219 Door Assembly ...
Page 57: ...57 Parts Breakdown Model VRD37 42862 General Assembly ...
Page 58: ...58 Parts Breakdown Model VRD37 42862 Evaporator Assembly ...
Page 59: ...59 Parts Breakdown Model VRD37 42862 Condenser Assembly ...
Page 60: ...60 Parts Breakdown Model VRD37 42862 Door Assembly ...
Page 62: ...62 Parts Breakdown Model VRD43 41218 General Assembly ...
Page 63: ...63 Parts Breakdown Model VRD43 41218 Evaporator Assembly ...
Page 64: ...64 Parts Breakdown Model VRD43 41218 Condenser Assembly ...
Page 65: ...65 Parts Breakdown Model VRD43 41218 Door Assembly ...
Page 67: ...67 Parts Breakdown Model G372 41220 Model G372 BLACK 45250 General Assembly ...
Page 68: ...68 Parts Breakdown Model G372 41220 Model G372 BLACK 45250 Evaporator Assembly ...
Page 69: ...69 Parts Breakdown Model G372 41220 Model G372 BLACK 45250 Condenser Assembly ...
Page 70: ...70 Parts Breakdown Model G372 41220 Model G372 BLACK 45250 Door Assembly ...
Page 72: ...72 Parts Breakdown Model VR1 5 45800 General Assembly ...
Page 73: ...73 Parts Breakdown Model VR1 5 45800 Condenser Assembly ...
Page 74: ...74 Parts Breakdown Model VR1 5 45800 Door Assembly ...
Page 76: ...76 Parts Breakdown Model VR04 45801 General Assembly ...
Page 77: ...77 Parts Breakdown Model VR04 45801 Condenser Assembly ...
Page 78: ...78 Parts Breakdown Model VR04 45801 Door Assembly ...
Page 80: ...80 Parts Breakdown Model VFS24 41221 General Assembly ...
Page 81: ...81 Parts Breakdown Model VFS24 41221 Evaporator Assembly ...
Page 82: ...82 Parts Breakdown Model VFS24 41221 Condenser Assembly ...
Page 83: ...83 Parts Breakdown Model VFS24 41221 Door Assembly ...
Page 85: ...85 Electrical Schematics Model VR08 41215 ...
Page 86: ...86 Electrical Schematics Model VR06 41214 ...
Page 87: ...87 Electrical Schematics Model VR12 41217 ...
Page 88: ...88 Electrical Schematics Model VR10 41216 ...
Page 89: ...89 Electrical Schematics Model G319 HC 45445 Model G319 41161 ...
Page 90: ...90 Electrical Schematics Model G326 41219 ...
Page 91: ...91 Electrical Schematics Model VRD37 42862 ...
Page 92: ...92 Electrical Schematics Model VRD43 41218 ...
Page 93: ...93 Electrical Schematics Model G372 41220 Model G372 BLACK 45250 ...
Page 94: ...94 Electrical Schematics Model VR1 5 45800 ...
Page 95: ...95 Electrical Schematics Model VR04 45801 ...


