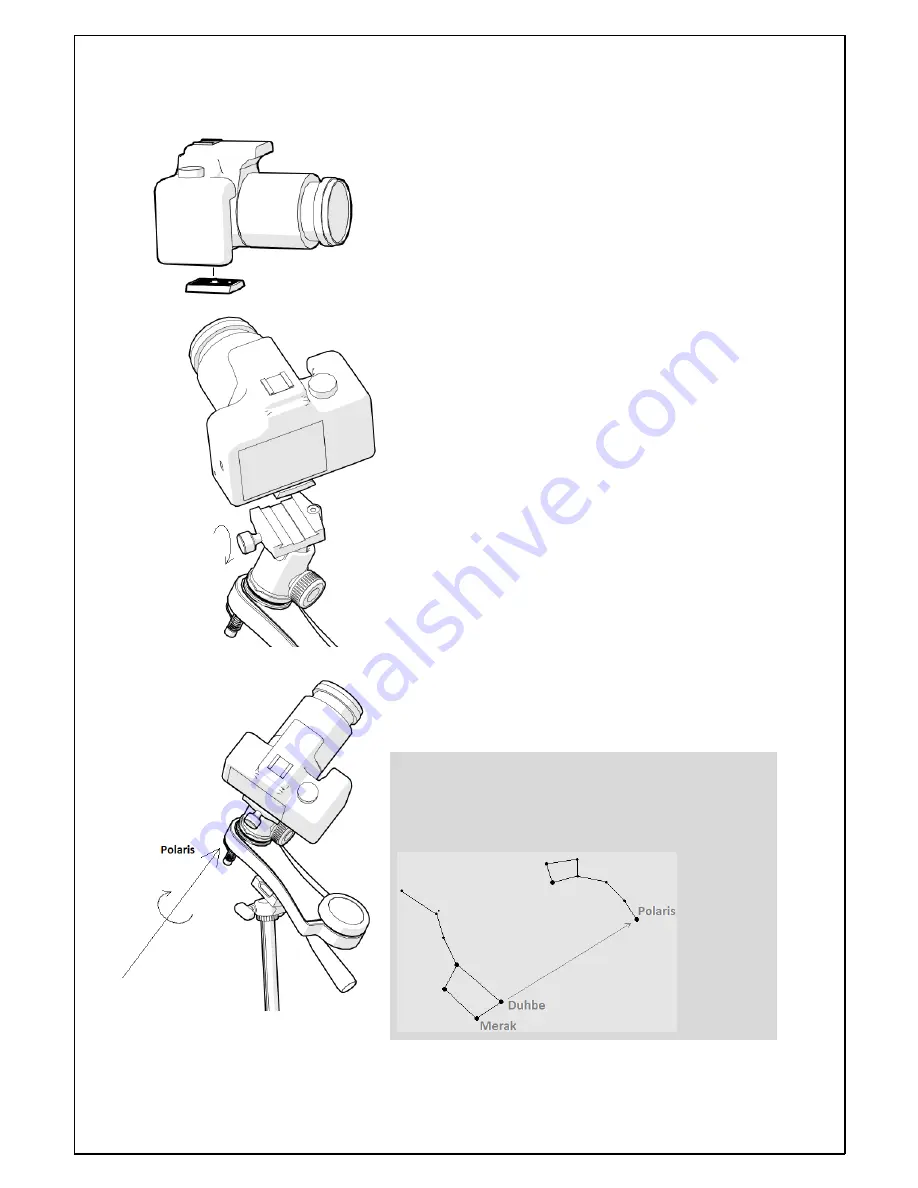
4.5. Install the camera adapter to the camera (only for version with supplied
ball-head). Again, make sure the adapter is square to the camera base and
well tighten.
4.6. Set the camera with the adapter to the ball-head. Make sure to
tighten well the whole set. The ball-head has two knobs. One fixes the
ball-head position (azimuth) while the other fixes the free-ball movement.
The movement allows the user to point to any desired object. Make sure
both are tight before installing the camera. Release the knobs - slightly –
to allow pointing the camera to different directions.
4.7. Point the mount to the Polaris. It is not important to be exactly
aligned – a rough alignment is fine. Upon installing the supplied polar
finder (B) we will look more accurately on how to have the star in the
centre of the polar finder (B) field of view.
How to identify Polaris?
Polaris is not the brightest star on the sky but still easy to identify. Look
north and try to find the Big Dipper (constellation). This is a very easy to
recognise constellation. Polaris is about six times the distance and
direction of two of it’s brightest stars – Merak and Duhbe.


