background image


ENGLISH


Cod. 710.0150.01.00 Rev.03 – 09.2019


14 - 73 

1. GENERAL INFORMATION 

1.1 FUNCTIONAL DESCRIPTION 

Drying  systems  with  refrigeration  cycle  have  been  designed  for  a  cost  effective  elimination,  with  minimal  overall  dimensions,  of  the 
condensate contained in compressed air by cooling it down to approxi 3°C. 

The operation principle of the dryers described in this manual is shown in the air and refrigeration circuit diagrams (attachment A). 

The  air  delivered  to  the  services  is  virtually  humidity  free,  and  the  condensate  collected  in  the  separator  is  discharged  through 
appropriate draining devices. In order to limit the size of the machine and to avoid condensation on the external surface of the tubing, 
before exiting the dryer, treated air is counter current pre-heated by the air entering the system. 


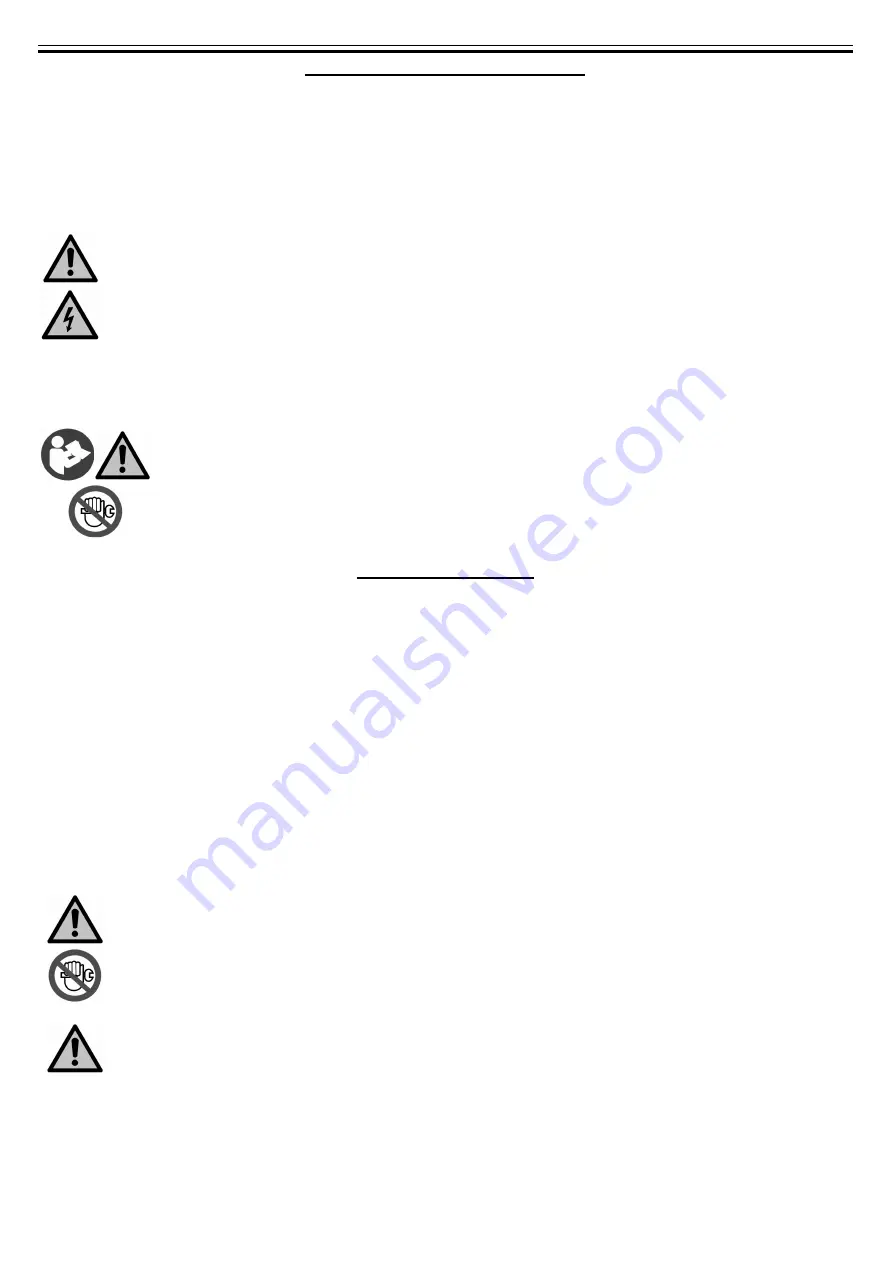
The  dryer  comes  provided  with  all  the  control,  safety  and  adjustment  devices,  therefore  no  auxiliary  devices  are 
needed. 

A system overload not exceeding the maximum operative limits can worsen the operational performances of the dryer 
(high dew point), but it will not affect its safety. 

The  electric  diagram  (attachment  B) shows  the minimum  protection  degree  IP  42.  The  user  must  provide  the  dryer 
with a line protection and a ground terminal

1.2 USE OF THE MACHINE IN SAFE CONDITIONS 

This system has been designed and manufactured in compliance with the European safety directive in force, therefore any installation, 
use and maintenance operations must be performed respecting the instructions contained in this manual. 


Any installation, use and maintenance operation requiring to access the internal parts of the dryer must be 
performed by qualified personnel. 

The manufacturer will not be liable in case of uses different or nor complying with those foreseen in this 
manual.


2. INSTALLATION 

2.1 ACCEPTANCE  AND HANDLING 

Upon  receiving  your  Ingersoll  Rand  air  dryer,  please  inspect  the  unit  closely.  If  rough  handling  is  detected,  please  note  it  on  your 
delivery receipt, especially if the dryer will not be uncrated immediately. Then obtain the freight carrier's signed agreement to any noted 
damages:  this is a precondition for any insurance claims by the customer. 

It is mandatory to keep the dryer always in vertical position, as indicated by the symbols present on the packaging. For handling, use 
devices having sufficient capacity for the weight of the machine. 

Remove the packaging after having positioned the dryer in the installation site. For unpacking, refer to section 2.3. 

Under no circumstances should any person attempt to lift heavy objects without proper lifting equipment (i.e., crane, hoist, slings or fork 
truck). Lifting any unit without proper lifting equipment, may cause serious injury. Use fork lift channels where provided. 

2.2 STORAGE AND INSTALLATION LOCATION 

If not in use, the dryer can be stored in its packaging in a dust free and protected site between 32°F (0°C) and 120 °F (50 °C), and a 
specific humidity not exceeding 90 %. Should the stocking time exceed 12 months, please contact your local Ingersoll Rand authorized 
distributor. 


If the dryer is not used, it will be placed in a site with the following conditions: 


The machine must be protected from atmospheric agents and not directly exposed to sun light. 


A seating base flat and capable to hold the weight of the machine. 


Ambient temperature complying with the nominal data of the dryer. 


The dryer should be located in a clean area, without forced air draft that can affect the fan control system. 


Make  sure  to  leave  sufficient  clearance  (20  inches,  500  mm)  around  the  dryer  in  order  to  allow  an  adequate 

cooling of the machine and for maintenance and/or control operations. 


The incoming air must be free from smoke or flammable vapours which could lead to explosion or fire risks. 


Summary of Contents for ED HP108

Page 1: ...one GB DIRECT EXPANSION COMPRESSED AIR DRYERS Instruction and Maintenance Manual D DRUCKLUFT K LTETROCKNER Handbuch f r Betrieb und Wartung F SECHEUR D AIR A EXPANSION DIRECTE Manuel d instructions et...

Page 2: ......

Page 3: ...tion 15 3 START UP 3 1 Control Panel 16 3 1 1 Keys function 17 3 1 2 Condensate discharge Parameters Programming 17 3 1 3 Anomaly Warning 18 3 1 4 Remote signalling Alarm 18 3 2 Before Start Up 19 3 3...

Page 4: ...ir et frigo 65 B Sch ma lectrique 67 C Fiches techniques 70 E NDICE 1 INFORMACIONES GENERALES 1 1 Descripci n funcional 44 1 2 Uso seguro del secador 44 2 INSTALACI N 2 1 Aceptaci n y transporte 44 2...

Page 5: ...ndita e o sul contratto di fornitura SIMBOLOGIE UTILIZZATE NEL MANUALE E SULL ESSICCATORE o o o Punto ingresso aria o o o Punto uscita aria Leggere il manuale dell operatore prima della messa in funzi...

Page 6: ...ONE 2 1 ACCETTAZIONE E TRASPORTO Al ricevimento del vostro essiccatore siete pregati di ispezionare attentamente la macchina Se si notano danni dovuti alla movimentazione durante il trasporto annotate...

Page 7: ...l installazione di un gruppo by pass se non presente che consenta di isolare la macchina dall impianto per agevolare eventuali operazioni di manutenzione Effettuare le connessioni elettriche in accord...

Page 8: ...ollo sotto raffigurato si pu controllare il corretto funzionamento della macchina Fig 2 VISUALIZZAZIONE DISPLAY LED DI SEGNALAZIONE Mod 18 225 Nm3 h LED DI SEGNALAZIONE Mod 270 660 Nm3 h LED STATO DES...

Page 9: ...atore vengono mantenute sotto tensione pertanto ai fini della sicurezza sconnettere l alimentazione elettrica prima di effettuare qualsiasi intervento sulla macchina 3 1 2 PROGRAMMAZIONE PARAMETRI DI...

Page 10: ...o spegnimento della centralina Contattare Centro Assistenza ESA Energy saving attivo Uscita allarme non attiva Uscita compressore non attiva Uscita ventilatore non attiva Uscita scarico standard Nessu...

Page 11: ...icazioni dei capitoli LUOGO DI INSTALLAZIONE e INSTALLAZIONE 2 Verificare che il sistema by pass se presente non sia aperto 3 Alimentare la rete elettrica e premere l interruttore ON OFF per 1 secondo...

Page 12: ...CAUSA E RIMEDIO Interruttore luminoso Display del pannello di controllo spento 1 Verificare la presenza di tensione in linea 2 Verificare il cablaggio elettrico 3 Verificare la scheda elettronica se l...

Page 13: ...ll evaporatore mal posizionata o guasta verificare 9 Perdita di gas nel circuito frigorifero arrestare l essiccatore e contattare un tecnico frigorista 10 Verificare il cablaggio elettrico 11 Pressost...

Page 14: ...il sezionatore abbia isolato la corrente dall essiccatore e disponga dei segnali necessari ad evitare una riconnessione dell unit all alimentazione elettrica Per effettuare correttamente le operazioni...

Page 15: ...ularly tested and covered by the warranty conditions specified on the sale list and or on the supply contract SYMBOLS USED IN THE MANUAL AND ON THE DRYER Air entry point Air outlet point Read the Oper...

Page 16: ...manual 2 INSTALLATION 2 1 ACCEPTANCE AND HANDLING Upon receiving your Ingersoll Rand air dryer please inspect the unit closely If rough handling is detected please note it on your delivery receipt es...

Page 17: ...chine from the plant thus to facilitate eventual maintenance operations 2 Perform the electrical connection in accordance with any local laws and regulations after reviewing the dryer electrical speci...

Page 18: ...lling LEDs indicated by icons PIC 1 PIC 2 DISPLAY VISUALIZATION SIGNALLING LEDS Mod 18 225 Nm3 h SIGNALLING LEDS Mod 270 660 Nm3 h LED STATUS DESCRIPTION ON Compressor energized Blinking Programming m...

Page 19: ...parts of the dryer are kept under tension therefore for safety purposes disconnect the electrical power before performing any operation on the machine 3 1 2 CONDENSATE DISCHARGE PARAMETERS PROGRAMMING...

Page 20: ...e ESA Energy saving mode activated Alarm output OFF Refrig Compressor output OFF Fan output OFF Discharge cycle standard No action necessary Automatic Reset ES2 ASt Series of alarms very close to each...

Page 21: ...1 Make sure that all instructions contained in chapters INSTALLATION SITE and INSTALLATION have been respected 2 Check if by pass is locked properly if existent 3 Activate current supply and press th...

Page 22: ...refrigeration engineer TROUBLE POSSIBLE CAUSE AND REMEDY Luminous switch Display of the control panel OFF 1 Check if the line is electrically powered 2 Check cabling 3 Check the electronic control boa...

Page 23: ...n the evaporator is positioned improperly or faulty 9 Gas leakage in the refrigerating circuit stop dryer and call a refrigeration engineer 10 Check cabling 11 Defective or burned out fan pressure swi...

Page 24: ...ppropriate warning signs to avoid the machine being reconnected to the electricity mains Please consult the contents and the safety instructions in the relevant sections of these instructions for deta...

Page 25: ...und oder auf dem Liefervertrag angegebenen Bedingungen berpr ft IM HANDBUCH UND AUF DEM TROCKNER VERWENDETE SYMBOLE o o o Drucklufteintritt o o o Druckluftaustritt Vor der Inbetriebnahme und vor jede...

Page 26: ...TRANSPORT Pr fen Sie beim Erhalt Ihres Trockners bitte die Einheit genau Wenn Zeichen einer groben Handhabung festgestellt werden notieren Sie dies bitte auf Ihrer Empfangsquittung Dies gilt vor allem...

Page 27: ...nn nicht vorhanden eine By pass Gruppe zu installieren die erlaubt die Anlage f r die Durchf hrung von eventuellen Wartungsarbeiten zu isolieren 2 Nehmen Sie die elektrischen Anschl sse in bereinstimm...

Page 28: ...trolliert werden Bild 2 SIGNALSIERUNGSLED SIGNALSIERUNGSLED Mod 18 225 Nm3 h SIGNALSIERUNGSLED Mod 270 660 Nm3 h LED STATUS DESCRIPTION ON Aktiver Kompressor LEUCHTEND Programmierungsmodalit t ON Akti...

Page 29: ...Wenn der Prozess deaktiviert ist wird auf dem Display die Meldung OFF angezeigt Zwei Minuten nach der Z ndung beginnt der Trockner zu funktionieren HINWEIS wenn der Kontroller in OFF Position ist ble...

Page 30: ...nal OFF Ableitersignal Standard Nullstellung nach Austauschen der Probe und anschlie ende Steuerl schung Bitte den Kundendienst anrufen ESA Energiesparung aktiv Alarmsignal OFF Kompressorsignal OFF Ve...

Page 31: ...DEN AUFSTELLUNGSORT und INSTALLATION ber cksichtigt worden sind 2 berpr fen dass der Bypass wenn vorhanden geschlossen ist 3 Einschalten der Stromversorgung und den ON OFF Leuchtschalter an der Steue...

Page 32: ...ist 2 Die elektrische Verkabelung berpr fen 3 Die Steuerung berpr fen Bei andauerndem Fehler die Steuerung ersetzen Der K ltekompressor l uft nicht an 1 Die elektrische Verkabelung und Steuerung berp...

Page 33: ...sen weder Luft noch Wasser Siehe entsprechenden Absatz 8 Der Temperaturkontrollf hler im Verdampfer ist falsch positioniert oder defekt berpr fen 9 Gasverlust im K hlkreislauf Den Trockner abschalten...

Page 34: ...nweise an um zu verhindern dass das Ger t versehentlich wieder an das Stromnetz angeschlossen wird Bitte beachten Sie Inhalte und Sicherheitsanweisungen in den entsprechenden Abschnitten dieser Anweis...

Page 35: ...ns figurant dans le tarif et ou le contrat de fourniture SYMBOLES UTILISES DANS LE MANUEL ET SUR LE SECHOIR ou ou ou Point d entr e de l air ou ou ou Point de sortie de l air Lire le manuel des op rat...

Page 36: ...ECEPTION ET TRANSPORT Lorsque vous recevez votre s cheur veuillez examiner attentivement l appareil Si le colis porte les marques d une manipulation brutale veuillez l indiquer sur votre bordereau de...

Page 37: ...en 2 Effectuez les branchements lectriques conform ment aux lois et aux r glements locaux apr s avoir consult les sp cifications lectriques et le sch ma de c blage du s choir 3 V rifier le groupe de p...

Page 38: ...achine peut tre contr l l aide du pupitre de commande illustr ci dessous Fig 2 ECRAN D AFFICHAGE DIODES ELECTROLUMINESCENTES DE SIGNALISATION Mod 18 225 Nm3 h Mod 270 660 Nm3 h LED STATUS DESCRIPTION...

Page 39: ...arte lectronique indique OFF plusieurs composants du s cheur reste sous tension Donc pour des raisons de s curit il est imp ratif de couper l alimentation lectrique du s cheur avant toute op ration su...

Page 40: ...lisation apr s remplacement de la sonde et extinction de la centrale Contacter le Centre d Assistance ESA Option d conomie d nergie active Sortie alarme active Sortie compresseur inactive Sortie venti...

Page 41: ...ignes des chapitres LIEU D INSTALLATION et INSTALLATION ont bien t observ es 2 V rifier que le by pass si pr sent n est pas ouvert 3 Pour enclencher l alimentation lectrique appuyer le bouton lumineux...

Page 42: ...nel sp cialis Contacter un technicien frigoriste pour toute intervention sur le circuit frigorifique de la machine INCONVENIENT CAUSE POSSIBLE ET REMEDE Interrupteur lumineux du pupitre de commande te...

Page 43: ...e de la temp rature dans l vaporateur est mal plac e ou est en panne La contr ler 9 Fuite de gaz dans le circuit frigorifique Arr ter le s choir et contacter un technicien frigoriste 10 V rifier le c...

Page 44: ...es panneaux d avertissement adapt s pour viter que la machine ne soit rebranch e au secteur Veuillez consulter les instructions relatives au contenu et la s curit dans les sections correspondantes de...

Page 45: ...s en la lista de venta y o en el contrato de suministro SIMBOLOG AS UTILIZADAS EN EL MANUAL Y EN EL SECADOR o o o Punto de entrada aire o o o Punto de salida aire Lea el manual de uso y mantenimiento...

Page 46: ...a Constructora 2 INSTALACI N 2 1 ACEPTACI N Y TRANSPORTE Al recibir su secador inspecci nelo detenidamente Si se detecta una manipulaci n inadecuada an telo en el recibo de entrega especialmente si no...

Page 47: ...a de la instalaci n para facilitar eventuales operaciones de mantenimiento 2 Efect e las conexiones el ctricas seg n las leyes locales vigentes despu s de haber examinado las especificaciones y los es...

Page 48: ...RICI N DE DISPLAY LED DE SE ALIZACI N Mod 18 225 Nm3 h LED DE SE ALIZACI N Mod 270 660 Nm3 h LED ESTADO DESCRIPCI N ON Compresor activo Parpadeo Modalidad de programaci n ON Descarga condensado activa...

Page 49: ...t debajo de tensi n por tanto por securidad hay que desconectar la alimentaci n el ctrica antes de efectuar cualquiera intervenci n sobre la m quina 3 1 2 DESCRIPCI N Y VALOR EST NDAR DE LOS PAR METRO...

Page 50: ...ficado MENSAJE PARPADEO CAUSA SALIDAS ACCIONES HtA Punto de roc o elevado alarma retrasado Salida de alarma activa Salida de compresor no activa Salida de ventilador activa Salida de descarga standard...

Page 51: ...rvado todas las indicaciones de los cap tulos LUGAR DE INSTALACI N e INSTALACI N 2 Verifique que el by pass si est instalado no est abierto 3 Activar la alimentaci n de corriente y accionar el pulsado...

Page 52: ...tenimiento deben ser ejecutadas por personal calificado Contacte a un t cnico frigorista para cualquier operaci n en el circuito refrigerante de la m quina ANOMAL AS POSIBLE CAUSA Y REMEDIO Interrupto...

Page 53: ...a del aire en ingreso al secador son superiores a los valores de chapa reestablezca las condiciones nominales 5 La temperatura ambiente es superior a los valores de chapa reestablezca las condiciones...

Page 54: ...evitar que la m quina vuelva a conectarse a la red el ctrica Para obtener detalles sobre una manipulaci n y un almacenamiento correctos del secador consulte el contenido y las instrucciones de seguri...

Page 55: ...Cod 710 0150 01 00 Rev 03 09 2019 53 73...

Page 56: ...Cod 710 0150 01 00 Rev 03 09 2019 54 73 1 1 1 3 C IP 42 1 2 2 2 1 2 3 2 2 0 C 50 C 90 12 Ingersoll Rand 20 500...

Page 57: ...Cod 710 0150 01 00 Rev 03 09 2019 55 73 2 3 2 1 2 4 1 2 3 4 1 2 3 4 5 6 10 DF 7 5 QF 8 9 10 0 10 3 PF 11 0 01 3 HF 12 0 003 3 CF 13 1...

Page 58: ...Cod 710 0150 01 00 Rev 03 09 2019 56 73 3 3 1 1 5 ON OFF TEST SET DOWN UP 3 2 Mod 18 225 Nm3 h Mod 270 660 Nm3 h ON ON ON ON ON 100 100 OFF...

Page 59: ...Cod 710 0150 01 00 Rev 03 09 2019 57 73 3 1 1 TEST 3 SET 10 DOWN 10 0 1 10 UP 10 0 1 ON OFF 1 OFF 2 c 3 1 2 10 SET 1 UP DOWN SET 15 C8 1 999 1 C9 1 999 1 3...

Page 60: ...Cod 710 0150 01 00 Rev 03 09 2019 58 73 3 1 3 HtA Ht2 LtA PF1 ESA ES2 ASt PF1 3 1 4 1 2 3 3 250 3A AC 15 3...

Page 61: ...Cod 710 0150 01 00 Rev 03 09 2019 59 73 3 2 3 3 1 2 3 4 2 5 6 7 ON OFF 10...

Page 62: ...Cod 710 0150 01 00 Rev 03 09 2019 60 73 4 4 1 1 2 40 200 2000 24 4000 4 2 1 2 3 1 2 1 3 4 1 2 3 1 2 3 4 5 6...

Page 63: ...Cod 710 0150 01 00 Rev 03 09 2019 61 73 1 2 3 1 2 3 4 1 2 3 4 5 6 7 8 9 1 2 3 4 5 6 4...

Page 64: ...Cod 710 0150 01 00 Rev 03 09 2019 62 73 4 3...

Page 65: ...tch Hauptschalter Interruptor luminoso Interrupteur g n ral 1T1 Trasformatore Transformer Transformator Transformador Transformateur 1V1 Elettrovalvola di scarico completa Complete solenoid drain valv...

Page 66: ...chaleur SCO Separatore di condensa Condensate separator Kondensabscheider Separador de condensacion S parateur de condensants SLI Separatore di Liquido Liquid separator Fl ssigkeit separator Separador...

Page 67: ...01 00 Rev 03 09 2019 65 73 A CIRCUITO FRIGORIFERO FRIGORIFIC CIRCUIT K LTESCHEMA CIRCUITO FRIGORIFICO CIRCUIT FRIGORIF RIQUE Mod 54 88 108 144 225 Nm3 h Mod 900 1466 1800 2400 3750 Nl min Cod 713 0007...

Page 68: ...Cod 710 0150 01 00 Rev 03 09 2019 66 73 Mod 270 360 480 660 Nm3 h Mod 4500 6000 8000 11000 Nl min Cod 713 0057 08 00 Rev 00...

Page 69: ...01 00 Rev 03 09 2019 67 73 B SCHEMA ELETTRICO WIRING DIAGRAM SCHALTSCHEMA ESQUEMA ELECTRICO SCHEMA LECTRIQUE Mod 54 88 108 144 225 Nm3 h Mod 900 1466 1800 2400 3750 Nl min 230V 1Ph 50Hz Cod 714 0151...

Page 70: ...Cod 710 0150 01 00 Rev 03 09 2019 68 73 Mod 270 360 Nm3 h Mod 4500 6000 Nl min 230V 1Ph 50Hz Cod 714 0162 01 00 Rev 01 5...

Page 71: ...Cod 710 0150 01 00 Rev 03 09 2019 69 73 Mod 480 660 Nm3 h Mod 8000 1100 Nl min 230V 1Ph 50Hz Cod 714 0163 01 00 Rev 00 5...

Page 72: ...W Full load consumpt KW 0 22 0 27 0 54 0 80 1 43 2 3 RLA Nom Current A 1 07 1 48 2 99 4 00 5 55 6 83 FLA Full load current A 1 30 1 68 3 50 4 75 7 14 10 20 LRA Locked rotor current A 8 90 10 00 16 50...

Page 73: ...i n piena car Amp re pl charge LRA Ass spunto Locked rotor current Anlass aufnahme Absorci n principio Amp re max CONN Attacchi aria Air connections Luftansschl sse Uniones de aire Connexion aircomp A...

Page 74: ...1M2 Fan Motor B 210 0121 01 00 210 0121 01 00 210 0122 01 00 210 0123 01 00 210 0123 01 00 VT Fan blade G Grid 1V1 Complete solenoid drain valve B 240 0086 00 00 240 0086 00 00 240 0086 00 00 240 008...

Page 75: ...5 00 00 250 0015 00 00 250 0015 00 00 250 0015 00 00 K1 Contactor switch A 242 0031 00 00 242 0031 00 00 1V1 Complete solenoid drain valve B 240 0086 00 00 240 0086 00 00 240 0086 00 00 240 0086 00 00...

Reviews: