CPC 100 V1.41
4 - 42
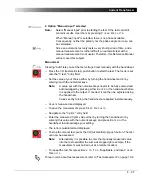
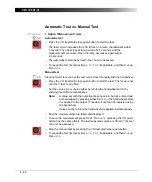
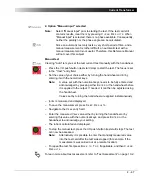
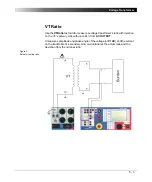
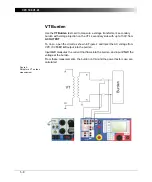
2. Option "Manual input" selected
Manual test
Clearing "Auto" lets you set the test current Itest manually with the handwheel.
– Press the I/O (test start/stop) push-button to start the test. The focus is set
onto the "I test:" entry field.
– Set the value of your choice either by turning the handwheel and/or by
entering it with the numerical keys.
– Iprim is measured and displayed.
– To save the measurement press K
E E P
R
E S U L T S
.
– Navigate to the Vsec entry field.
– Enter the measured Vsec value either by turning the handwheel or by
entering this value with the numerical keys, and press E
N T E R
or the
handwheel to acknowledge your setting.
– The ratio is calculated and displayed.
– To stop the manual test, press the I/O (test start/stop) push-button. The test
can now be assessed.
– To repeat the test, first press B
A C K
T O
T
O P
, if applicable, and then C
L E A R
R
E S U L T S
.
To learn more about test assessment, refer to ”Test Assessment” on page 10-2.
Note:
Select "Manual input" prior to starting the test. If the test card still
contains results, clear them by pressing C
L E A R
R
E S U L T S
. When
"Manual input" is selected, there is no phase available. Consequently,
neither the polarity nor the phase angle can be calculated.
Since an automatic test only lasts a very short period of time, and a
manual measurement is rather difficult, an automatic test with a
manual measurement is not useful. Therefore, this Reference Manual
will not cover this subject.
Note:
A value set with the numerical keys needs to be fully entered and
acknowledged by pressing either E
N T E R
or the handwheel before
it is applied to the output. If needed, it can then be adjusted using
the handwheel.
Values set by turning the handwheel are applied instantaneously.
Note:
Alternatively it is possible to enter the manually measured value
into the test card after the test was stopped (for example, if the
measurement was carried out at a remote location).
Summary of Contents for CPC 100
Page 12: ...CPC 100 V1 41 x...
Page 28: ...CPC 100 V1 41 1 16...
Page 90: ...CPC 100 V1 41 3 14...
Page 194: ...CPC 100 V1 41 6 30...
Page 250: ...CPC 100 V1 41 8 32 Figure 24 Settings of Amplifier test card for this example use case...
Page 258: ...CPC 100 V1 41 9 4...
Page 264: ...CPC 100 V1 41 10 6...
Page 282: ...CPC 100 V1 41 12 10 Figure 9 Saving tests with the CPC Editor...
Page 284: ...CPC 100 V1 41 12 12...
Page 312: ...CPC 100 V1 41 14 12...
Page 316: ...CPC 100 V1 41 15 4...
Page 350: ...CPC 100 V1 41 16 34...
Page 372: ...OMICRON Contact Addresses 22...

