Version February 2020
EN
13
HST 300 Smart User’s Manual
O . M . I . S . A . S r l
Via Verga 9/11
20845 Sovico (MB), Italy
ner. The maximum length is 32 characters. Confirm your
input by pressing the START/SET key. The job number will
be saved to memory and will appear in the downloaded
welding report.
7
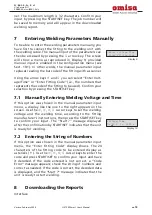
Entering Welding Parameters Manually
To be able to enter the welding parameters manually, you
have first to connect the fitting to the welding unit with
the welding cable. The manual input of the parameters can
then be accessed by pressing the
ò
arrow key. The screen
will show a menu as reproduced in Display 9, provided
manual input is enabled in the configuration menu (see
Sect. 10.1). In other words, the manual parameter input
replaces reading the bar code of the fitting with a scanner.
Using the arrow keys
ñ
and
ò
you can select “Enter Volt-
age/Time” or “Enter Fitting Code” (i.e., the numbers that
represents the code of the fitting to be used). Confirm your
selection by pressing the START/SET key.
7.1 Manually Entering Welding Voltage and Time
If this option was chosen in the manual parameter input
menu, a display like the one to the right appears on the
screen. Use the
ï
,
ð
,
ñ
,
ò
cursor keys to set the welding
voltage and the welding time, according to the fitting
manufacturer’s instructions, then press the START/SET key
to confirm your input. The “Start ?” message displayed
after the confirmation by START/SET indicates that the unit
is ready for welding.
7.2 Entering the String of Numbers
If this option was chosen in the manual parameter input
menu, the “Enter Fitting Code” display shows. The 24
characters of the fitting code to be entered display as
asterisks (
*
). Use the
ï
,
ð
,
ñ
,
ò
cursor keys to enter the
code and press START/SET to confirm your input and have
it decoded. If the code entered is not correct, a “Code
Error” message appears; check the string of numbers and
correct as needed. If the code is correct, the decoded data
is displayed, and the “Start ?” message indicates that the
unit is ready to start welding.
8
Downloading the Reports
Interface
Display 9
>Enter Voltage/Time
Enter Fitting Code
Display 10
Voltage/Time
U= 40 V t= 1000 s

