AWAG Elektrotechnik AG Sandbüelstrasse 2 CH-8604 Volketswil
3210000.docx / 1876018
Tel. +41 44 908 19 19 Fax +41 44 908 19 99 info@awag.ch www.awag.ch
SW: UPD_V181004 / 31.10.2018 Seite 3 / 7
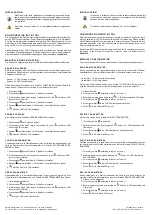
L AS T E I N M E S S E N
Der Omnio UP-Multi-Universaldimmer 1-Kanal UPD230/10 ist konzipiert worden,
um moderne LED Leuchtmittel optimal zu dimmen. Dazu muss das verwendete
Leuchtmittel vom Dimmer einmal eingemessen werden. Der Einmessvorgang
startet automatisch bei der ersten Inbetriebsetzung, er kann aber auch manuell
ausgelöst werden, siehe Tabelle 4 GERÄTEPARAMETER (Last einmessen).
Wird das Leuchtmittel durch einen anderen Typ ersetzt, muss dieses neu einge-
messen werden. Ist der Dimmer nicht zugänglich, kann der Einmessvorgang auch
folgendermassen ausgelöst werden:
•
Dimmer stromlos machen (Sicherungskasten)
•
Leuchtmittel entfernen
•
Strom einschalten
•
Lichtschalter betätigen
•
Strom ausschalten
•
Neues Leuchtmittel einsetzen
•
Strom wieder einschalten
→
Einmessvorgang startet automatisch.
M I N I M A L E R P H AS E N W I N K E L
Um den unteren Dimmbereich von LED Leuchtmitteln optimal ausnutzen zu kön-
nen, muss unter Umständen der
minimale Phasenwinkel
manuell angepasst wer-
den, siehe Tabelle 4 GERÄTEPARAMETER (Minimaler Phasenwinkel). Der mini-
male Phasenwinkel wird folgendermassen eingestellt:
•
Lampe auf minimale Helligkeit runterdimmen
•
Leuchtet die Lampe zu hell, muss der Phasenwinkel soweit verringert werden,
dass die Lampe gerade noch leuchtet.
•
Leuchtet die Lampe nicht mehr, muss der Phasenwinkel soweit erhöht werden,
dass die Lampe gerade wieder leuchtet.
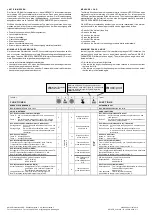
M E A S U R E L O A D
The Omnio flush mounted multi universal dimmer 1-channel UPD230/10 has been
designed for optimum dimming of modern LED luminaires. For this purpose the
LED lamp must be measured by the dimmer once. The measuring procedure starts
automatically at the first start-up, but can also be triggered manually, see table 4
DEVICE PARAMETERS (Measure load).
If the LED lamp is replaced by another type, it must be recalibrated. If the dimmer
is not accessible, the measuring procedure can be triggered as follows:
•
Switch off the dimmer (fuse box)
•
Remove the lamp
•
Switch on the dimmer
•
Press the light switch
•
Switch off the dimmer
•
Insert new lamp
•
Switch on the dimmer
→
measuring procedure starts automatically.
M I N I M U M P H A S E A N G L E
In order to get the optimum use of the lower dimming range of LED luminaires, the
minimum phase angle
may have to be adjusted manually, see Table 4 DEVICE
PARAMETERS (Minimum phase angle). The minimum phase angle can be ad-
justed as follows:
•
Dim the lamp to minimum brightness
•
If the lamp is too bright, the phase angle must be reduced to such an extent that
the lamp is still lit.
•
If the lamp is no longer lit, the phase angle must be increased to such an extent
that the lamp is illuminated again.
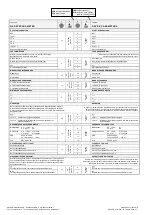
Tabelle 1
FUNK TI ONE N
1
2
3
4
5
Table 1
FUNC TI ONS
NEBENSTELLENEINGANG
EXTENSION INPUT
D03: Dimmen mit Taste
siehe unten
-
-
-
-
-
D03: Dim with push-button
see below
AWAG FUNKTIONEN
AWAG FUNCTIONS
A01: Anwesenheitssimulation mit Wippe
Taste O: Aus, zur Kontrolle schaltet das Licht 3 s ein und dann
aus
Taste I:
Ein, zur Kontrolle schaltet das Licht 6…30 s ein und
dann aus, bevor die Anwesenheitssimulation startet
2
2
s
d
rü
cke
n
p
re
ss 2
s
0
Wippe 2x drücken
press rocker 2x
d
rü
cke
n
p
re
ss
A01: Presence simulation with rocker
Button O:
Off, for checking purposes the light turns on 3 s and
then goes out
Button I:
On, as a check the light turns on 6...30 s and then off
before the simulation starts
A02: Anwesenheitssimulation mit Key-Card Schalter
Karte gesteckt:
Aus, zur Kontrolle schaltet das Licht 3 s ein und
dann aus
Karte gezogen:
Ein, zur Kontrolle schaltet das Licht 6…30 s ein
und dann aus, bevor die Anwesenheitssimula-
tion startet
2
1
Karte 2x einstecken
insert card 2x
A02: Presence simulation with key-card switch
Inserted card: Off, as a check the light turns on 3 s and then goes
out
Removed card: On, for checking purposes the light turns on
6...30 s and then turns off before the presence simu-
lation starts
A05: Sperre mit Wippe
Taste O: Ausgang sperren
Taste I:
Ausgang freischalten
1
11
Wippe 2x drücken
press rocker 2x
A05: Lock with rocker
Button O: Lock output
Button I:
Unlock output
A23: Minuterie EcoSwitch (AW23)
Timer oder aus. Verzögerungszeit einstellbar, siehe
Tabelle 4
Treppenlicht Einschaltdauer
, Standardzeit = 3 Min.
Beim Einschalten beträgt der Dimmwert immer 100 %.
1
7
Taste 2x drücken
press push-button 2x
A23: Timer EcoSwitch (AW23)
Timer or off. Adjustable time delay, see
Table
4 Staircase light dura-
tion
, default = 3 min.
Upon switch-on the dim value is always at 100 %.
A24: Minuterie TimeSwitch (AW24)
Retriggerbarer Timer mit einstellbarer Verzögerungszeit, siehe
Ta-
belle 4 Treppenlicht Einschaltdauer
, Standardzeit = 3 Min.
Beim Einschalten beträgt der Dimmwert immer 100 %.
1
8
Taste 2x drücken
press push-button 2x
A24: Timer TimeSwitch (AW24)
Timer retriggerable with adjustable time delay, see
Table
4 Staircase
light duration
, default = 3 min.
Upon switch-on the dim value is always at 100 %.
PIR (Bewegungsmelder), gleiche Funktion wie oben
Unterstützte EEP:
A5-07-01/02/03
A5-08-01/02/03
LRN-Taste an PIR
drücken
press LRN-button on
PIR
PIR (motion detector), same function as above
Supported EEP:
A5-07-01/02/03
A5-08-01/02/03
A25: Minuterie ComfortSwitch (AW25)
Kurzer Tastendruck: Retriggerbarer Timer mit einstellbarer Verzö-
gerungszeit, siehe
Tabelle 4 Treppenlicht
Einschaltdauer
, Standardzeit = 3 Min
Langer Tastendruck: Timer mit 4-facher Verzögerungszeit
Beim Einschalten beträgt der Dimmwert immer 100 %.
1
9
Taste 2x drücken
press push-button 2x
A25: Timer ComfortSwitch (AW25)
Short keystroke:
Timer retriggerable with adjustable time delay, see
Table
4 Staircase light duration
,
default = 3 min
Long keystroke:
Timer with fourfold time delay
Upon switch-on the dim value is always at 100 %.
LRN
leuchtet / illuminates
CLR
blinkt / blinks
Einlernen erfolgreich / Programming successful:
CLR
leuchtet 1 s und blinkt / lights up 1 s and blinks
Einlernen fehlgeschlagen / Programming failed:
LRN
blinkt / blinks
LRN
erlischt / goes out
CLR
erlischt / goes out


