00042058.DOC, Version 1.0
18/24
5. ASSEMBLY AND BASIC ADJUSTMENTS
The headshell, the turntable platter, the counterweight for the tone arm, and the dust cover are separately
packed to prevent damage to the turntable during transportation. After unpacking, the parts can be easily
assembled. The packing material should be kept for transportation purposes.
5.1 Mounting the turntable platter
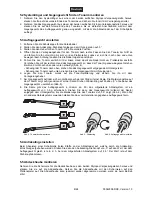
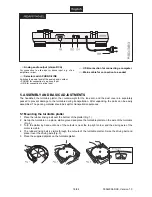
1 Place the rubber driving belt over the bottom of the platter (Fig. 1).
2 Set up the turntable on a plane, stable ground and place the turntable platter on the axle of the turntable
(Fig. 2).
3 Turn the platter by hand until one of the cutouts is near the top right corner and the driving axle of the
motor is visible.
4 The rubber driving belt is visible through the cutouts of the turntable platter. Seize the driving belt and
place it over the driving axle (Fig. 3).
5 Place the supplied slipmat on the turntable platter.
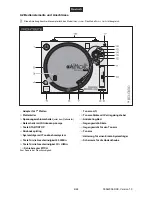
19
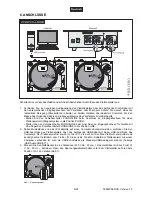
Analog audio output (stereo RCA)
For connection to a line input or phono input, e.g. of an
amplifier or mixer.
20
Selector switch PHONO/LINE
Switches the audio level of the analog audio output
• PHONO for connection to a phono input
• LINE for connection to a line input
21
USB connection for connecting a computer
22
Mains cable for connection to a socket

