A-276
Standard Photoelectric Sensors
Precautions
Installation and adjustment
1. Switch off power supply
2. Connect sensor 1 to the power supply station. Make sure
that the correct voltage value is adjusted. Max. 30 sensors
can be connected together. The power supply is linked
from oneswitch to the other via M12-connector.
3. Fix sensor, by using an adequate mounting bracket, in the
middle of between the conveyer rolls and twist the case
slighty backward (2-5°)
4. Turn black-coloured distance adjustment knob (Pos. 40)
and yellow coloured screw (Pos. 60) for near-side-detec-
tion carefully counterclockwise until minimum position is
reached
5. Switch on power supply
6. At first adjust the sensing distance by turning the black
knob, that at least 5 % of the switching distance value can
be guaranteed related to the reflecting background (check
by using a Kodak Gray Card with 90 % reflectivity)
7. Activate near-side detector by turning the yellow-coloured
knob (Pos. 60) clockwise - the red LED should not blink
and should light permanently when the object is detected.
Otherwise increase sensitivity by turning the yellow knob
clockwise
8. When object is removed, the red LED should not light or
blink
Recommended adjustment
The adjusted sensing-distance of the near-side detector
should not exceed the BGS-Settingdistance.
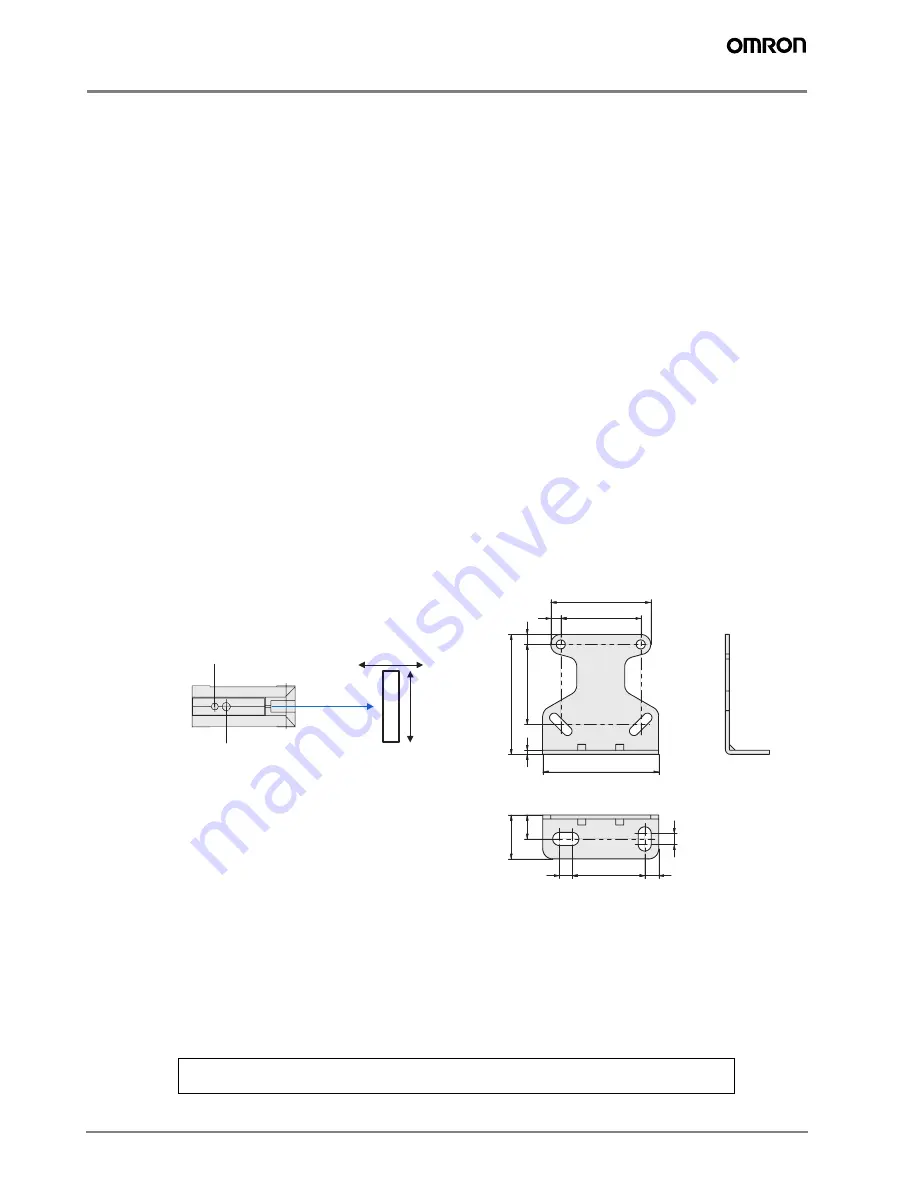
Correct operation
The moving di-
rection of the
sensor or object
should be prefer-
ably along the
optical axis of the
light beam. Lat-
eral approach is
also possible. Movement from the top to the bottom or oppo-
site can case malfunction and should be avoided.
In case of installing two sensors facing each other, the optical
axis should be moved to prevent any mutual interference.
Avoid influences of any strong ambient light sources that can
decrease the sensitivity of the sensor or cause instable work-
ing condition.
Connections and precautions
If the input/output lines of the photoelectric sensor are placed
in the same conduit or duct as power lines or high-voltage
lines, the photoelectric sensor could be induced to malfunc-
tion, or even be damaged by electrical noise. Either separate
the wiring or use shielded lines as input/output lines to the
photoelectric sensor.
The cord connected to the Sensor can be extended up to
50 m provided that the diameter of each wire is 0,3 mm² min-
imum.
Maintenance
Normally the F3C doesn’t need any maintenance. Only the
optical surfaces should be cleaned from time to time by using
a soft cloth.
Startup Operation
A maximum of 300 ms is required from the time power is
turned on until F3C is able to detect objects. If power is sup-
plied to the loads and the F3C from different sources, turn on
power to the F3C first.
Water resistivity
Do not use F3C in water, in rain or outdoors.
Accessories
Standard mounting bracket for easy installation. Ordering
number E39-L40
Movement of object
LED (light received)
Light beam
Sensing distance
adjuster
50
58
60
40
5
2
36.2
6.6
7
40
5
12
22
5.6
In the interest of product improvement, specifications are subject to change without notice.
ALL DIMENSIONS SHOWN ARE IN MILLIMETERS.
To convert millimeters into inches, multiply by 0.03937. To convert grams into ounces, multiply by 0.03527.
Cat. No.
E27E-EN-01


