67
ZX-T
Operation Manual
Sec
tio
n 4
Ot
he
r M
e
a
s
u
re
me
nts
Section 4
MAIN APPLICATIONS AND SETTING METHODS
Other Measurements
Measuring Gaps in Sensing Objects
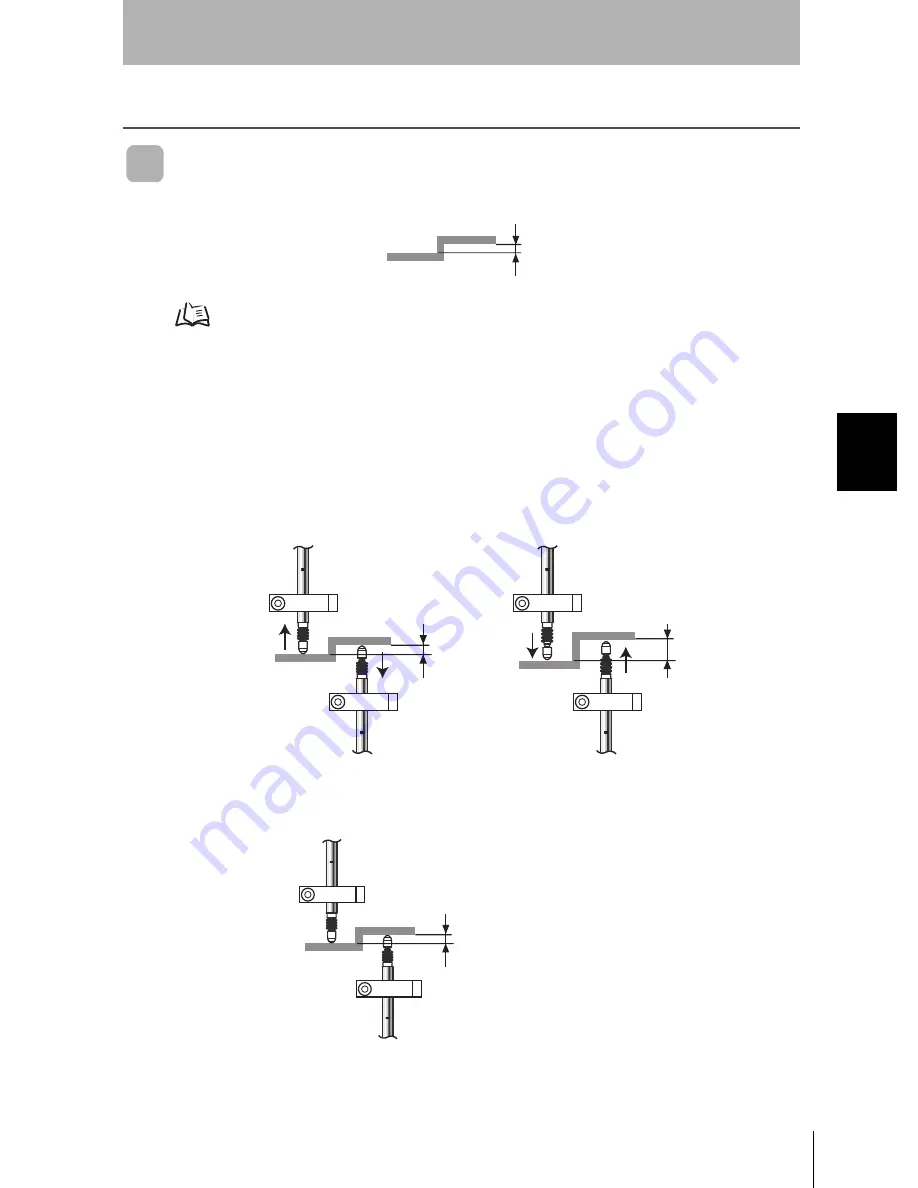
Gaps (G) in sensing objects can be measured using the thickness measurement.
The procedure is the same one used to measure thickness.
Measuring Thickness, p. 52
■
Gap Measurement Basics
❚
Using the Scale Inversion Function
Switch ON the Scale Inversion Function (INV) on the Amplifier Units to match changes
in gap size to changes in measured values on the display. (Inversion is turned OFF in
the default setting.)
❚
Setting the Gap (G) on the Zero Reset Display (ZRDSP)
G
For the default setting (OFF), the display value increases when the Sensor Head plunger is pressed.
If a measurement is taken with this setting, the display value will increase as the gap size decreases.
Changes are inverted if the Scale Inversion Function (INV) is set to ON. This means that changes in
the amount of displacement can be matched to changes in display values.
Large gap = Lower display value
Small gap = Higher display value
G
CH2
CH1
Set the reference sample gap.
Summary of Contents for ZX-T -
Page 1: ...OPERATION MANUAL Smart Sensors ZX T Series Cat No E346 E1 04 ...
Page 9: ...6 Preface Contents ZX T Operation Manual PREFACE ...
Page 15: ...12 Preface How to Use This Manual ZX T Operation Manual PREFACE ...
Page 16: ...Section 1 FEATURES 13 ZX T Operation Manual Section 1 FEATURES ZX T Features 14 ...
Page 53: ...50 Section 3 Function Transition Charts ZX T Operation Manual Section 3 BASIC OPERATION ...
Page 103: ...100 Section 5 Error Output Function ZX T Operation Manual Section 5 DETAILED SETTINGS ...
Page 113: ...110 Section 6 Initializing Settings Data ZX T Operation Manual Section 6 AUXILIARY FUNCTIONS ...


