background image

Beatnik™ Rhythmic Analyzer Model 

RA

800

User Guide


13 

Setting the Tempo


Set Tempo


The

set tempo

is the metronome marking that you set for the quarter 

note beat. For example, if the current settings display shows a set 
tempo of “120,” Beatnik is set to play 120 quarter note beats per 
minute.


To set the tempo using the selector:


1.  Press the Tempo button. The button illuminates, indicating the 

selector is controlling the tempo. 

2.  Turn the selector to display the desired tempo. 

3.  Press the Start button to start a practice session.


To set the tempo using the Tap Tempo function:


1.  With Beatnik paused, press the Click/Tap button once. 

2.  Strike the drum pad at least two times to set a tempo. 

3.  Press the Start button to start a practice session.


Note:

See “Click/Tap” for more information.


To set the tempo using the Tap Start function:


1.  With Beatnik paused, press the Click/Tap button twice. 

2.  Turn the selector until the desired count­off number is displayed. 

3.  Strike the drum pad to start the count­off, set the tempo, and start 

a practice session automatically.


Note:

See “Click/Tap” for more information. 

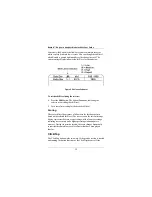
Measured Tempo


The

measured tempo

is the tempo of your strokes as Beatnik measures 

them. For example, if the set tempo is “120” and the measured tempo 
is on or around “130,” your strokes are occurring at a faster tempo 
than Beatnik, which means you’re playing ahead of the beat (i.e., 
rushing).

Summary of Contents for Model RA800P

Page 1: ...Model RA800P User Guide Designed and manufactured by Manual Revision 098 00002 008 May 2007 ...

Page 2: ...e The four vertical dotted lines on the display represent the four 16th notes in a quarter note To test your skills play the 16th notes with the metronome When you strike the drum pad Beatnik displays a real time view of your stroke timing and calculates a running score of your performance accuracy When you stop striking the drum pad Beatnik automatically switches to its History summary view that ...

Page 3: ... development of Beatnik Rhythmic Analyzers The Beatnik Design Team Mark Wilson Niru Nirumandrad Rusty Membreno Jim Dulaney Bob Snyder Recommended Practice Stands We recommend the Beatnik Stand see Optional Accessories pg 26 for its ease of use and durability This product can also be attached to any percussion practice pad bell stand or cymbal stand equipped with a standard 8 millimeter screw Warra...

Page 4: ...11 Attaching the AC Adapter 11 Inserting Batteries 11 Turning Beatnik On and Off 12 Overview of Setting up a Practice Session 12 Setting the Tempo 13 Set Tempo 13 Measured Tempo 13 Selecting a Note 14 Setting the Volume 14 Starting and Pausing a Practice Session 14 Using the Start Pause button 14 Using the Tap Start Control 15 The Accuracy Analyzers 15 Groove Analyzer 15 Subdivision Analyzer 16 Vi...

Page 5: ...Beatnik Rhythmic Analyzer Model RA800P User Guide v Product Specifications 26 Optional Accessories 26 ...

Page 6: ...e your technical precision and assess your strengths and weaknesses to help you speed up your progress toward rhythmic perfection After you set the desired rhythm simply start the rhythm playback and strike the touch sensitive practice pad Beatnik s large display shows a visual representation of each stroke in real time and records every stroke for a history view which lets you see exactly where y...

Page 7: ...Beatnik Rhythmic Analyzer Model RA800P User Guide 7 Figure 1 Top View Figure 2 Rear View ...

Page 8: ... and represents it as one or more pixels in the data display You can change the view to show your timing and rhythmic accuracy in a variety of ways to help you better understand your performance strengths and weaknesses Settings Panel The Settings panel includes the following controls Accuracy Analyzers Lets you select from two accuracy analyzers Groove Subdivision See Accuracy Analyzers Skill Let...

Page 9: ...u tap a count off and automatically start a practice session on the fly at the detected tempo See Click Tap Selector The selector lets you select settings for the currently active function When you press a button the button illuminates indicating that the selector controls that function Note All buttons work this way except the Reset Start Pause and Click Tap buttons To scroll between options or v...

Page 10: ...nect standard headphones equipped with a 3 5mm plug The output speaker is disconnected when a headphone plug is inserted in the Beatnik s headphone jack External speakers such as computer speakers can also be used if equipped with a 3 5mm plug AC Jack The AC jack lets you power Beatnik from a standard AC outlet using the optional Beatnik AC adapter or other adapter that confirms to the required sp...

Page 11: ...wer you can power Beatnik using the optional Beatnik adapter To attach the AC adapter 1 Plug the adapter s barrel plug into the AC jack on the back of Beatnik 2 Plug the other end of the adapter into a standard AC outlet Inserting Batteries If AC power is not available you can power Beatnik using six AA batteries To insert batteries 1 Remove the battery compartment cover by pressing the two flexib...

Page 12: ... for two seconds then sets up according to saved references To turn off Beatnik Set the Power Switch to Off Overview of Setting up a Practice Session Setting up a typical practice can be as simple as 3 steps 1 Turn on Beatnik using the Power Switch 2 Press the Start button to begin a practice session 3 Practice Additional steps or settings changes can include 4 Setting the desired accuracy analyze...

Page 13: ... paused press the Click Tap button once 2 Strike the drum pad at least two times to set a tempo 3 Press the Start button to start a practice session Note See Click Tap for more information To set the tempo using the Tap Start function 1 With Beatnik paused press the Click Tap button twice 2 Turn the selector until the desired count off number is displayed 3 Strike the drum pad to start the count o...

Page 14: ...ting the Volume The Volume function lets you adjust the volume of a playback session To set the volume 1 Press the Start Pause button to start a practice session 2 Press the Volume button once to activate the selector The Volume button illuminates to indicate the selector is controlling volume 3 Turn the selector to the desired volume The progress bar changes in the current settings display as you...

Page 15: ...s you analyze your performance skills in a unique way Groove Analyzer Groove Analyzer is intended to help you improve your ability to create and play in a groove This analyzer tests your ability to play with consistent tempo regardless whether it is ahead of or behind the beat of the metronome Groove features a horizontal tempo range with the set tempo displayed in the center a moving arrow that s...

Page 16: ... one 512th note The score is based on the timing precision of each note in relation to the metronome as well as the selected skill level View Options in Subdivision Analyzer Beatnik features three different ways to view the results of your practice session in Subdivision Analyzer You can use the Analyzer button and the Selector to set up the view you want Realtime This view displays a single touch...

Page 17: ...single pixel within the data display Over the course of the entire practice session the pixels accumulate from the bottom up to provide at a glance a clear picture of your timing tendencies For example a History view that shows the majority of the strokes pixels near a click marker means that you were very accurate On the other hand if the history view shows several pixels that are before and afte...

Page 18: ...nik lets you adjust the skill level to allow a wider margin of tolerance for timing accuracy You can select from the following levels Low Medium High Expert Beatnik calculates the margin of tolerance in 512th notes For example the Expert level allows a margin of a single 512th note to determine a perfect stroke That is to obtain a perfect score of 100 at the Expert level your stroke must be within...

Page 19: ...r is controlling the skill level 5 Turn the selector to display the desired skill level Scoring The score reflects the accuracy of all notes in the rhythmic pattern based on the selected skill level The score area on the current settings display represents the score as a percentage with a lower percentage indicating less accuracy and a higher percentage indicating more accuracy During the practice...

Page 20: ... if you reduce the click depth Beatnik still records and scores all strokes for the selected note subdivision To change the click depth 1 Press the Start Pause button to start playback 2 Press the Click Tap button to adjust the click depth Tap Tempo Tap Start Control The Tap control works as either a Tap Tempo control or a Tap Start control The Tap Tempo control simply sets the tempo based on stro...

Page 21: ...ce 2 Turn the selector to set the desired number of count off beats 3 Strike the set number of count off beats on the drum pad at the desired tempo Beatnik assumes your taps are quarter notes Beatnik starts automatically at the tempo of the count off beats 4 To stop a practice session started with Tap Start press the Start Pause button Figure 11 Tap Start ...

Page 22: ...on of all strikes during a practice session in the form of individual pixels Groove Analyzer an accuracy analyzer that tests your ability to play with consistent tempo regardless whether it is ahead of or behind the beat of the metronome History a view option that depicts each stroke as a single pixel within the data display for each vertical click marker Measured Tempo the tempo of your strokes a...

Page 23: ...an 8th note two vertical click markers appear on the data display Subdivision a rhythmic fraction of the main quarter note beat for example 8th notes and 16th notes Tap Tempo sets the tempo based on strokes on the drum pad allowing you to manually start a practice session later Tap Start sets the tempo and automatically starts a practice session based on a number of count off beats allowing you to...

Page 24: ...D data display 5 7 13 22 depth click 8 19 display current settings 7 drum pad 5 7 9 E expert skill level 15 G groove analyzer 12 22 H headphones 9 headphones jack 5 high skill level 15 history view 5 14 18 22 I introduction 5 L layout 5 low skill level 15 M measured tempo 7 12 17 22 medium skill level 15 metronome panel 5 8 N note selecting 18 P pause 7 18 pixel 7 13 14 22 power switch 5 9 powerin...

Page 25: ...16 scoring 15 16 selector 5 8 16 17 22 set tempo 17 22 settings panel 5 7 skill level 7 15 16 speaker 5 speaker jack 5 start pause button 7 18 20 subdivision analyzer 13 23 T tap set 8 tap start 8 17 18 19 20 23 tap tempo 17 19 23 tempo measured 7 12 17 22 setting 8 17 V view options 13 voume button 7 8 21 ...

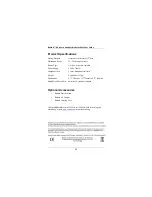
Page 26: ...d Power Supply 9 Volts 300mA Headphone Jack 3 5mm headphones included Weight 2 5 pounds 1 33kg Dimensions 9 75 76mm x 13 330mm x 2 75 69mm Stand Screw Thread Size 8mm screw stand not included Optional Accessories 1 Beatnik Practice Stand 2 Beatnik AC Adapter 3 Beatnik Carrying Case Call the OnBoard Research Toll Free at 1 800 340 8890 for pricing and availability or go to www tuners com for online...

Page 27: ...Beatnik Rhythmic Analyzer Model RA800P User Guide 27 Notes ...

Reviews: