background image


Dear Customer 

Thank you for your purchase of our Treka rollator.  

Please find the following instrutions for use and product specifications. 

We wish you all the best with your new rollator.  


Product Specifications 

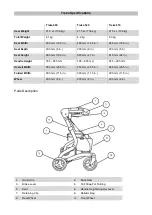
The Treka rollator has been designed to assist the user to walk, rest and carry small items 
of shopping for both indoor and outdoor use on flat surfaces by a single individual with 
limited mobility with a maximum weight as shown below. 

It is important that the user reads and understands the safety advice given within this 
manual before attempting to operate the product to avoid possible injury to the user or 
bystanders and avoid damage to the wheeled walker or surrounding property. 


SUMMARY  

The Treka rollator has been manufactured from high quality materials including the 
aluminum frame, padded seat and locking brakes. The handles are adjustable in height 
and the wheeled walker folds easily for transport or storage. 

The Treka rollator has been designed to assist the user to walk, rest and carry small items 
of shopping for both indoor and outdoor use on flat surfaces by a single individual with 
limited mobility with a maximum weight as shown below. 

The Treka rollator has been tested according to BS ENISO 11199-2:2005 


Summary of Contents for Treka 480

Page 1: ...ROLLATOR USER MANUAL...

Page 2: ...en within this manual before attempting to operate the product to avoid possible injury to the user or bystanders and avoid damage to the wheeled walker or surrounding property SUMMARY The Treka rolla...

Page 3: ...in Seat Height 480 mm 18 9 in 540 mm 21 in 610 mm 24 in Handle Height 765 855 mm 795 885 mm 875 995 mm Overall Width 650 mm 25 5 in 650 mm 25 5 in 650 mm 25 5 in Folded Width 290 mm 11 5 in 290 mm 11...

Page 4: ...re sitting on the rollator 1 Remove all packaging and set out parts 2 Un folding the rollator To open the rollator un hook the RED retaining clip as shown by lifting upwards Push down on either side o...

Page 5: ...the open position as shown below insert the handles making sure the rectangular slots are facing inwards Adjust the handles to the required height Re adjust the handle height if necessary by releasin...

Page 6: ...de of the rollator Secure the back strap into position by tightening the screw and nut 6 Installing the shopping bag Slide the hooks located either side of the bag onto the brackets positioned under t...

Page 7: ...shown and always brake slowly and steadily Lifting the brake also releases the brake from locked position 8 Locking the Brakes Parking Position Press both brake levers down to apply and lock the brak...

Page 8: ...nd slowly lower your weight onto the seat WARNING NEVER MOVE ROLLATOR WHILE SEATED WARNING ALWAYS APPLY PARKING BRAKES BEFORE SITTING Maintenance and other 1 Do not use strong corrosive cleaners to cl...

Reviews: