SKU 97439
For technical questions, please call 1-800-444-3353.
Page 4
asseMblY instructions
read the entire iMportant
saFetY inForMation section
at the beginning of this manual
including all text under
subheadings therein before set
up or use of this product.
note:
For additional information regarding
the parts listed in the following pages,
refer to the Assembly Diagram near
the end of this manual.
note:
The Greenhouse is heavy and
unwieldy when fully assembled. It
should be assembled near the area
where it will be anchored. The area
should be firm, level, and provide
shelter from the wind.
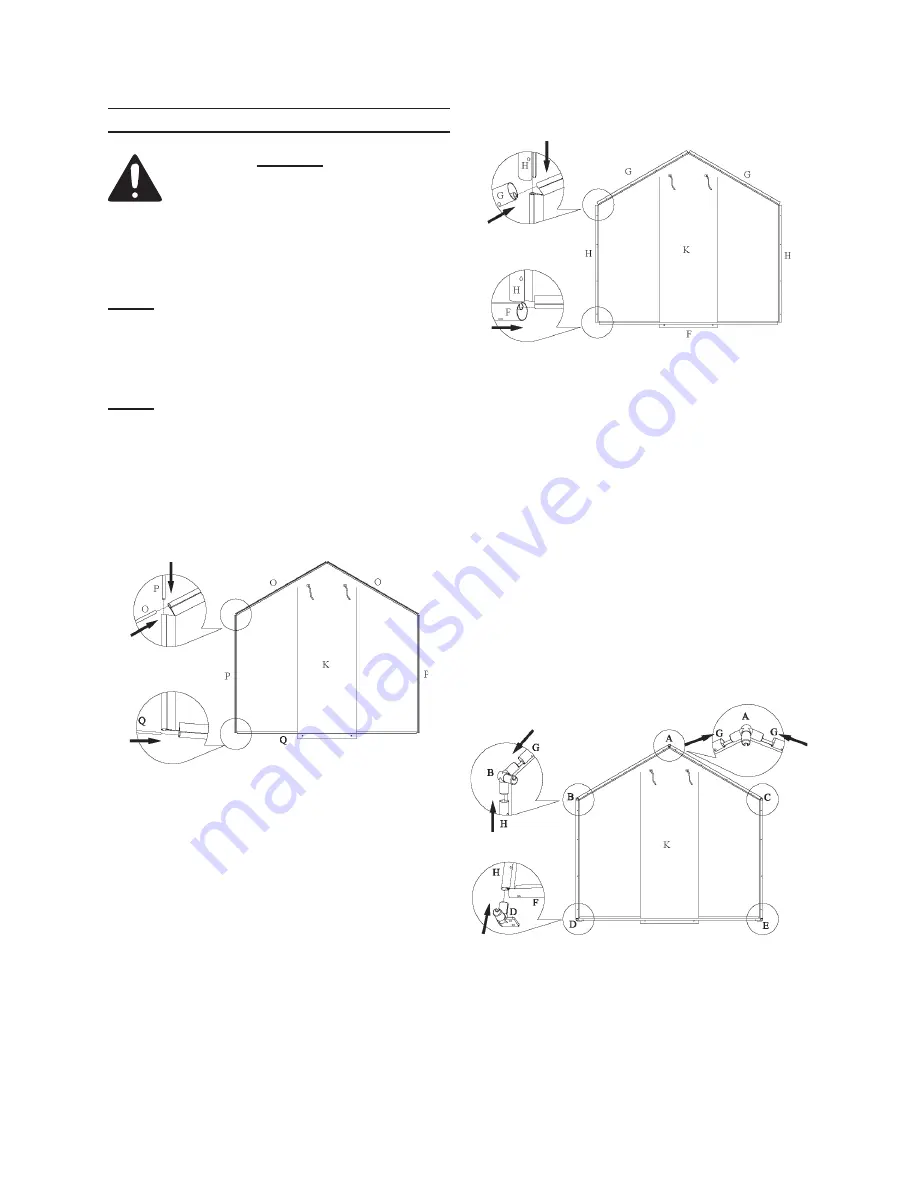
Figure for slat assembly (steps 1-3)
1. Slide two Rafter Slats (O) into the
sleeves on the top of the Front Panel
(K).
Slide two Side Slats (P) into the
2.
sleeves on the sides of the Front
Panel.
Slide Bottom Slat (Q) into the sleeve
3.
on the bottom of the Front Panel.
Figure for pole assembly (steps 4-6)
4. Fit the covered Rafter Slats into the
grooves in the Rafter Poles (G) and
slide into place, with the holes on the
Rafter Poles facing toward you (see
insets above).
Fit the covered Side Slats into the
5.
grooves in the Side Poles (H) and
slide into place, with the holes on the
Side Poles facing toward you.
Fit the covered Bottom Slat into the
6.
groove in the Bottom Pole (F) and
slide into place, with the holes on the
Bottom Pole facing toward you.
Figure for connector ass’y (steps 7-8)
7. Secure the Rafter Poles together at
the peak of the roof using Connector
A. Make sure the unconnected point
on the Connector faces towards you.


