background image

8

Inserting and charging the battery

• 

Remove the cover on the side of the camera and insert the 

battery so that the metal pins connect. 

• 

Make sure the battery is inserted firmly and doesn‘t fall out.

• 

Use the Micro USB cable to connect the camera to a computer 

or charging adapter to charge the battery.

• 

The red LED indicates that the camera is charging. The LED 

automatically turns of when the device is fully charged.

• 

You can record video while charging the battery.

Inserting a Micro SD card

• 

Remove the cover on the side of the camera and insert the 

Micro SD Card in the appropriate slot.

• 

To remove the card, push it a little deeper into the slot. The card 

will be automatically ejected.

• 

The camera supports Micro SD cards with up to 64GB memory. 

For best results, Please use cards from reputable brands.

Powering the Camera On and Off

Press the power button for about 3 to 5 seconds to power the 

camera on or off

Getting Started

Recording and recording options

• 

Briefly push the power button to switch between video 

recording, photography, slow motion camera modes. The 

symbol in the top left corner of the screen indicates which mode 

is currently active.

Summary of Contents for PanoView 360

Page 1: ...PanoView 360 presents Quickstart Guide Schnellanleitung 360 Panorama Camera...

Page 2: ...owing instructions and safety advice carefully before using the product Danke dass Sie sich f r die PanoView 360 entschieden haben Mit dieser Kamera k nnen Sie hochwertige Panorama Videoaufnahmen mach...

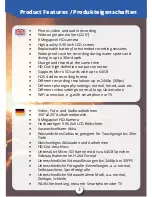
Page 3: ...nt video settings normal loop slow motion WiFi connection e g with smartphone or TV Video Foto und Audioaufnahmen 360 x220 Aufnahmebereich 8 Megapixel HD Kamera Hochwertiger 0 96 Zoll LCD Bildschirm A...

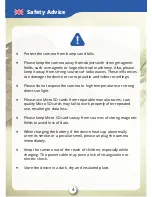
Page 4: ...ase use Micro SD cards from reputable manufacturers Low quality Micro SD cards may fail to work properly after repeated use resulting in data loss Please keep Micro SD cards away from sources of stron...

Page 5: ...von bekannten Herstellern Minderwertige SD Karten k nnen nach wiederholtem Gebrauch ggf schnell versagen Bitte halten Sie Speicherkarten von starken Magnetfeldern fern um Datenverlust zu vermeiden Sol...

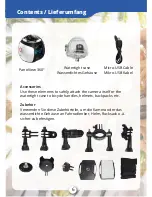
Page 6: ...the camera itself or the watertight case to bicycle handles helmets backpacks etc Zubeh r Verwenden Sie diese Zubeh rteile um die Kamera oder das wasserdichte Geh use an Fahrradlenker Helm Rucksack o...

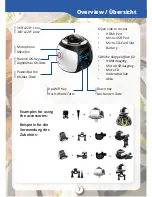
Page 7: ...Taste 360 x220 Lens 360 x220 Linse Microphone Mikrofon Open side to reveal HDMI Port Micro USB Port Micro SD Card Slot Battery Seitliche Klappe ffnen f r HDMI Ausgang Micro USB Ausgang Micro SD Karten...

Page 8: ...a Micro SD card Remove the cover on the side of the camera and insert the Micro SD Card in the appropriate slot To remove the card push it a little deeper into the slot The card will be automatically...

Page 9: ...and easy to use way to chose recording modes and settings as well as see a live preview of the recording Before using WiFi functionality please install the XDV360 app on your smartphone Download the...

Page 10: ...inlegen einer Micro SD Karte ffnen Sie die seitliche Klappe der Kamera und schieben Sie die Micro SD Karte in den daf r vorgesehenen Schlitz Um die Karte wieder zu entnehmen dr cken Sie sie ein St ck...

Page 11: ...et wurde die Kamera erfolgreich mit einem Ger t verbunden Ist die LED aus so bedeutet dies dass die WLAN Funktion der Kamera derzeit nicht aktiv ist Verbinden Sie Ihr Smartphone mit dem WLAN Netzwerk...

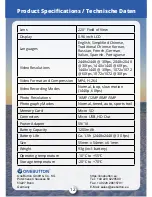
Page 12: ...x2048 30fps 1440x1440 60fps 1440x1440 30fps 1072x1072 60fps 1072x1072 30fps Video Format and Compression MP4 H 264 Video Recording Modes Normal loop slow motion 1440p 60fps Photo Resolutions 16MP 12MP...

Page 13: ...13...

Reviews: