15
Mounting the Unit
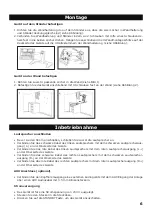
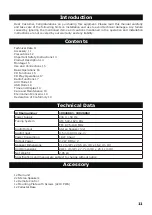
To mount the unlt to the stand
1.
Use 2 holes of the wall mounting bracket to match the 2 holes in the stand (refer to the follwring
drawing).
2. Use a screwdriver to Insert 2 screws to make the wall mounting steadily connecting to the stand,
then hang the 4 slots on the bottom of the unit to the 4 hooks of the wall mounting bracket (refer
to the follwring drawing).
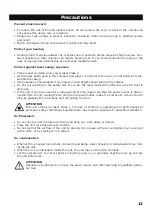
To mount the unit to the wall
1. First cut 4 suilable holes on the wall (as drawing 1).
2. Use screwdriver to Insert 4 screws to make the bracket steadily on the wall (as drawing 2).
Use and Connections
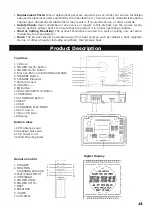
Speakers
• Always connect the speakers before connecting the power supply.
• Connect the black wire of the left speaker to the black terminal marked (L-) on the rare of the
main unit.
•
Connect the red wire of the left speaker to the red terminal marked (L+) on the rare of the main
unit.
• Connect the black wire of the right speaker to the black terminal marked (R-) on the rare of the
main unit.
•
Connect the red wire of the right speaker to the red terminal marked (R+) on the rare of the main
unit.
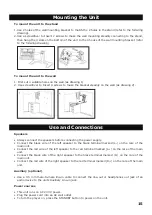
Auxiliary (optional)
• Use a 3.5 mm male-to-male line-in cable to connect the line-out or headphones out jack of an
audio device to the units Auxiliary Line-in jack.
Power sources
•
This unit runs on AC 230 V power..
• Plug the power cord into an AC wall outlet.
• To turn the player on, press the STANDBY button to power on the unit.

