Section Heading
12
Oneida Air Systems, Inc.
8
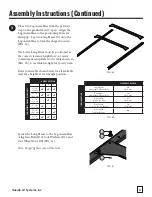
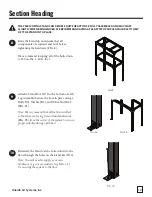
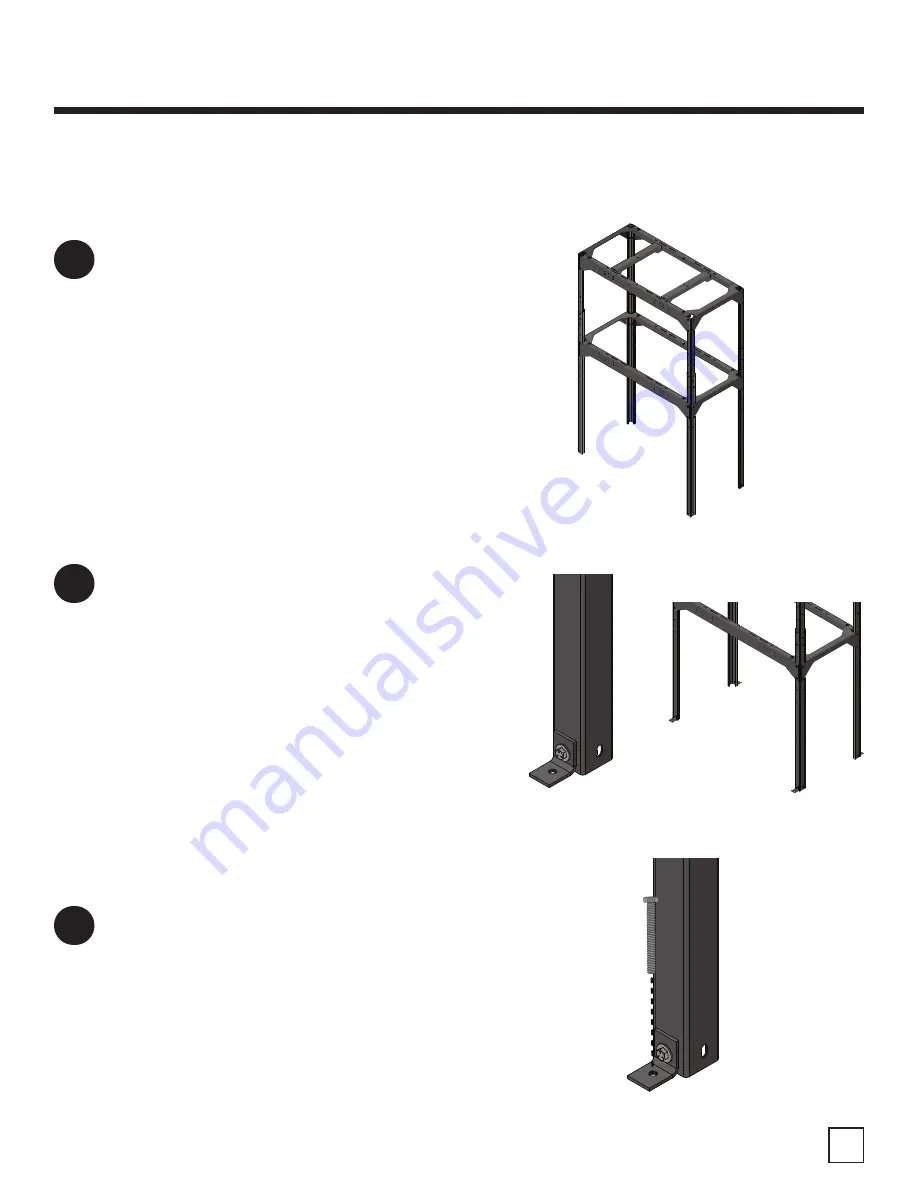
Raise the Stand up and ensure that all
components are squared and level before
tightening the hardware [FIG. 8].
We recommend torquing all of the bolts down
to 250 in.-lbs. (~20 ft.-lbs.).
9
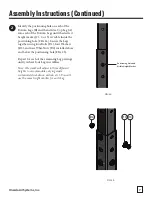
Attach a Stand Foot (D1) to the bottom of each
Leg Assembly. Secure the Foot in place using a
Bolt (D2), Washer (D3), and Whiz-Nut (D4) .
[FIG. 9a]
Note: We recommend that all feet be installed
so that they are facing forward and backwards
[FIG. 9b]
from the center of the system to ensure
proper stability during operation.
10
If desired, the Stand can be bolted down to the
floor through the holes on the Stand Feet (D1).
Note: You will need to supply your own
hardware (e.g. screws, washers, lag bolts, etc.)
for securing the system to the floor.
THE TELESCOPING STAND CAN BECOME QUITE HEAVY ONCE FULLY ASSEMBLED AND MAY SHIFT
SLIGHTLY WHEN BEING MOVED. WE RECOMMEND HAVING AT LEAST TWO PEOPLE AVAILABLE TO HELP
LIFT THE STAND INTO PLACE.
FIG. 9b
FIG. 10
FIG. 8
FIG. 9a


