ASSEMBLY INSTRUCTIONS
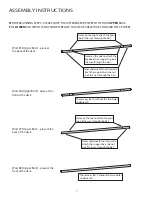
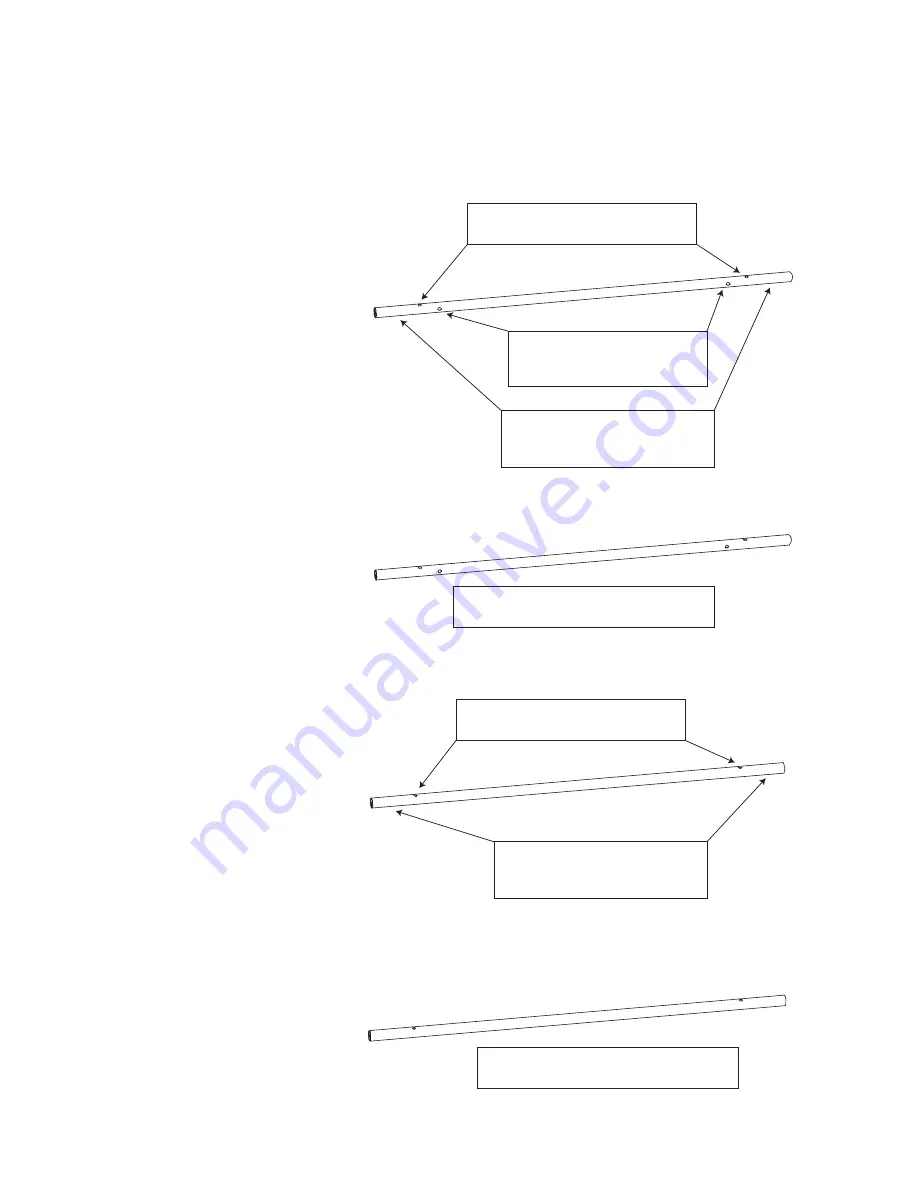
BEFORE BEGINNING STEP 3, PLEASE NOTE THE DIFFERENCES BETWEEN THE FOUR
UPPER
BARS
(THE
LOWER
BAR, WHICH IS NOT SHOWN BELOW, HAS TWO SCREW HOLES TOWARD THE CENTER).
(Part #5) Upper Bar A
- place at
the back of the desk.
(Part #6) Upper Bar B
- place at the
front of the desk.
(Part #7) Upper Bar C
- place at the
back of the desk.
(Part #8) Upper Bar D
- place at the
front of the desk.
Holes on the top to attach the glass
(go all the way through the bar)
Holes on the side to attach the
keyboard tray supports (go all
the way through the bar)
Holes underneath (not shown) to
attach the support bars (do not
go all the way through the bar)
Holes on the top to attach the glass
(go all the way through the bar)
Holes underneath (not shown) to
attach the support bars (do not
go all the way through the bar)
The same as Bar A without the two holes
underneath
The same as Bar C without the two holes
underneath
7

