


M A N U T E N Z I O N E
197 / 216
XS10000_manual_ger_eng_it_V1.1.2.doc
R. Kistler
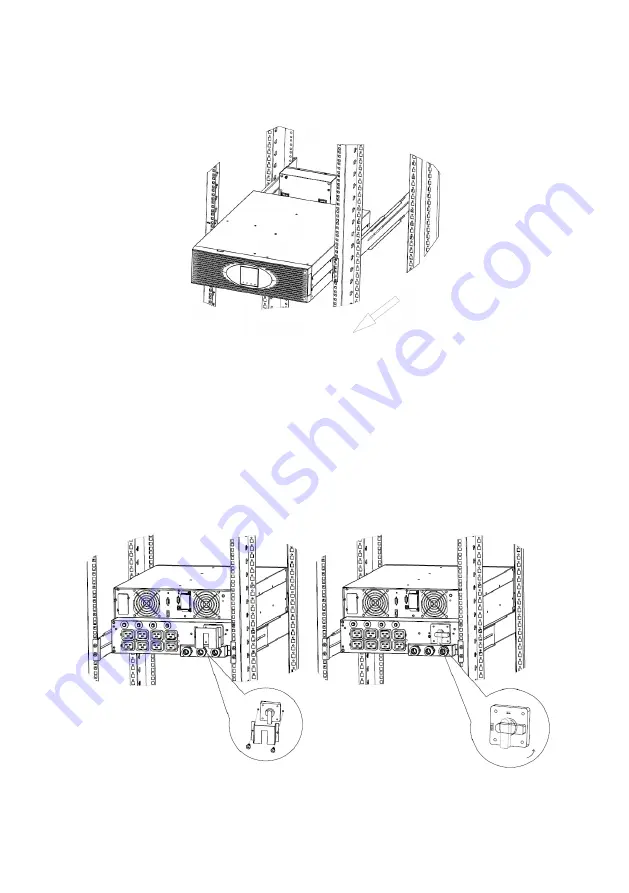
3. Allentare la staffa di montaggio
19“ dell’UPS sul lato anteriore
del rack ed estrarre
l’UPS dal rack (vedi Figura 36).
Figura 36: Smontaggio del sistema XANTO S 6000, 3/3
4. Svitare la staffa di montaggio
19“ dall’UPS.
5. Il montaggio del nuovo sistema UPS avviene nella sequenza
inversa.
XANTO S 10000
1. Rimuovere il coprifusibile dal bypass di manutenzione. A tal fi-
ne allentare 2 viti. Commutare il bypass di manutenzione su
Bypass (vedi Figura 37).
Figura 37: Smontaggio del sistema XANTO S 10000, 1/3
Summary of Contents for XANTO S 10000
Page 2: ...2 216 XS6000 XS10000_manual_ger_eng_it_V1 1 2 doc R Kistler ...
Page 72: ...72 216 XS6000 XS10000_manual_ger_eng_it_V1 1 2 doc R Kistler ...
Page 74: ...74 216 XS6000 XS10000_manual_ger_eng_it_V1 1 2 doc R Kistler ...
Page 144: ...144 216 XS6000 XS10000_manual_ger_eng_it_V1 1 2 doc R Kistler ...
Page 146: ...146 216 XS6000 XS10000_manual_ger_eng_it_V1 1 2 doc R Kistler ...
Page 216: ...216 216 XS6000 XS10000_manual_ger_eng_it_V1 1 2 doc R Kistler ...


