


W A R T U N G
54 / 216
XS10000_manual_ger_eng_it_V1.1.2.doc
R. Kistler
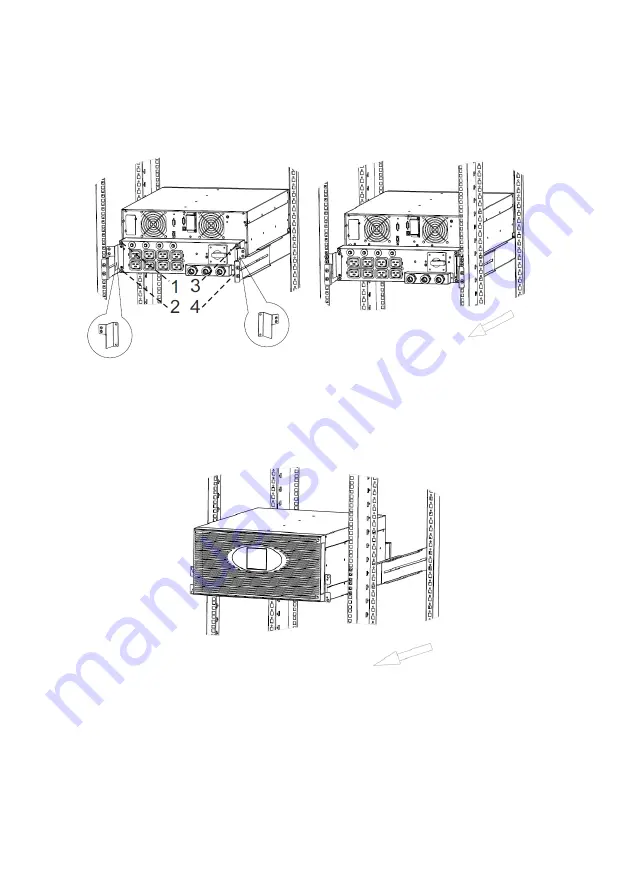
2. Befestigen Sie die PDU mit den Hilfswinkeln am Rack und
trennen Sie diese von der USV-Anlage. Lösen Sie hierzu 4
Schrauben (siehe Abbildung 38).
Abbildung 38: Ausbau XANTO S 10000, Schritt 2/3
3. Lösen Sie die
19“ Montagewinkel der USV-Anlage an der Vor-
derseite des Racks und ziehen Sie die USV-Anlage aus dem
Rack (siehe Abbildung 39).
Abbildung 39: Ausbau XANTO S 10000, Schritt 3/3
4. Schrauben Sie die
19“ Montagewinkel von der USV-Anlage
ab.
5. Der Einbau der neuen USV-Anlage erfolgt in umgekehrter
Reihenfolge.
Summary of Contents for XANTO S 10000
Page 2: ...2 216 XS6000 XS10000_manual_ger_eng_it_V1 1 2 doc R Kistler ...
Page 72: ...72 216 XS6000 XS10000_manual_ger_eng_it_V1 1 2 doc R Kistler ...
Page 74: ...74 216 XS6000 XS10000_manual_ger_eng_it_V1 1 2 doc R Kistler ...
Page 144: ...144 216 XS6000 XS10000_manual_ger_eng_it_V1 1 2 doc R Kistler ...
Page 146: ...146 216 XS6000 XS10000_manual_ger_eng_it_V1 1 2 doc R Kistler ...
Page 216: ...216 216 XS6000 XS10000_manual_ger_eng_it_V1 1 2 doc R Kistler ...


