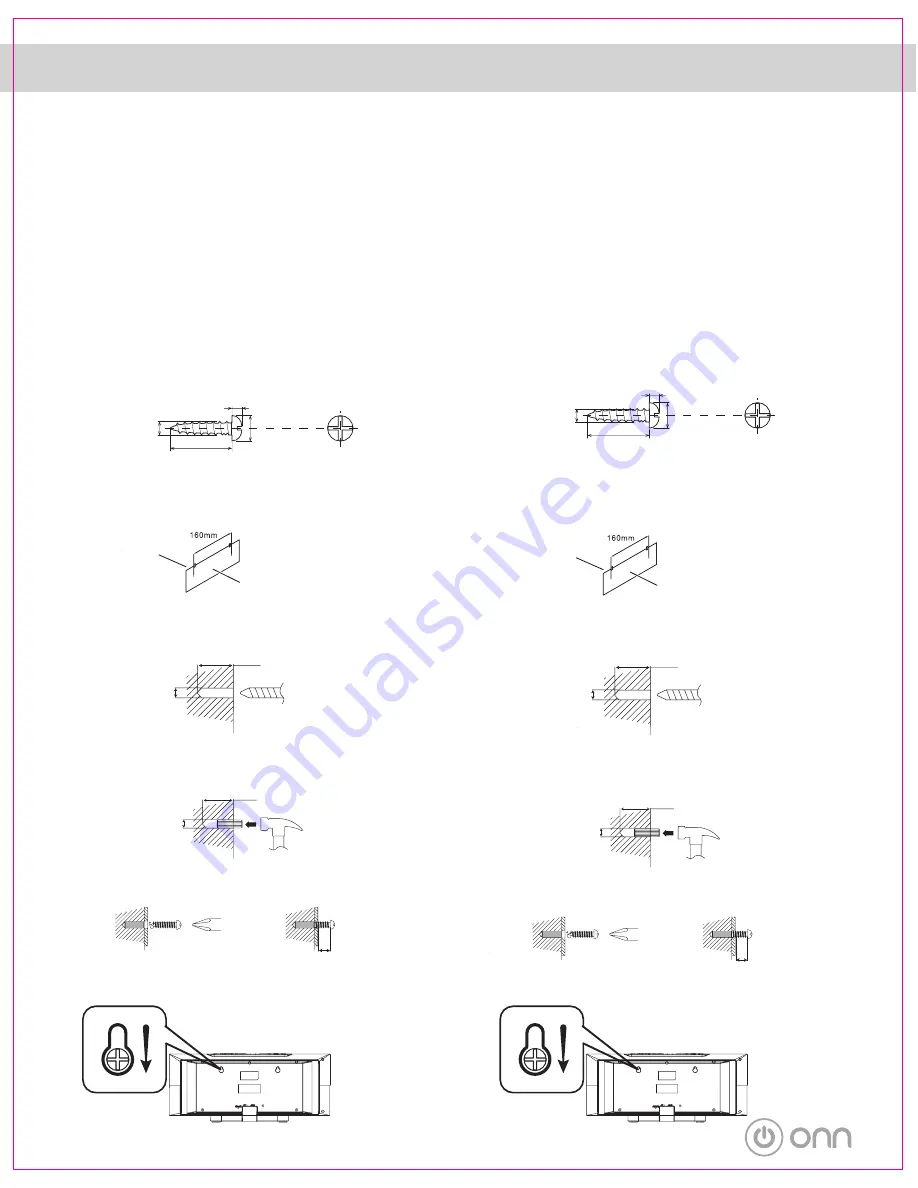
WALL MOUNT PREPARATION/PRÉPARATION POUR MONTAGE MURAL
- 5 -
To mount the unit on the wall
CAUTION:
• Be very careful to prevent the unit 2.1 kg (4.2 bs.) from falling when
mounting on the wall.
• Before mounting, check the wall strength. (Do not put on the veneer
plaster or whitewashed wall. The unit may fall.) If unsure, consul a
qualified service technician.
• Mounting screws are not supplied. Use appropriate ones.
• Check all wall mount screws for looseness.
• Select a good location. If not, accidents may occur or the unit may
get damaged.
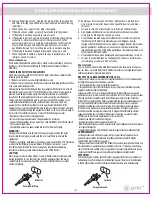
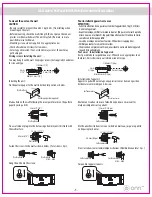
Driving screws: Installing the unit:
You may hang it on the wall. Use proper screws (not supplied). See below
for size and type.
Installing the unit:
Fix the pattern paper to the wall in horizontal position as below.
Make a hole on the wall following the screw point marks on the pattern
paper by using a drill.
Fix a wall mount plug into the hole using a hammer,until it is flush with
the wall surface.
Fasten the screws to the wall as shown below. (Total screws: 2 ps).
Hang the unit onto the screws.
Pour installer l'appareil sur le mur
ATTENTION :
• Faire très attention de ne pas laisser tomber l’appareil de 2,1 kg (4,2 lb) lors
d'un montage mural.
• Avant le montage, vérifier la résistance du mur. (Ne pas monter sur du plâtre
mince ni sur un mur blanchi. l’appareil risque de tomber.) Si un doute existe,
consulter un technicien qualifié.
• Les vis de montage ne sont pas fournies. Utiliser des vis appropriées.
• Vérifier que toutes les vis sont bien serrées.
• Choisir un bon emplacement. Sinon, un accident peut se produire l’appareil
risque d'être endommagé.
Pour visser : Installation de l’appareil :
Il est possible de le suspendre au mur. Utiliser des vis appropriées (non
fournies). Voir ci-dessous pour la dimension et le type.
Installation de l’appareil :
Apposer le gabarit de montage en papier sur le mur dans une position
horizontale comme indiqué ci-dessous.
Réaliser un trou dans le mur à l'aide d'une perceuse en suivant les
marques indiquées sur le gabarit.
Mettre une cheville dans le trou à l'aide d'un marteau, jusqu'à ce qu'elle
ne dépasse plus du mur.
Visser les vis dans le mur comme indiqué ci-dessous. (Nombre de vis au total : 2 pc.)
Suspendre l’appareil aux vis.
TM/MC
Surface murale
Wall surface
Pattern paper (no supplied)
Gabarit (non fourni)
5 mm
3/16 po
5 mm
3/16’’
3\b2 mm (1/8 po)
3\b2 mm (1/8’’)
9 mm (3/8’’)
Min\b 22 mm (7/8 po)
Min\b 22 mm (7/8’’)
32 mm (1-1/4 po)
32 mm (1-1/4 po)
32 mm (1-1/4’’)
32 mm (1-1/4’’)
8-9 mm (3/8 po)
8-9 mm (3/8’’)
Surface murale
Surface murale
Surface murale
Surface murale
Wall surface
Wall surface
Wall surface
Wall surface
4/b3 ~ 4/b8
4/b3 ~ 4/b8
9 mm (3/8 po)


