background image


SAFETY INFORMATION ........... 

3


PARTS INCLUDED .................... 

4


CONTROLS ................................ 

5


USING THE TOASTER OVEN ..... 

5


ACCESSORIES ........................... 

10


CARE AND CLEANING .............. 

10


TROUBLESHOOTING ................ 

10


LIMITED WARRANTY ................... 

11


CONSUMER SUPPORT ................ 

12


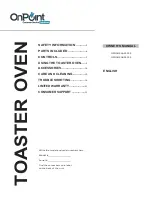
OWNER’S MANUAL 


OPG9OCAASSPSS 

OPG9OCABSSPSS


ENGLISH


Write the model and serial numbers here:


Model #   


Serial #    


Find these numbers on a label 
on the back of the unit.


TO

AS

TE

R

 OV

EN


Summary of Contents for OPG9OCAASSPSS

Page 1: ...N 5 ACCESSORIES 10 CARE AND CLEANING 10 TROUBLESHOOTING 10 LIMITED WARRANTY 11 CONSUMER SUPPORT 12 OWNER S MANUAL OPG9OCAASSPSS OPG9OCABSSPSS ENGLISH Write the model and serial numbers here Model Seri...

Page 2: ...manufacturer may cause injuries Do not store any materials other than manufacturers recommended accessories in this oven when not in use This appliance is intended for indoor household use only Do no...

Page 3: ......

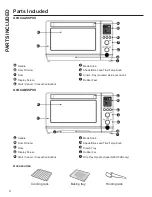
Page 4: ...umb Tray Located inside ovendoor Rubber Feet Handle Door Window Door Display Screen Start Cancel Convection Buttons Shade Slices and Time Temp Knob Crumb Tray Rubber Fee Drip Tray Handle model G90OCAB...

Page 5: ...ssing knob button toggles between adjustment of slices shade or time temperature depending on the cooking mode selected Convection Fan Icon Displays when convection fan is activated Time Display Displ...

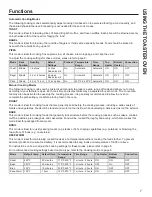
Page 6: ...reen will illuminate and all icons will briefly display By default the LCD screen will display theTOAST cooking mode Before First Use It is recommended to operate the oven empty in ROAST mode for 20 m...

Page 7: ...cooking process It is generally recommended to allow the oven to complete the preheating cycle before placing food in the oven ROAST This mode is ideal for cooking foods that are generally solid befo...

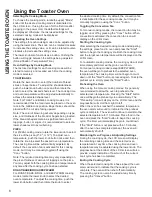
Page 8: ...des rotate the lower knob to select the desired oven temperature To adjust the cooking time push the lower knob button and then rotate the knob to select the desired cooking time By default the convec...

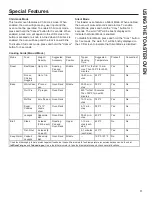
Page 9: ...ty Suggested Accessory Rack Position Typical Cooking Time Suggested Temperature Preheat Convection Roast Beef Roast Up tp 3 lb Roasting Pan and Oven Rack Middle 450 F for the first 15 min utes Then 35...

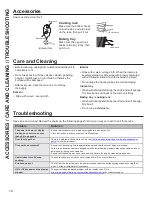
Page 10: ...er Save time and money Review the charts on the following pages first and you may not need to call for service Problem Solution The power indicator or display window does not turn on even though it is...

Page 11: ...service at https www onpointwarranty com small appliances cx portal For Terms and Conditions please visit https f hubspotusercontent20 net hubfs 4854028 GE_First 20Build RefurbGoodsT C pdf Staple you...

Page 12: ...ion and prompt service under the terms of your warranty should the need arise Register your appliance at https www onpointwarranty com small appliances cx portal Contact Us If you are not satisfied wi...

Reviews: