7. Additional Software Options
7.1. Compute Box/Eye Box
7.1.1. Ethernet Interface Setup
A proper IP address must be set for the Compute Box/Eye Box and the robot/computer to be
able to use the Ethernet interface. The IP address can be configured using DIP switches 3 and
4.
WARNING:
Stop the robot program before you change any Ethernet interface settings.
NOTE:
Configuring DIP switch 3 will remove any previously set static IP address.
To change between modes, first change the DIP switches and then cycle the
Compute Box/Eye Box power so the changes will take effect.
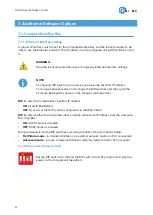
DIP 3 - sets the Compute Box / Eye Box IP address
•
ON: Fixed IP (192.168.1.1)
•
OFF: Dynamic or Static IP (can be configured via the Web Client)
DIP 4 - sets whether the connected robot or laptop will receive IP address from the Compute
Box / Eye Box
•
ON: DHCP server is disabled
•
OFF:DHCP server is enabled
We recommend to set the DIP switches according to either of the two options below:
•
Fix IP/Auto mode - in simple installations (no external network and/or no PLC connected)
•
Advanced mode - in more complex installations (external network and/or PLC are used)
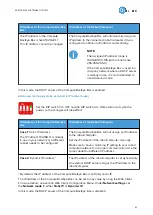
Fix IP/Auto mode (factory default)
Set the DIP switch 3 to ON and the DIP switch 4 to OFF position and cycle the
power so the changes will take effect.
ADDITIONAL SOFTWARE OPTIONS
42
Summary of Contents for 2FGP20
Page 1: ...USER MANUAL FOR UR ROBOTS v1 13 0 Original Instructions...
Page 62: ...Illustration Pad position Maximum force N 2 200 3 100 4 400 HARDWARE SPECIFICATION 62...
Page 71: ...8 2 3 Tools 8 2 3 1 2FGP20 All dimensions are in mm and inches HARDWARE SPECIFICATION 71...
Page 79: ...12 Certifications CERTIFICATIONS 79...
Page 80: ...12 1 EMC 12 2 2FGP20 Environment CERTIFICATIONS 80...
Page 81: ...12 3 Declaration of Incorporation 12 3 1 2FGP20 CERTIFICATIONS 81...


