background image


HOBO U30 Station (NRC) User’s Guide 

61 

Time Accuracy 

The internal clock in the HOBO U30 Station is set by the time zone when 
the logger was launched and it will not change after a spring or fall time 
change. If you want to see the data in HOBOware Pro in the new time, 
change the time zone offset accordingly when you open the data file. 

There are two common sources of errors with time reporting. 


Launch time loss. 

The HOBO U30 Station may lose up to two 

seconds when it is launched. This is unavoidable. 


Clock drift. 

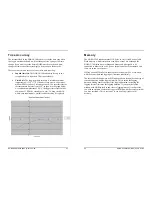
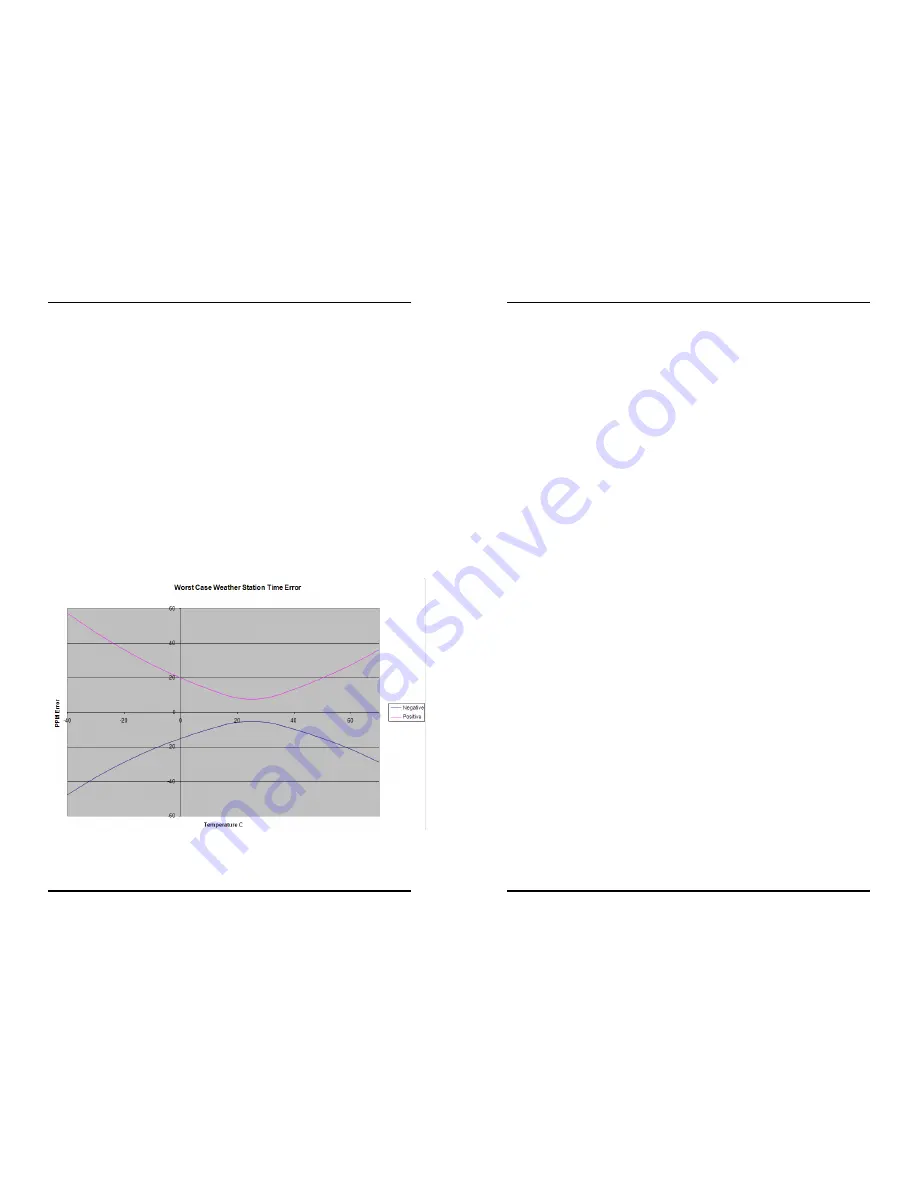
The long-term time accuracy is related to ambient 

temperature. At 25°C (77°F), the worst-case error is ±8 parts per 
million (PPM), or about 5 seconds per week. The error increases as 
the temperature deviates from 25°C, as shown in the graph below. 
At a constant temperature of -20°C, the logger time error could be 
as much as 35 PPM (21 seconds per week). To keep clock drift 
within your requirements, periodic relaunches may be required. 


62 

HOBO U30 Station (NRC) User’s Guide 

Memory 

The HOBO U30 Station contains 512K bytes of very reliable non-volatile 
Flash memory, which retains data even if power runs out. Although the 
HOBO U30 Station has a rechargeable battery and is designed to be 
connected to either solar or AC power, the data would still be retained even 
if it were to run out of power. 

If Wrap Around When Full is enabled, the oldest data will be overwritten 
with the newest data and logging will continue indefinitely. 

The rate at which the memory will fill up depends on the number and type of 
sensors connected and the logging interval. This is called the logging 
duration. Adding sensors decreases the logging duration; increasing the 
logging interval increases the logging duration. If you open the launch 
window with HOBOware Pro and select a logging interval, it will provide 
you with an estimate of when the logger will fill up with the sensor suite that 
you have installed. (This is just a way to see how long it takes to fill 
memory. 

Summary of Contents for HOBO U30 NRC

Page 1: ...tion All rights reserved Onset HOBO and HOBOware are trademarks or registered trademarks of Onset Computer Corporation for its data logger products and configuration interface software All other trade...

Page 2: ...r an Onset Authorized Dealer Mailing Address P O Box 3450 Pocasset MA 02559 3450 Phone 1 800 LOGGERS 1 800 564 4377 or 508 759 9500 Fax 508 759 9100 Hours of Operation 8 AM to 5 PM ET Monday through F...

Page 3: ...stalling Grounding Wire 30 Installing Weatherproof Cable Channel s 31 Connect Solar Panel or AC Power 35 Launching the U30 NRC in the Field 36 Chapter Four The Battery 37 iv HOBO U30 Station NRC User...

Page 4: ...HOBO U30 Station NRC User s Guide v Supplementary Information 71 Warranty 72 Returns 74 Repair Policy 75 Contacting Technical Support 76 vi HOBO U30 Station NRC User s Guide...

Page 5: ...ly plug them in before logging begins No programming wiring or calibration is required to set them up The connections between the Smart Sensors and the logger are digital ensuring accurate reliable da...

Page 6: ...onnect directly to a computer 5 Smart Sensor Expansion Board 6 Vent This vent allows pressure to equalize inside the enclosure but does not allow liquid to pass through NOTE The pressure inside the ca...

Page 7: ...up to 100 meters 328 feet as measured from the logger connection point to the electronics embedded in the individual cables Optional Smart Sensor extension cable lengths must also be included in the t...

Page 8: ...n and signal filtering as well as delta sigma A D conversion and factory calibration This port features extremely low power operation resulting in long battery life for unattended data logging applica...

Page 9: ...o connect these sensors to the shield that could easily get lost in the field It is strongly recommended you install these sensors in the solar radiation shield before going to the field 4 Connect Bat...

Page 10: ...Smart Sensor Expander Board and connector are already installed See page 65 If you are using the Smart Sensor Expander Board connect sensors to those ports first 1 Run cables for secondary Smart Sens...

Page 11: ...ss opening To fit into the holes in the rubber cable channel the ideal cable diameter is 0 157 in 4 0 mm If the cable is too small build up the diameter using heat shrink If it is too big and you are...

Page 12: ...computer before it may take some time for the computer to detect the new hardware and report that it has connected successfully One or more messages will appear indicating that new hardware has been f...

Page 13: ...onitoring the device 18 HOBO U30 Station NRC User s Guide Configuring the Analog Sensor Port This topic provides the basic steps for configuring the analog sensor port See the HOBOware User Guide for...

Page 14: ...uired Channel Name You can select Current or Voltage or enter a custom label to represent the type of measurement the sensor is taking For example if you are connecting a level sensor you could make t...

Page 15: ...ion if desired Channels to Log Make sure all of the sensors connected to the logger are visible in the Channels to Log pane Logging Interval Choose a logging interval of 10 seconds so that your test w...

Page 16: ...f the logger and the attached sensors 24 HOBO U30 Station NRC User s Guide 2 Verify Sensor Readings Change the sensor readings by changing the conditions For example if you are measuring temperature h...

Page 17: ...t the change in conditions that you caused previously 26 HOBO U30 Station NRC User s Guide 5 Stop Logging Once you are satisfied everything is working properly stop the logger by clicking the Stop ico...

Page 18: ...figuration and have performed a pre deployment test see Chapter 2 page 9 1 Setup the Tripod 2 Mount the U30 3 Install grounding wire optional page 30 4 Plug all Smart Sensors into the HOBO U30 Station...

Page 19: ...U30 Station NRC User s Guide Installing Grounding Wire You should install the grounding wire if you are using the Wind Speed and Direction Smart Sensor S WCA MXXX or if you are installing the HOBO U30...

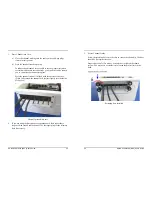
Page 20: ...two halves of the cable channel Greasing the cable channel 32 HOBO U30 Station NRC User s Guide 2 Place Cables in Channel Hold the channel just below the HOBO U30 Station case with the channel s hinge...

Page 21: ...ide of the case When fully seated the channel will project slightly into the inside of the case Channel pressed into case 4 If you are using the Smart Sensor expander board then repeat these steps wit...

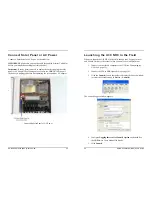
Page 22: ...AC adapter Connecting Solar Panel or AC Power 36 HOBO U30 Station NRC User s Guide Launching the U30 NRC in the Field When you launch the U30 NRC in the field change your Logging Interval and Launch...

Page 23: ...sor Ensure that your solar panel gets full sunlight Solar panels are extremely sensitive to partial shading Obstructing even a single cell of the panel will result in significant loss of charging powe...

Page 24: ...battery has been replaced contact the vendor that sold it to you It may be possible to retrieve the logged data 40 HOBO U30 Station NRC User s Guide Estimating Battery Life without External Power The...

Page 25: ...low Important Due to the self discharge characteristics of this type of battery it is imperative that you charge the battery for at least 12 hours every six months at minimum even if you are not activ...

Page 26: ...re 4 Unscrew the antenna cable with a 5 16 inch wrench 5 Use a Phillips head screwdriver to remove the four screws at the corners of the clear inner case 6 Remove the clear inner case 7 Use a Phillips...

Page 27: ...bles are prone to being chewed by rodents and should be protected in conduit in locations where rodents are present Fastened securely Free of corrosion and in good condition If moisture is visible ins...

Page 28: ...new sensors should start recording measurements 48 HOBO U30 Station NRC User s Guide Removing or Replacing Sensors If you remove a Smart Sensor while the HOBO U30 Station is logging the Logging LED w...

Page 29: ...the computer using the USB cable If it is currently logging stop logging through HOBOware Pro 2 Unplug all Smart Sensors if you are troubleshooting an error You can leave them plugged in if you are no...

Page 30: ...which could cause bad electrical contact with a sensor If found remove the offending sensor and check its wires and connector for damage and or signs of moisture Blinking orange There was a communica...

Page 31: ...Solution The power has run out Try recharging the battery by connecting the AC Adapter for 12 hours If the HOBO U30 Station is completely dead below 3 5 volts you will need to charge the battery with...

Page 32: ...ding The sensor most likely needs to be replaced Contact your Onset Authorized Dealer or Onset Technical Support Data file is missing data for a sensor Check that the sensor is properly installed and...

Page 33: ...more than one data channel see sensor manual for details Expansion Slot One expansion slot is available for factory installed expansion port Check www onsetcomp com for the latest list of options Loca...

Page 34: ...th user supplied padlocks Sensor Network Cable Length 100 m 328 ft maximum External Power External power is required The system optionally accepts the following Onset solar panels see the next section...

Page 35: ...t within your requirements periodic relaunches may be required 62 HOBO U30 Station NRC User s Guide Memory The HOBO U30 Station contains 512K bytes of very reliable non volatile Flash memory which ret...

Page 36: ...U30 Station Otherwise permanent loss of battery capacity may occur 64 HOBO U30 Station NRC User s Guide Accessories The following accessories can be used with the HOBO U30 Station These accessories ca...

Page 37: ...e ready to use the Expander Board Steps 1 Make sure the HOBO U30 Station is turned off and all cables are disconnected 2 Use a hammer and a bladed tool e g screwdriver chisel to punch through at the f...

Page 38: ...re You Begin If you have not already done so remove the piece covering the Secondary Cable Slot page 65 Steps 1 Insert a self tapping screw supplied into each end of the expander 2 Lower expander onto...

Page 39: ...h this kit can be used at the end of the screwdriver to hold screws while lowering them into place Attach screw to screwdriver Install Expander Cable 1 Plug one end of the supplied expander cable into...

Page 40: ...ling misapplication error or negligence of Purchaser or if there has been an unauthorized alteration attachment or modification THERE ARE NO WARRANTIES BEYOND THE EXPRESSED WARRANTY AS PROVIDED IN THI...

Page 41: ...liability or damage whatsoever arising out of the use of the product and or equipment in such manner LEGAL REMEDIES This warranty gives you specific legal rights You may also have other rights which...

Page 42: ...Support You can evaluate and often solve the problem yourself by taking the following steps Check the Diagnostics and troubleshooting chapter of this guide and online technical support at www onsetcom...

Page 43: ...ation Accessories 64 Cleaning 46 Data channels 6 Maintaining 45 Power 63 Specifications 58 Troubleshooting 53 L LEDs 51 Logging LED 4 51 M Maintenance 45 Measurement averaging 38 Memory 62 Mounting pl...

Page 44: ...d HOBOware are trademarks or registered trademarks of Onset Computer Corporation for its data logger products and configuration interface software All other trademarks are the property of their respec...

Reviews: