HOBO External Temp/RH Data Logger (UX100-023A) Manual
1-800-LOGGERS
3
www.onsetcomp.com
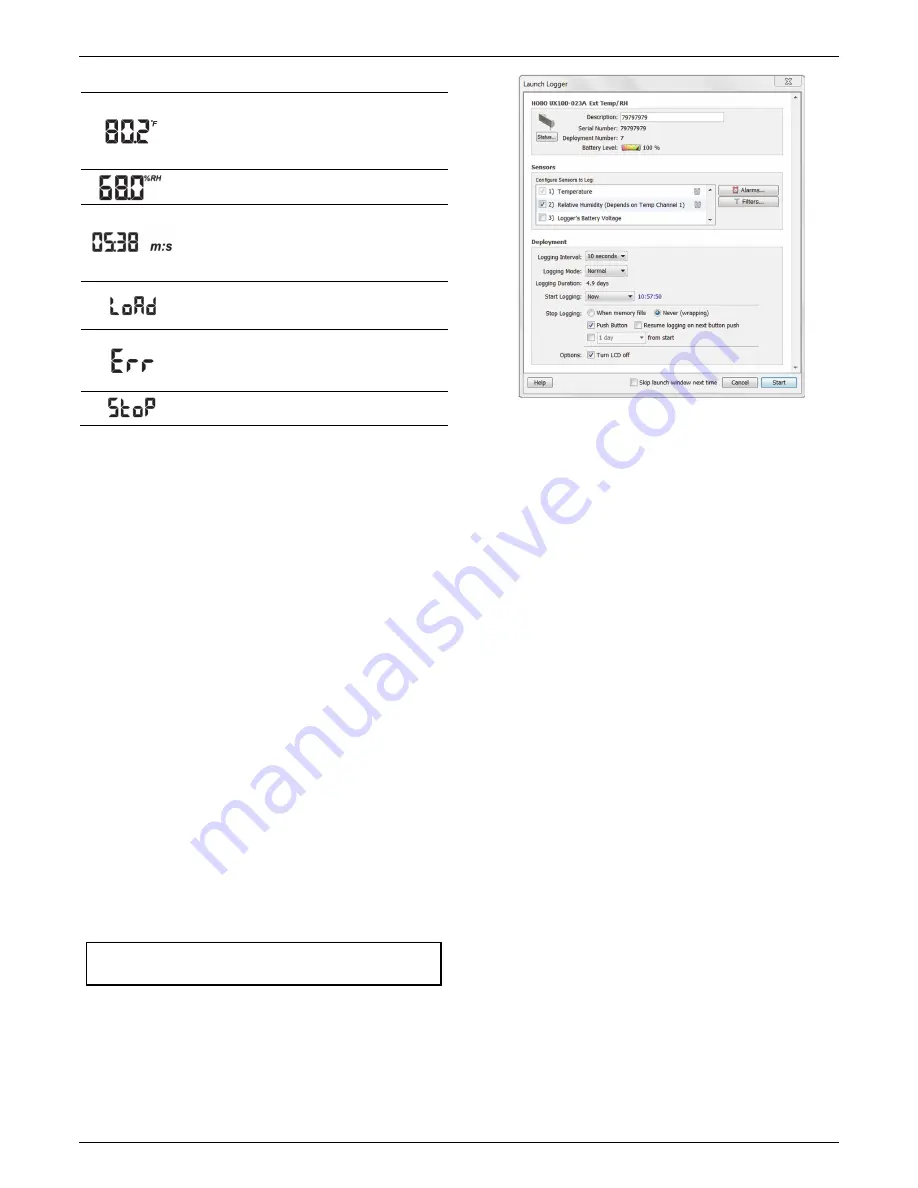
LCD Symbol
Description
This is an example of a temperature reading.
Temperature units are determined by the settings
in HOBOware. To switch between Celsius and
Fahrenheit, change the Display Preferences in
HOBOware before launching the logger.
This is an example of an RH reading.
The logger has been configured to start logging on
a particular date/time. The display will count down
in days, hours, minutes, and seconds until logging
begins. In this example, 5 minutes and 38 seconds
remain until logging will begin.
The launch settings are being loaded onto the
logger from HOBOware. Do not disconnect the
USB cable during this process.
An error occurred while loading the launch
configurations onto the logger from HOBOware.
Make sure the USB cable is connected to both the
logger and the computer and try launching again.
The logger has been stopped with HOBOware or
because the memory is full.
Notes:
•
You can disable the LCD screen when logging. Select
“Turn LCD off” when setting up the logger as described in
the next section. When this option is enabled, you can
still temporarily view the LCD screen by pushing the
Start/Stop button for 1 second. The LCD will then remain
on for 10 minutes.
•
The LCD screen refreshes every 15 seconds regardless of
the logging interval selected in HOBOware. If you choose
a logging interval less than 15 seconds, the data will be
recorded at the faster interval, but the sensor readings
will only be updated on the screen every 15 seconds.
•
When the logger has stopped logging, the LCD screen will
remain on until the logger is offloaded to a computer or
HOBO U-Shuttle (unless launched with the “Turn LCD off”
option). Once the logger has been offloaded and
disconnected from the computer, the LCD will turn off
automatically after 2 hours. The LCD will turn back on the
next time the logger is connected to the computer.
Setting up the Logger
Use HOBOware to set up the logger, including setting alarms,
selecting the options to start and stop logging, and choosing a
logging mode.
1.
Connect the logger and open the Launch Logger window
.
To connect the logger to a computer, use the USB cable
provided. Click the Launch icon on the HOBOware toolbar
or select Launch from the Device menu.
Important:
USB 2.0 specifications do not guarantee
operation outside the range of 0°C (32°F) to 50°C (122°F).
2.
Select the sensors to log in this deployment.
Choose
Temperature or Temperature and RH. Type a label for the
sensor(s) if desired. Note that both sensors are required to
calculate dew point, which is an additional data series
available for plotting after reading out the logger.
3.
Set up alarms (optional).
Click the Alarms button if you
want to configure an alarm to trip when the sensor reading
is above or below a value you specify. See
Setting up Alarms
for details.
4.
Configure filters (optional).
Click the Filters button to
create additional filtered data series. Any filtered series will
be available automatically upon reading out the logger.
5.
Select the Logging Interval.
Select a logging interval from 1
second to a maximum of 18 hours, 12 minutes, and 15
seconds.
6.
Select the Logging Mode
:
•
Fixed Interval.
In Fixed Interval mode, data will always be
recorded at the regular logging interval set in the
previous step. This is the default setting.
•
Burst.
In Burst mode, logging will occur at a different
interval when a specified condition is met. See
Burst
Logging
for more information.
•
Statistics.
In Statistics mode, maximum, minimum,
average, and standard deviation statistics are calculated
for all enabled sensors during logging, sampling at an
interval you specify. See
Statistics
for more information.
7.
Choose when to start logging:
•
Now.
Logging begins immediately.
•
At Interval.
Logging will begin at the next even interval as
determined by the selected logging interval.
•
On Date/Time.
Logging will begin at a date and time you
specify.
•
Push Button.
Logging will begin once you press the
Start/Stop logging button for 3 seconds.
8.
Choose when to stop logging:
•
When Memory Fills.
Logging will end once the logger
memory is full.
•
Never (Wrap When Full).
The logger will continue
recording data indefinitely, with newest data overwriting
the oldest. This option is not available if Burst is selected
for the Logging Mode.


