6
HOBO LCD Temp/RH User’s Manual
If an application requires a remote probe to be permanently installed at the site,
first disconnect the logger from any alarm and then disconnect it from the remote
probe. Then, transport the logger back to the host PC for Readout. The logger will
record values of -69°C/-92°F for temperature and 0% RH after the logger has been
disconnected from a remote probe. After offloading the logger, re-launch it with a
delayed start allowing enough time to return the logger back to the site, connect it
to the alarm, and re-insert the external probe.
If the alert output is connected to a remote alarm configured for Normally Closed
inputs (see page 7), you can avoid false alarms when the logger is disconnected by
making a temporary connection between the wires going to the remote alarm.
Be
sure to disconnect this temporary connection when the logger is reconnected to
the remote alarm wires.
Note:
HandCar software for Palm handhelds allows you
to start a logger, check current measurements, offload logger data for transport
back to a PC, and restart a logger. HandCar does not allow you to view stored data
or set launch parameters.
ALERT Operation Overview
Use the ALERT feature to flash a warning on the LCD if monitored temperature
or relative humidity falls outside user-selectable limits. If you require remote or
secondary notification of an ALERT condition, you can connect a remote audio
alarm and/or an autodialer to the contact closure. The limits are set in the host
software and are active only when the logger is logging. When the logger is not
logging (i.e., when in delayed launch mode or if the memory is full and the Wrap
Around When Full feature was disabled), the limits are not checked. When the
ALERT flashes, the measurement that went out of limits (temperature or RH) also
flashes. See page 8 for how to delay the triggering of the ALERT condition after
the logger senses an out-of-limit condition.
Avoiding False ALERTs when Deploying a Logger
In some applications, the environment in which the logger is launched is in
immediate violation of the desired ALERT limit. For example, launching the
HOBO LCD logger at the host PC in room temperature and setting an upper alarm
limit of +32°F for a freezer application will cause an immediate ALERT. In this
situation, choose
Delayed Start
to allow enough time to transport, mount, and
stabilize the logger in the desired location (see individual sensor response times
beginning on page 13). Alternatively, choose
Hold for Later Launch
to save
logging parameters for a subsequent start with a Palm handheld or laptop.
Connecting a Remote Alarm or Autodialer (optional)
The HOBO LCD logger is compatible with Onset’s Remote Alarm (part number
ARA) and Autodialer (part number AVD-45) available from Onset Computer or
an Onset Authorized Dealer.
To access the ALERT contact closure connection, remove the battery door. Inside
the logger, there are two screw terminals that connect to an internal relay. There is
a feed-through on the bottom of the case to run wires from the screw terminals to
HOBO LCD Temp/RH User’s Manual
11
alarm at the time logging stops due to low battery level. Use the Advanced options
screen in BoxCar Pro to set the alert on low battery.
External Probe Mounting Details
Temperature Probe
When mounting the temperature probe, be sure to thermally insulate the sensor
from the mounting surface. The probe should not be attached directly to a
mounting surface unless that surface is at the same temperature as the
environment being monitored. Note that the mass of the mounting surface can also
affect the probe’s response time, so for best accuracy and response, it is best to
mount the sensor away from the surface.
The sensor tip and cable on the L-TMA-M002 and L-TMA-M006 external
temperature probe is designed to last at least one year in water as warm as 50°C
(122°F). The sensor tip on the L-TMB-M002 stainless steel probe is waterproof,
but the connector and handle is not intended for prolonged use in water or moist
environments, especially those with temperatures greater than 50°C (122°F). For
accurate measurement, the probe should not be placed in direct sunlight. In
outdoor locations that are exposed to direct sun, use a solar radiation shield.
Consult the external probe User’s Manual for additional information.
Temperature/RH Probe
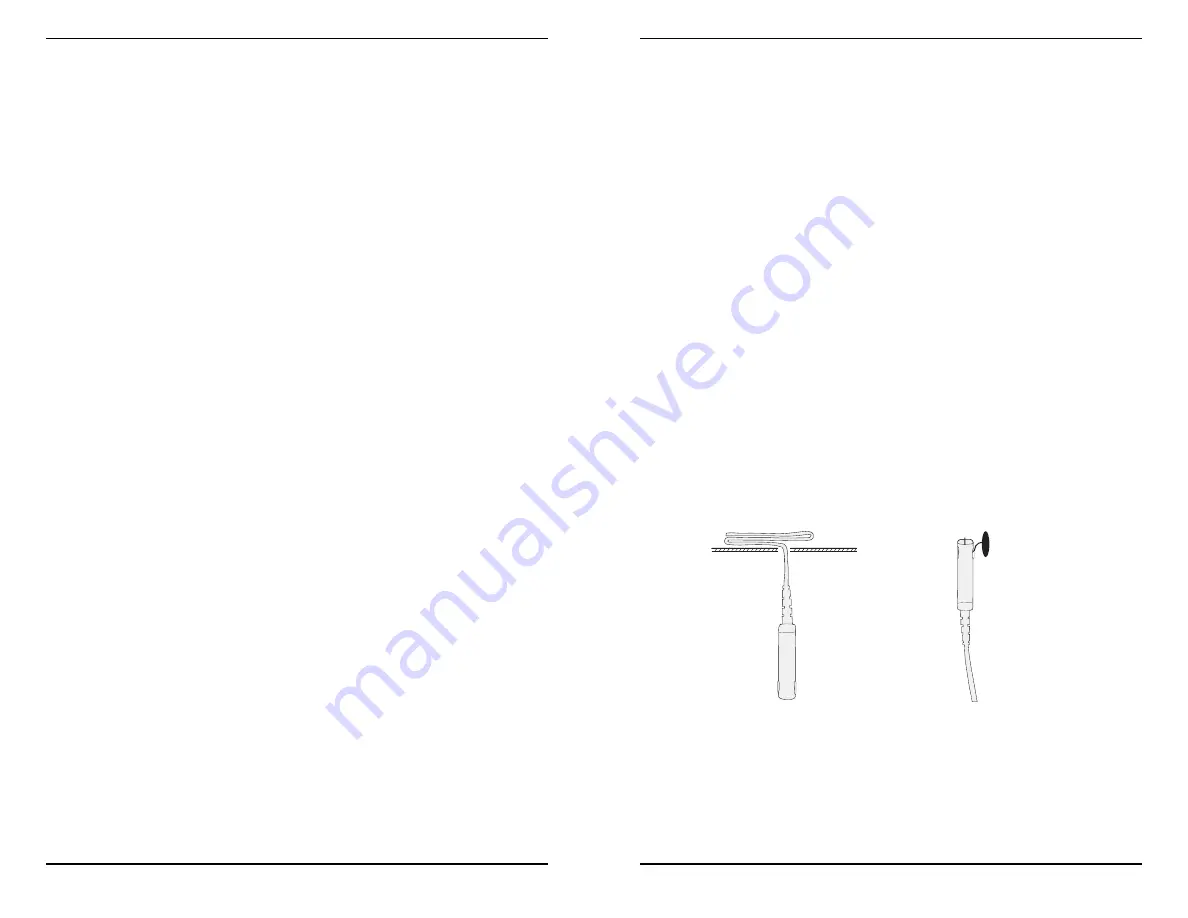
Temperature/RH probes should be mounted in one of the following ways:
•
Hanging via the cable in the vertical position as shown in Figure 10.
•
Hanging via the mounting hole as shown in Figure 11 (in non-condensing
environments only).
Figure 10
Figure 11
For accurate readings, the probe should not be attached directly to a mounting
surface unless that surface is at the same temperature as the environment being
monitored. Note that the mass of the mounting surface can affect the probe’s
response time, so if this is a concern, it is best to use one of the three mounting
methods listed above.


